> ## Documentation Index
> Fetch the complete documentation index at: https://docs.juicebox.ai/llms.txt
> Use this file to discover all available pages before exploring further.
# AFAS Software Integration Set-up
> Connect AFAS Software to Juicebox.
 ## About the integration
Connect AFAS Software to Juicebox to import jobs and start searches from their job descriptions. You can also export profiles with resumes to a selected job. Existing candidates can be identified in Juicebox and used for rediscovery, subject to the access granted to the connection.
## Before you start
Use an AFAS administrator account with access to **General > Management > App connector**. This setup uses a production Profit environment and four GetConnector files supplied below.
Open **Integrations** in Juicebox, select **AFAS Software**, and choose **Activate**. Keep the connection window open while completing the steps below. If the integration is not visible, ask [Juicebox Support](mailto:support@juicebox.ai) to confirm access for your account.
The screenshots show vendor settings or the connection window provided by Kombo. Use the credentials, source labels, permissions, and URLs from your own connection; screenshot values are examples.
## Download the GetConnector files
Download all four files before starting:
* [Applications](https://storage.googleapis.com/kombo-assets/connection-guides/afas/CustomApplications.gcn)
* [Vacancies](https://storage.googleapis.com/kombo-assets/connection-guides/afas/CustomVacatures.gcn)
* [Candidates](https://storage.googleapis.com/kombo-assets/connection-guides/afas/CustomSollicitantInclDel.gcn)
* [Application stages](https://storage.googleapis.com/kombo-assets/connection-guides/afas/CustomApplicationStatus.gcn)
If you use Citrix, upload the files into that environment first so AFAS can access them.
## Create the app connector
1. Open **General > Management > App connector** and select **New**.
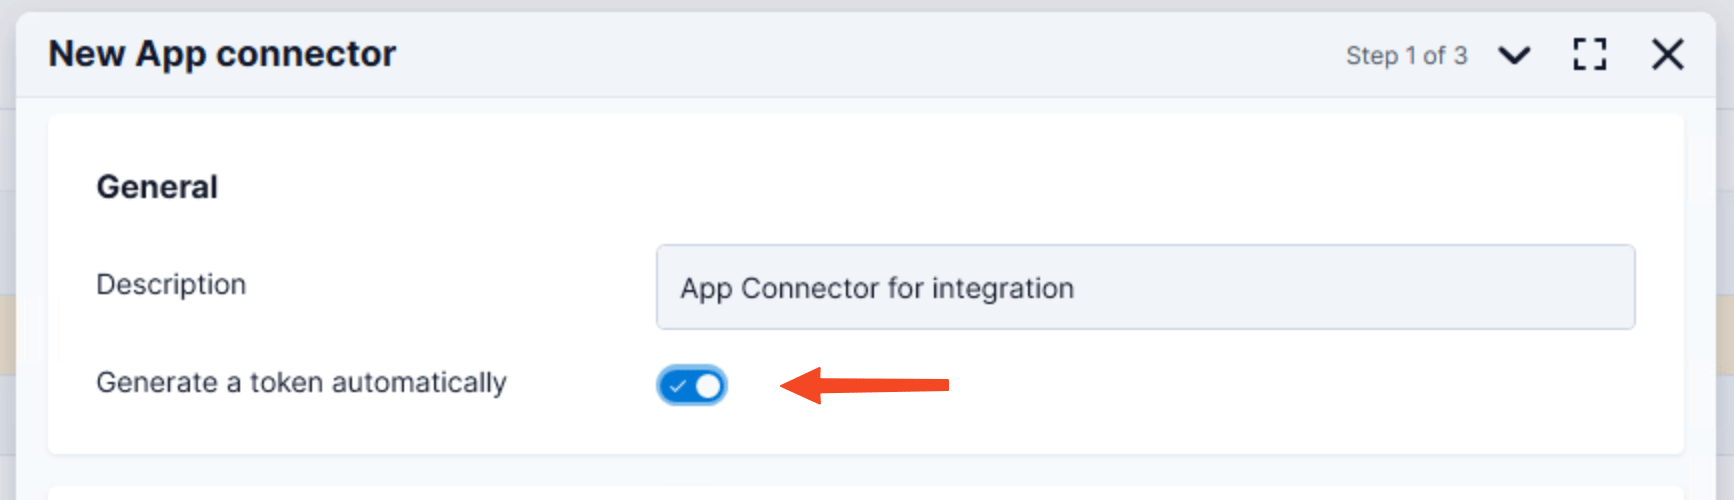
2. Give the connector a recognizable name, enable **Generate a token automatically**, and choose **Create a new user group based on App connector name**.
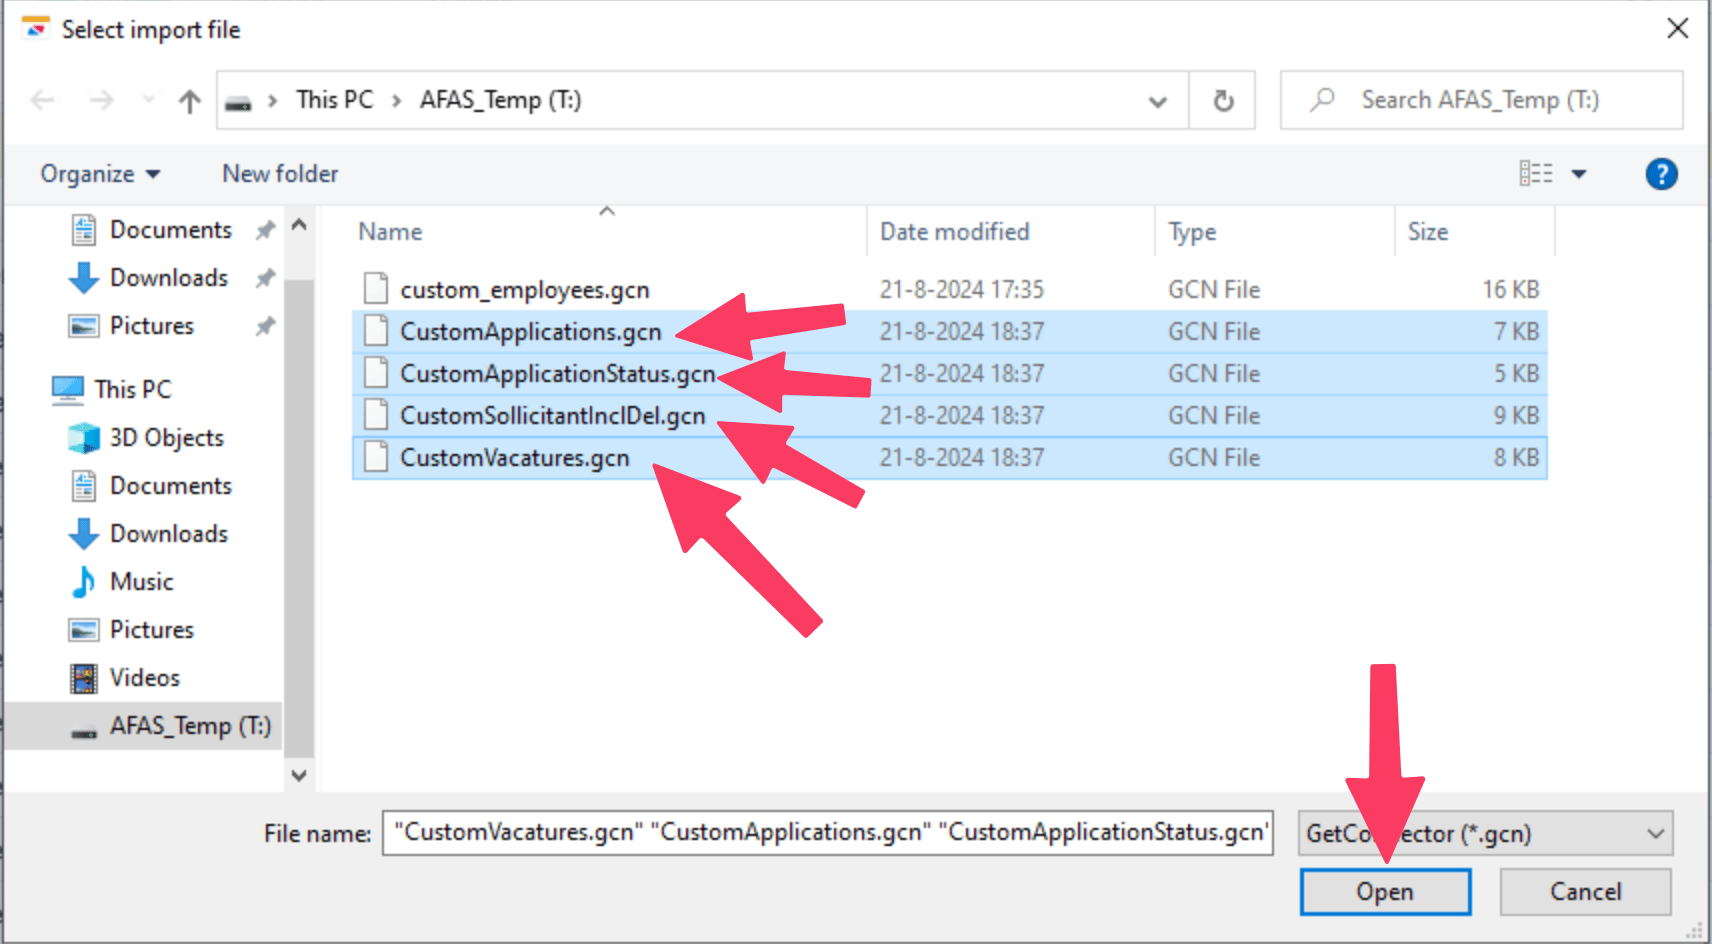
3. Choose **Action > Import**, select the four downloaded files, and complete the import.
## About the integration
Connect AFAS Software to Juicebox to import jobs and start searches from their job descriptions. You can also export profiles with resumes to a selected job. Existing candidates can be identified in Juicebox and used for rediscovery, subject to the access granted to the connection.
## Before you start
Use an AFAS administrator account with access to **General > Management > App connector**. This setup uses a production Profit environment and four GetConnector files supplied below.
Open **Integrations** in Juicebox, select **AFAS Software**, and choose **Activate**. Keep the connection window open while completing the steps below. If the integration is not visible, ask [Juicebox Support](mailto:support@juicebox.ai) to confirm access for your account.
The screenshots show vendor settings or the connection window provided by Kombo. Use the credentials, source labels, permissions, and URLs from your own connection; screenshot values are examples.
## Download the GetConnector files
Download all four files before starting:
* [Applications](https://storage.googleapis.com/kombo-assets/connection-guides/afas/CustomApplications.gcn)
* [Vacancies](https://storage.googleapis.com/kombo-assets/connection-guides/afas/CustomVacatures.gcn)
* [Candidates](https://storage.googleapis.com/kombo-assets/connection-guides/afas/CustomSollicitantInclDel.gcn)
* [Application stages](https://storage.googleapis.com/kombo-assets/connection-guides/afas/CustomApplicationStatus.gcn)
If you use Citrix, upload the files into that environment first so AFAS can access them.
## Create the app connector
1. Open **General > Management > App connector** and select **New**.
2. Give the connector a recognizable name, enable **Generate a token automatically**, and choose **Create a new user group based on App connector name**.
3. Choose **Action > Import**, select the four downloaded files, and complete the import.
 ## Enable writes and save the token
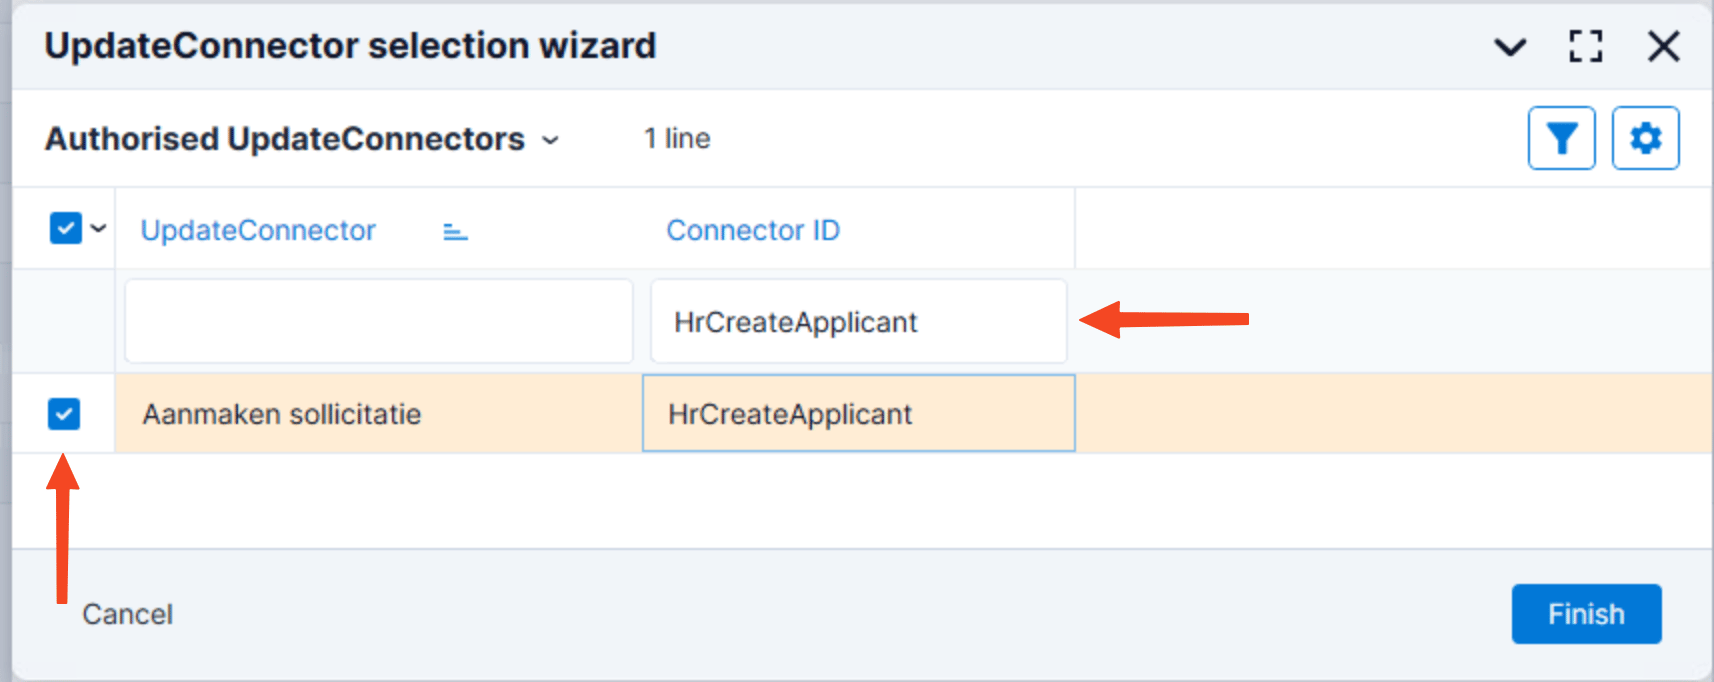
1. Under **UpdateConnectors**, add **HrCreateApplicant**.
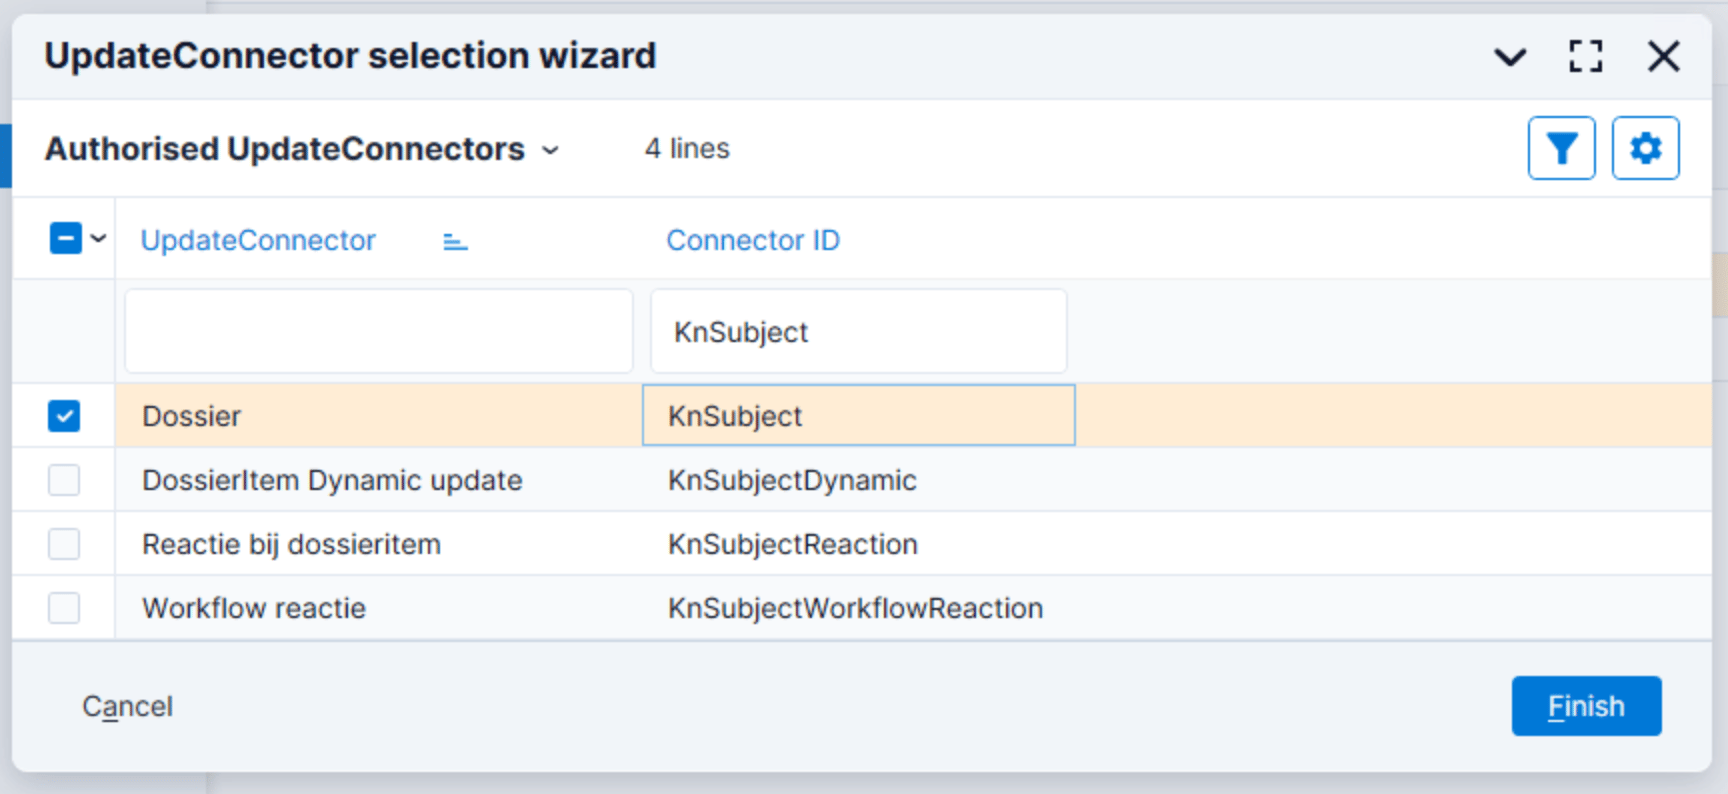
2. Add **KnSubject** as another UpdateConnector, then finish the wizard.
3. Copy the generated token to a secure location immediately; AFAS does not display it again. If using Citrix, use its clipboard controls to transfer the token.
## Enable writes and save the token
1. Under **UpdateConnectors**, add **HrCreateApplicant**.
2. Add **KnSubject** as another UpdateConnector, then finish the wizard.
3. Copy the generated token to a secure location immediately; AFAS does not display it again. If using Citrix, use its clipboard controls to transfer the token.
 ## Unblock the connector and connect
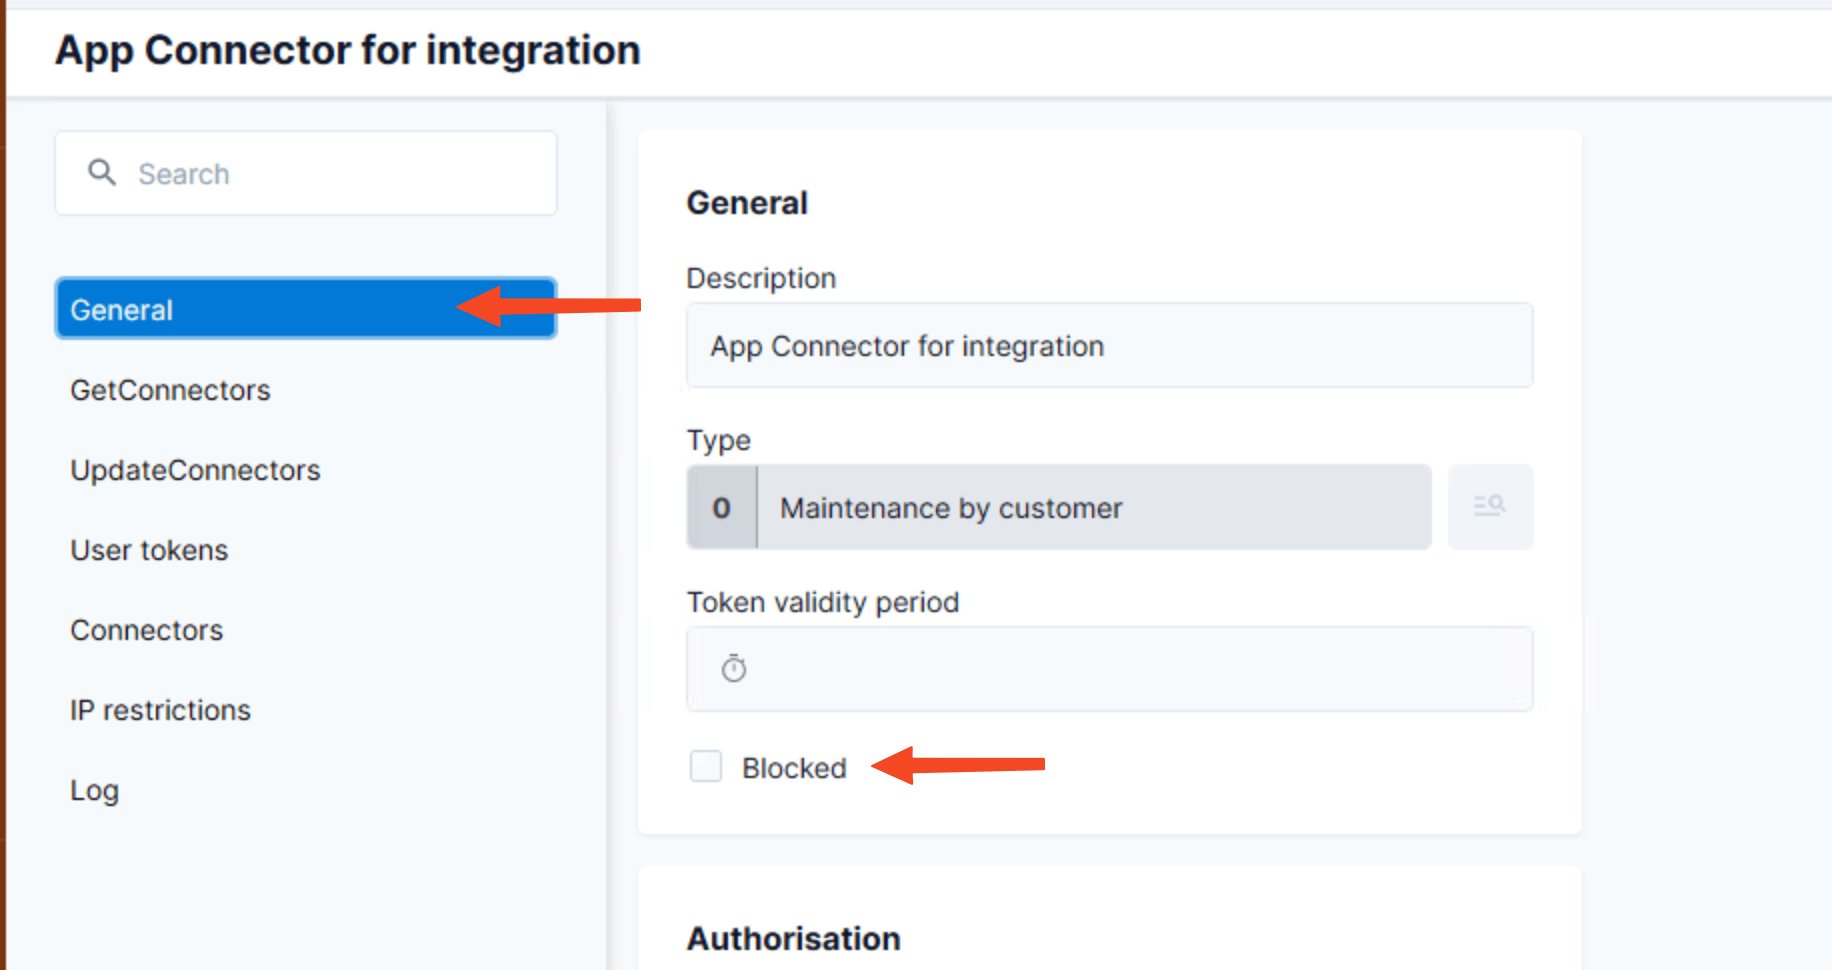
1. Reopen the app connector’s properties. Under **General**, clear **Blocked**, then select **Save and close**.
2. Find the production environment name at the top of Profit. An environment named `O12345AA` uses the service domain `12345.rest.afas.online`. The first character is the letter O.
3. Enter your production service domain and token in Juicebox, then complete setup.
## Unblock the connector and connect
1. Reopen the app connector’s properties. Under **General**, clear **Blocked**, then select **Save and close**.
2. Find the production environment name at the top of Profit. An environment named `O12345AA` uses the service domain `12345.rest.afas.online`. The first character is the letter O.
3. Enter your production service domain and token in Juicebox, then complete setup.
 ## Confirm the integration
Finish the connection window and return to Juicebox. Confirm that the connection has completed, then allow the initial sync to populate your data.
* Check that the expected jobs appear in Juicebox.
* Find a known candidate and confirm that the information available matches your configured access.
* Export a test profile with a resume to a selected job, then verify the application in AFAS Software.
If validation fails, check the credentials, account or region, and permission list shown in the connection window. Contact Juicebox Support if the expected data is still missing.
## Using the integration
Start from an imported job on the [Projects](/projects) page to create a search linked to that job.
To send a profile to AFAS Software, follow the [export steps](/exports) and select the connected ATS and intended job.
Learn how to work with existing candidates in [Talent Rediscovery](/talent-rediscovery).
## Support
For help, contact [support@juicebox.ai](mailto:support@juicebox.ai). For an overview of available workflows, see [ATS Integrations](/ats-integrations).
ATS-side setup reference: [Kombo’s AFAS Software connection guide](https://help.kombo.dev/hc/en-us/articles/18770528249105-AFAS-ATS-How-do-I-link-my-account).
## Confirm the integration
Finish the connection window and return to Juicebox. Confirm that the connection has completed, then allow the initial sync to populate your data.
* Check that the expected jobs appear in Juicebox.
* Find a known candidate and confirm that the information available matches your configured access.
* Export a test profile with a resume to a selected job, then verify the application in AFAS Software.
If validation fails, check the credentials, account or region, and permission list shown in the connection window. Contact Juicebox Support if the expected data is still missing.
## Using the integration
Start from an imported job on the [Projects](/projects) page to create a search linked to that job.
To send a profile to AFAS Software, follow the [export steps](/exports) and select the connected ATS and intended job.
Learn how to work with existing candidates in [Talent Rediscovery](/talent-rediscovery).
## Support
For help, contact [support@juicebox.ai](mailto:support@juicebox.ai). For an overview of available workflows, see [ATS Integrations](/ats-integrations).
ATS-side setup reference: [Kombo’s AFAS Software connection guide](https://help.kombo.dev/hc/en-us/articles/18770528249105-AFAS-ATS-How-do-I-link-my-account).