> ## Documentation Index
> Fetch the complete documentation index at: https://docs.juicebox.ai/llms.txt
> Use this file to discover all available pages before exploring further.
# TRAFFIT Integration Set-up
> Connect TRAFFIT to Juicebox.
## About the integration
Connect TRAFFIT to Juicebox to import job descriptions into your searches and identify profiles that already exist in your ATS.
You can also export profiles to a selected TRAFFIT job.
If TRAFFIT is not visible in your Juicebox Integrations tab, contact [Juicebox Support](mailto:support@juicebox.ai) to confirm availability for your account.
## Before you start
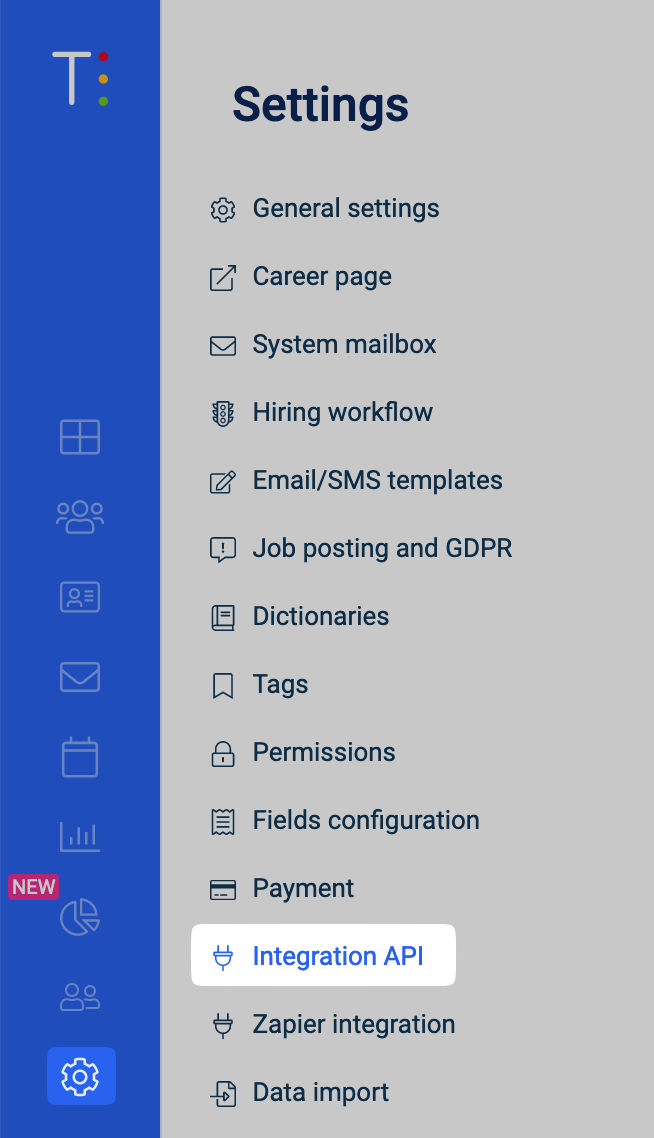
Use a TRAFFIT account that can manage **Integration API** settings. Open the cog in the bottom-left corner and check that **Integration API** is available. Ask your TRAFFIT administrator to perform setup if you cannot access it.
## Create a TRAFFIT API client
1. In Juicebox, open **Integrations**, select **TRAFFIT**, and click **Activate**. Keep the required scope list in the connection pop-up available.
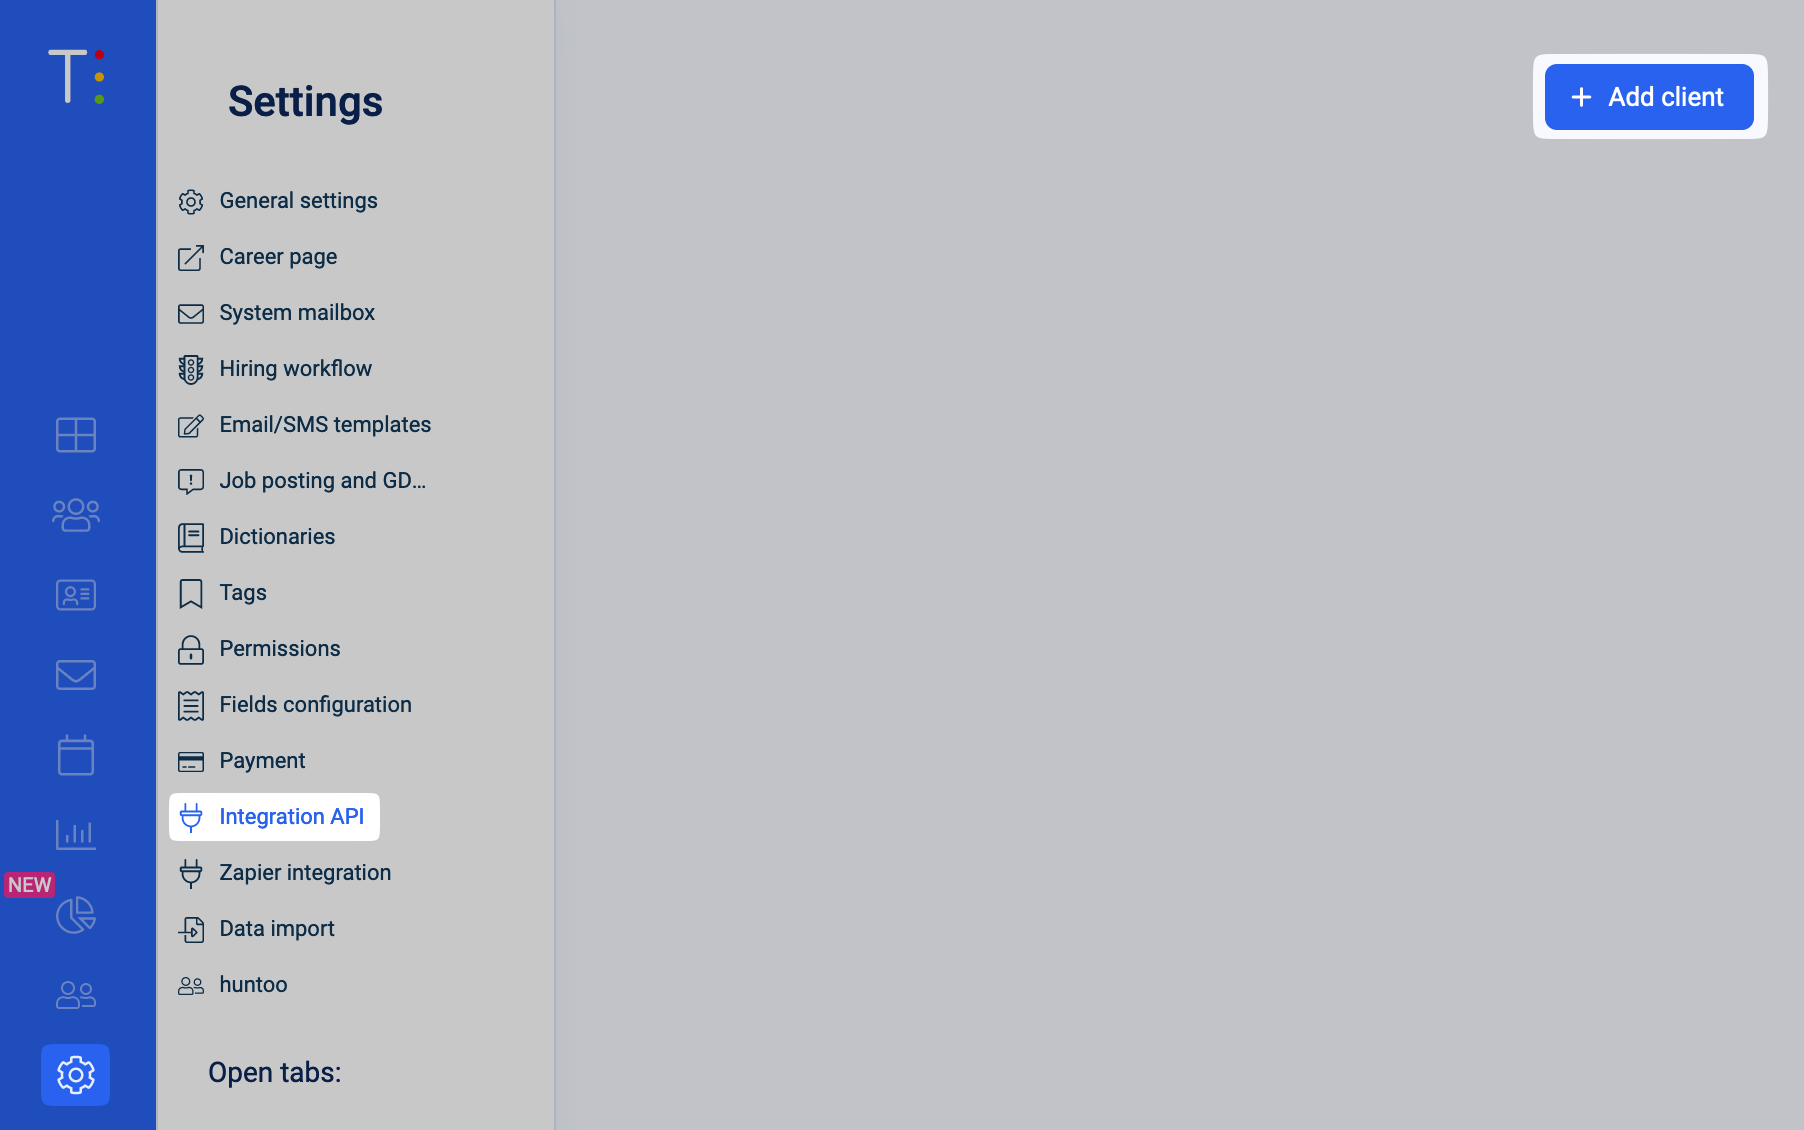
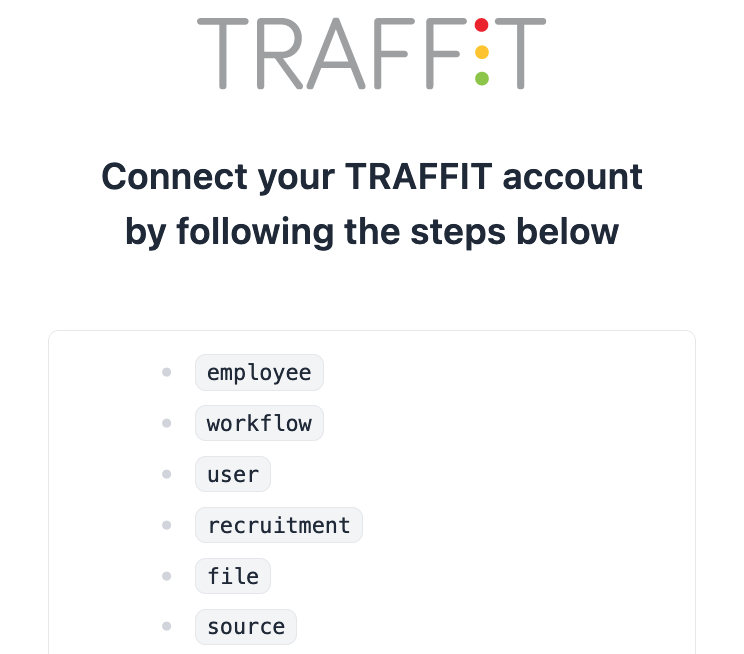 2. In TRAFFIT, click the bottom-left cog, select **Integration API**, and click **Add client**.
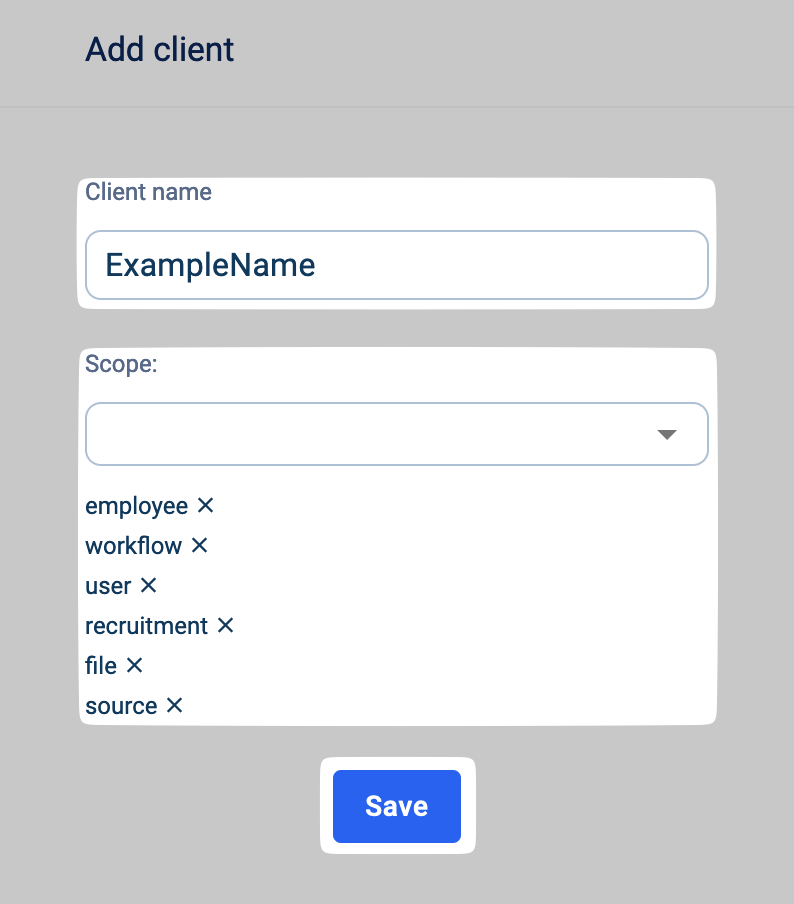
 3. Enter a recognizable **Client name**, such as **Juicebox**.
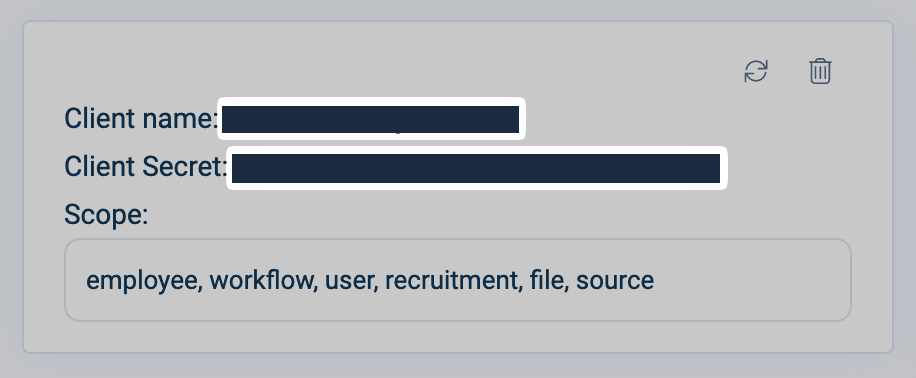
4. Select the scopes listed in your Juicebox connection pop-up, then click **Save**.
3. Enter a recognizable **Client name**, such as **Juicebox**.
4. Select the scopes listed in your Juicebox connection pop-up, then click **Save**.
 5. Copy the saved client's **Client name** and **Client secret**.
 ## Setting up the integration
1. Return to the Juicebox connection pop-up.
2. Enter the Client name and Client secret in their corresponding fields, along with any instance details requested by the flow.
## Setting up the integration
1. Return to the Juicebox connection pop-up.
2. Enter the Client name and Client secret in their corresponding fields, along with any instance details requested by the flow.
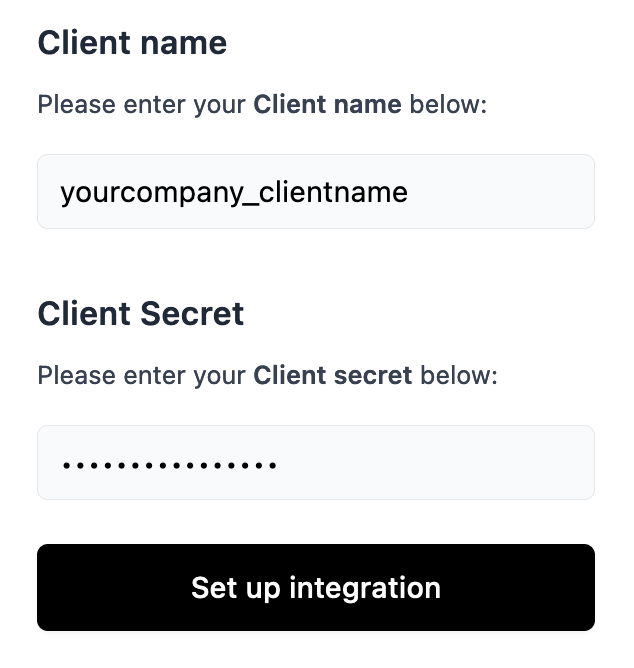 3. Click **Set up integration** and finish the remaining prompts.
4. Return to Juicebox and check that the integration shows **Connected**.
## Confirm the integration
After the initial sync, check that the expected jobs appear and that an existing TRAFFIT candidate is identified in Juicebox.
If the connection reports missing access, compare the API client's scopes with the list in your connection pop-up, save any corrections in TRAFFIT, and retry.
## Using the integration
To start a search from a job, open **Projects** and select **Import Job from ATS / CRM**, then choose the relevant TRAFFIT job.
Juicebox identifies profiles that already exist in TRAFFIT, helping your team check for existing records before reaching out.
To send a profile to TRAFFIT, follow the [export steps](/exports) and choose the TRAFFIT export option for the linked job. Confirm that the profile appears in TRAFFIT after the export completes.
The initial sync can take time. Data may continue to appear after the connection is established. If you do not see the expected records, contact Juicebox Support.
## Support
For an overview of integration features, see [ATS Integrations](/ats-integrations). If you need help, contact [support@juicebox.ai](mailto:support@juicebox.ai).
For illustrated ATS-side instructions, see [the TRAFFIT connection guide from Kombo](https://help.kombo.dev/hc/en-us/articles/18294477201425).
3. Click **Set up integration** and finish the remaining prompts.
4. Return to Juicebox and check that the integration shows **Connected**.
## Confirm the integration
After the initial sync, check that the expected jobs appear and that an existing TRAFFIT candidate is identified in Juicebox.
If the connection reports missing access, compare the API client's scopes with the list in your connection pop-up, save any corrections in TRAFFIT, and retry.
## Using the integration
To start a search from a job, open **Projects** and select **Import Job from ATS / CRM**, then choose the relevant TRAFFIT job.
Juicebox identifies profiles that already exist in TRAFFIT, helping your team check for existing records before reaching out.
To send a profile to TRAFFIT, follow the [export steps](/exports) and choose the TRAFFIT export option for the linked job. Confirm that the profile appears in TRAFFIT after the export completes.
The initial sync can take time. Data may continue to appear after the connection is established. If you do not see the expected records, contact Juicebox Support.
## Support
For an overview of integration features, see [ATS Integrations](/ats-integrations). If you need help, contact [support@juicebox.ai](mailto:support@juicebox.ai).
For illustrated ATS-side instructions, see [the TRAFFIT connection guide from Kombo](https://help.kombo.dev/hc/en-us/articles/18294477201425).