

Introduction
Profile statuses indicate the current stage a contact is in. By default, Juicebox includes the following statuses: Not Contacted, Pending, Contacted, InMail Sent, Interested, Interviewing, Hired, Rejected, Not Interested. You can customize the status list to your preferences. The Contacted status was previously named Email Sent. Juicebox now shows it as Contacted everywhere, including status cells, the Kanban view, CSV exports, the activity feed, and Slack notifications. The status keeps the same underlying ID, so existing profiles, reports, and integrations that use it keep working without changes.Pending status
When you add a candidate to a sequence, Juicebox sets their status to Pending instead of Contacted. Pending means outreach is scheduled but nothing has gone out yet. Juicebox moves a Pending candidate forward only after outreach actually happens:- First email sends: the status changes to Contacted.
- LinkedIn connection task is completed: the status changes to Contacted.
- LinkedIn message task is completed: the status changes to InMail Sent. If your status list doesn’t include InMail Sent, it changes to Contacted.
- Call task is completed: the status stays Pending. A completed call on its own doesn’t mark a candidate as Contacted.
Viewing profile status
To see a profile’s status, first ensure that the profile has been shortlisted. Only shortlisted profiles can be given a status. Next, navigate to the “Shortlisted Contacts” page on the left-side menu. You will see a list of all shortlisted profiles. Note that the shortlisted contacts page is project-specific (read more here).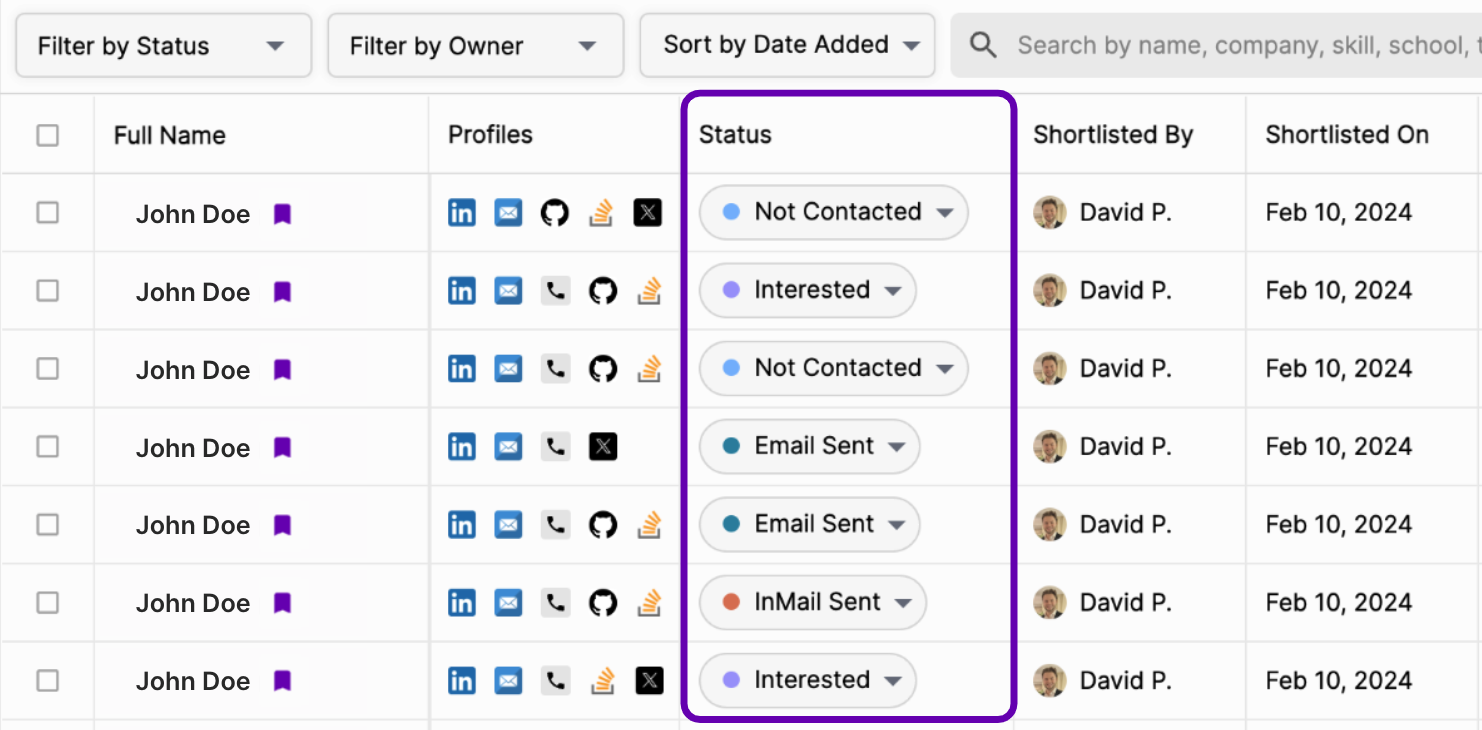
Changing profile status
To change the profile status, select the drop-down menu and select a preferred status. When taking certain actions, such as sending emails, statuses will be updated automatically.Editing profile statuses
To edit a profile status, select the “Edit Status List” field shown when selecting an outreach status.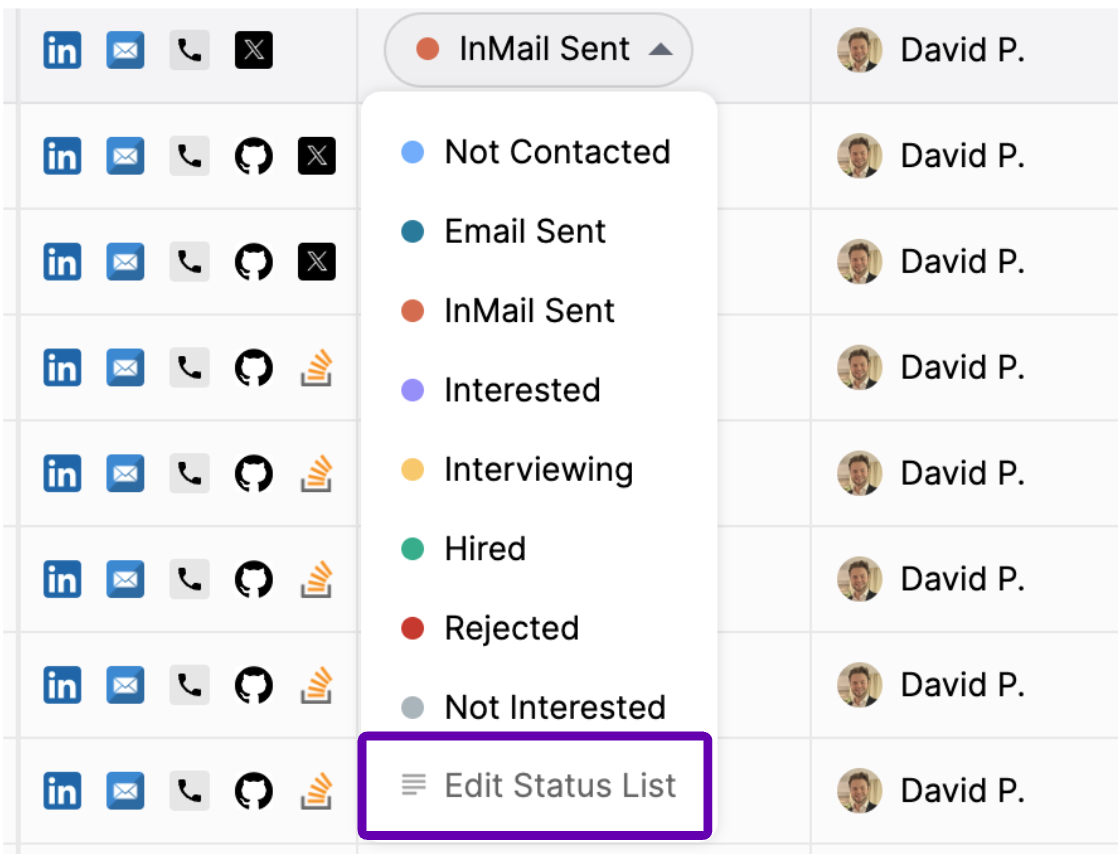 Next, you can add statuses and re-arrange the default order of statuses. The statuses field allows for full customization to your preferred workflow.
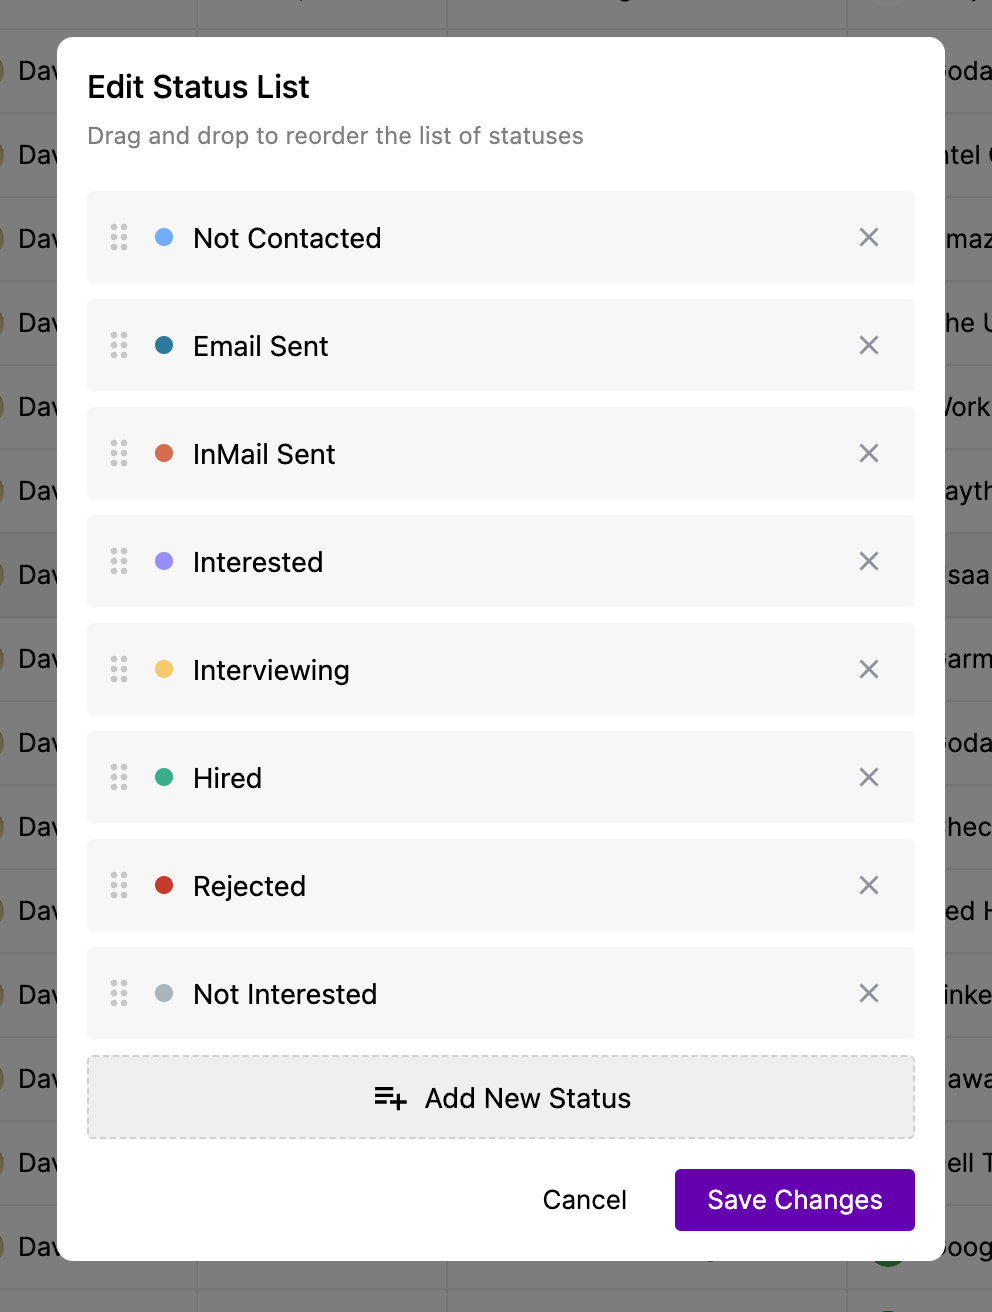 A few points to consider as you edit and customize your statuses:
- You will not be able to delete statuses that are currently in use across any of your projects.
- Customize the order of statuses by drag-and-dropping your statuses.
- Colors are randomly assigned to every new status you create.
- Use easily understandable labels, like “Not Contacted,” for each status.
- If you add a new status in one project, it will also be accessible in other projects.
- Only account admins are able to edit profile statuses.
- You can’t delete the built-in Not Contacted, Pending, Contacted, Interested, and Not Interested statuses.
- You can’t name a new custom status “Contacted,” “Email Sent,” or “Pending.”