

In this guide, you’ll learn how to:
- Integrate your Applicant Tracking System (ATS) with Juicebox
- Set up Single Sign-On (SSO)
- Add team members and set their permissions
- Manage settings and controls for AI Agents
- Set up Juicebox for Slack to enable collaboration with hiring managers
- Set up the Juicebox MCP to bring insights and data into your AI tool
Integrate your ATS
Juicebox integrates deeply with the Applicant Tracking System (ATS) that your talent acquisition team uses on a day-to-day basis. Put simply, they’ll search for candidates and handle communication outreach in Juicebox. Then once candidates are in the interview process, they’ll be managed in the ATS. With this integration, your team will be able to:- Automatically search for candidates using the corresponding job description for the role
- Search for candidates and save their profiles directly into the ATS, or even auto-export profiles that they shortlist
- Conduct “rediscovery” searches, where they search for candidates who have already interviewed in the past and exist in your ATS
- Keep a consistent source of truth for each applicant and role throughout the process
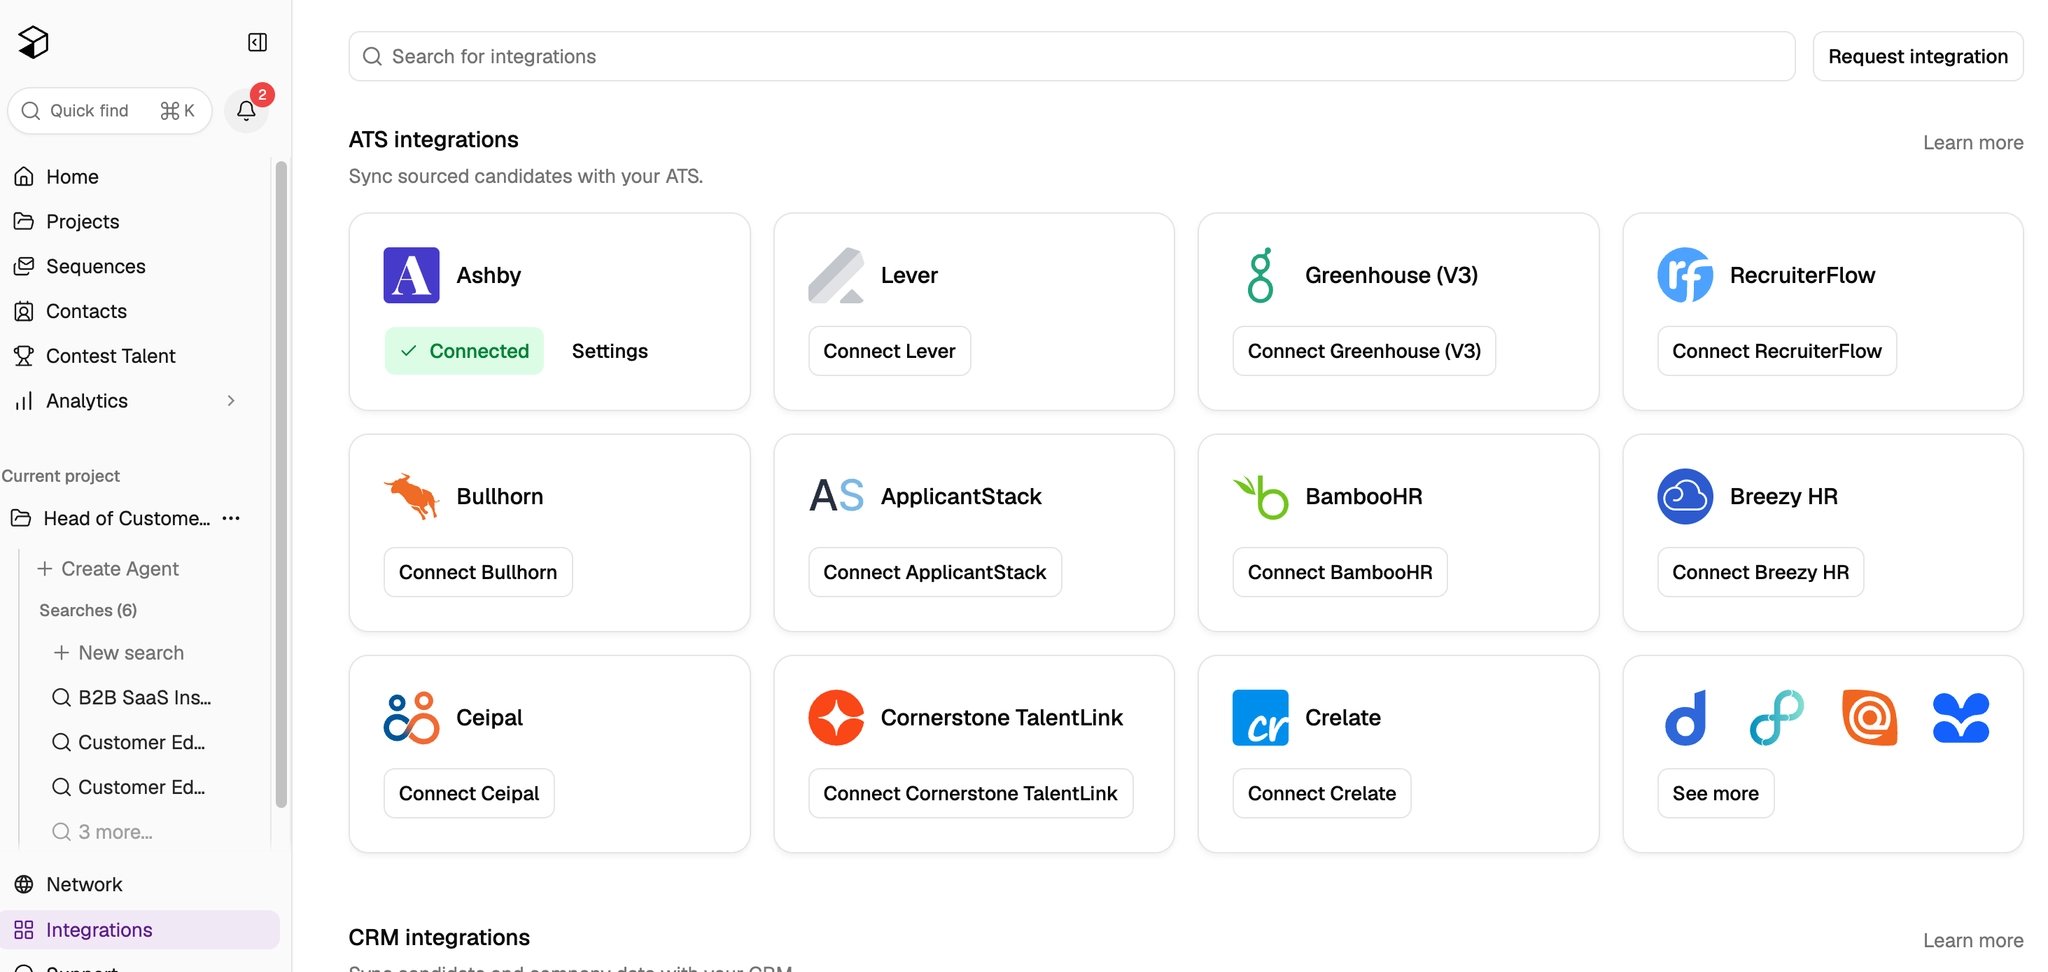
Connect Docs and Notes for Agent Context
Juicebox has connectors to apps like Granola, Notion, Google Drive, and Metaview. These let Juicebox Agents use the context captured in these apps to learn more about the specific needs for each role, and specific preferences for each individual in the hiring process. They also allow users to export talent maps and other summaries directly from a conversation with an Agent. Set these up from the Integrations tab, just like you did with the ATS integrations. Over time, as each user uses Juicebox, the information and preferences get stored in Juicebox’s Knowlege Vault, letting Agents run more targeted and personalized searches. Want more help? Learn more about Connectors.Account Settings
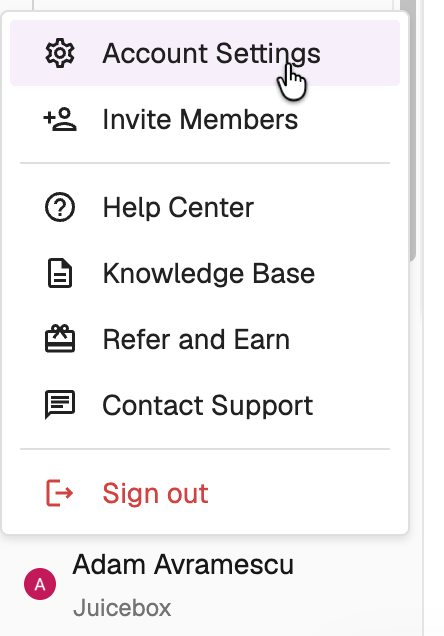
The next sections can be set up from the Account Settings page. To get there, click your name in the bottom of the left sidebar, then Account Settings.
Set up single sign-on (SSO)
Before you invite your team to Juicebox, set up single sign-on (SSO) for them so that they can log in using your SAML/SSO provider.SSO is available only to Business plan customers. Ask your CSM to help you get started with a one-time SSO setup portal link and an organization slug to use when signing in.
- Ask your CSM to help you get started. They will send a one-time SSO setup portal link and an organization slug to use when signing in.
- From the SSO setup portal, choose the identity provider that you use for SSO and follow the steps.
- Open Juicebox in a logged-out or private browser window and select Sign in with SSO.
- Enter the organization slug when prompted.
- If prompted, confirm your previous Juicebox login method (email/password or Google) by signing in with it. This links your existing Juicebox account to SSO.
Add team members and set user permissions
Now that you’ve configured the login settings, you’re ready to invite your team. Each member of your team may need different permissions, and you have the ability to set those as an admin in Juicebox. Go to Account Settings, then look under the Organization header, and go to the Team members section (or use this link and log directly into Juicebox).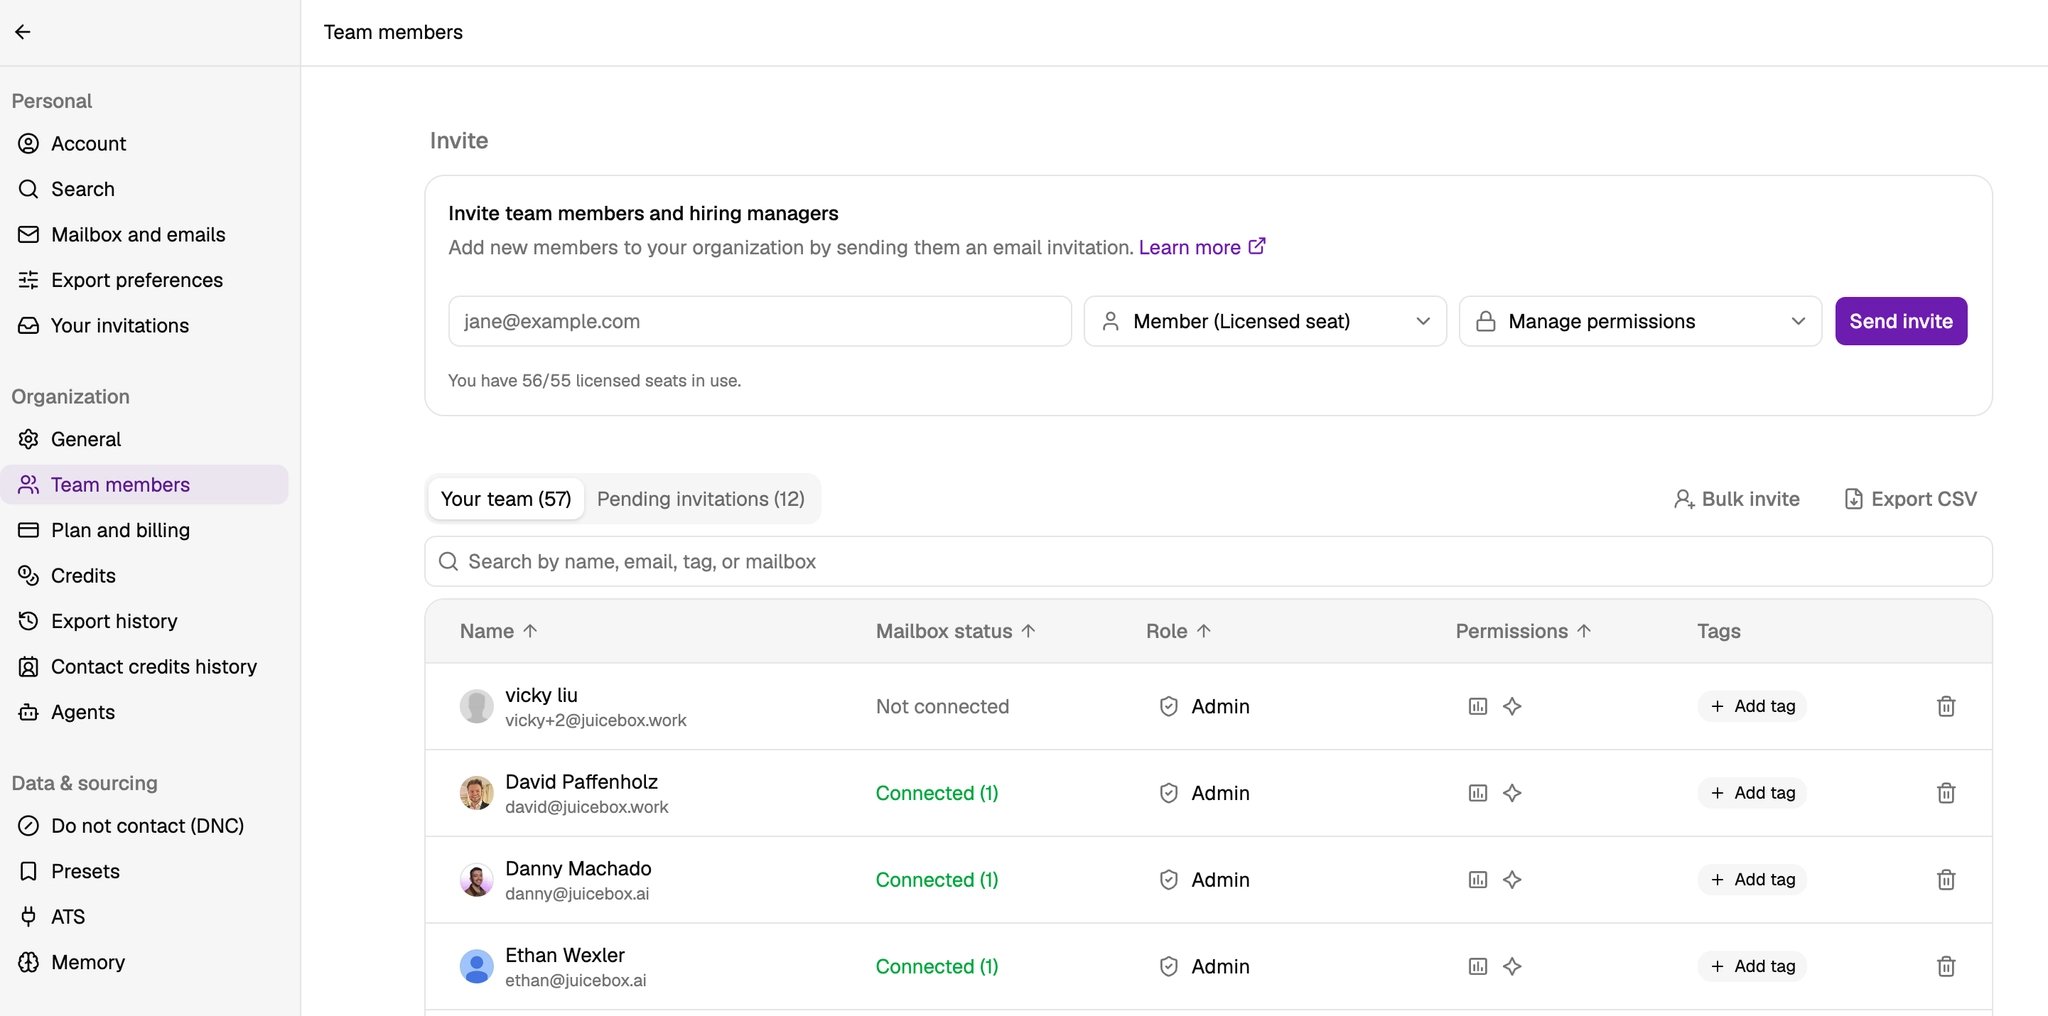
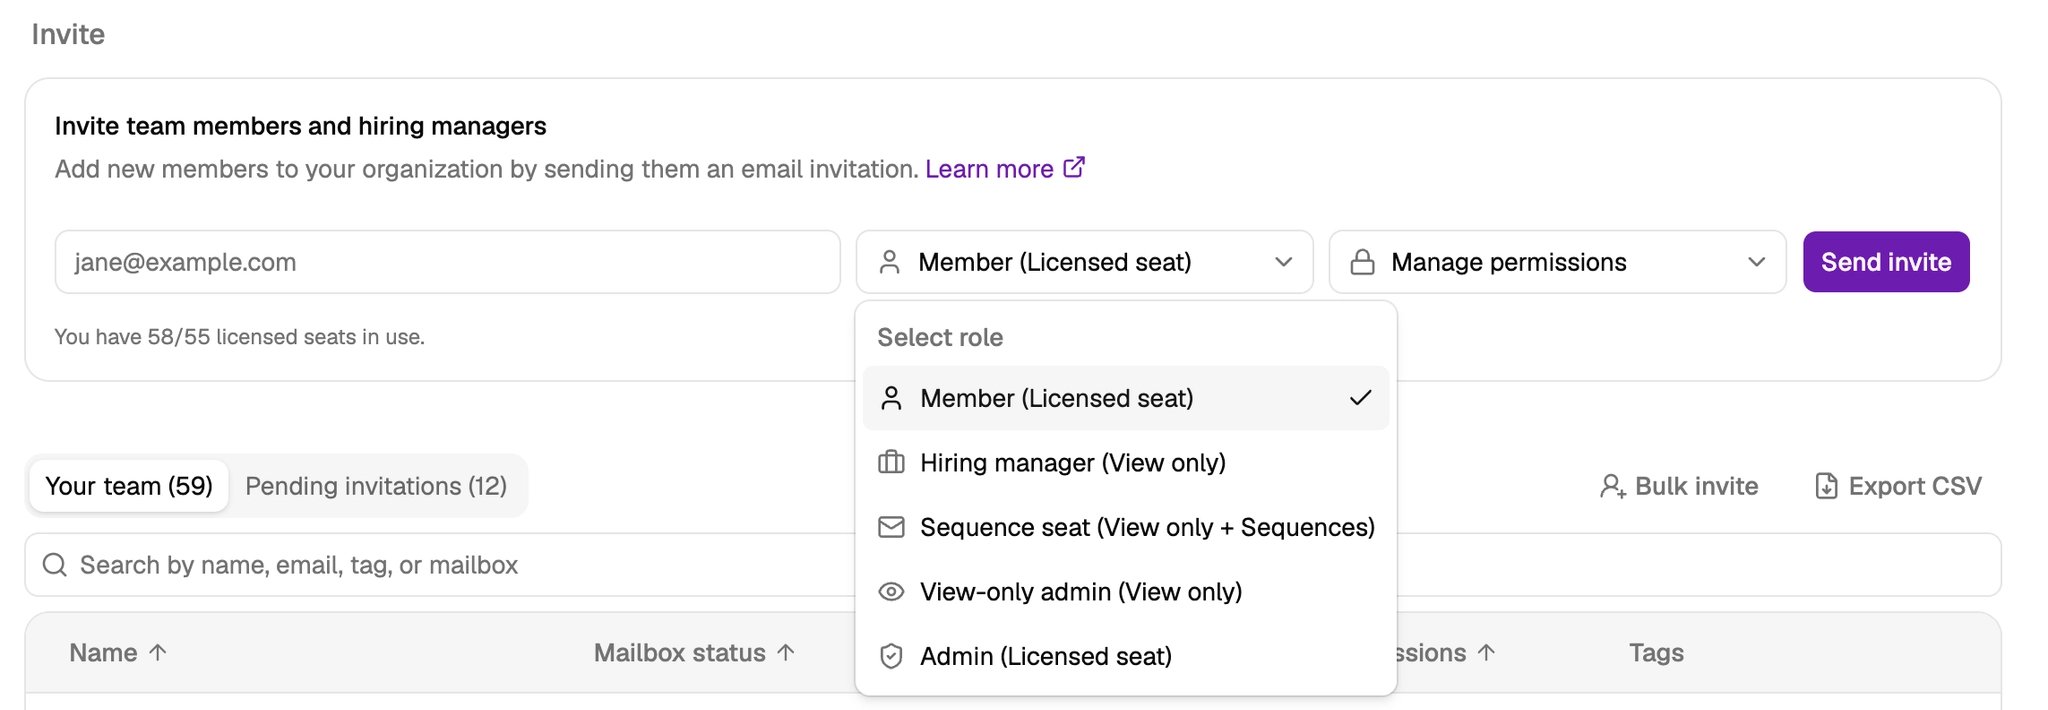
- Reserve the Admin role for the people who truly need to change organizational settings
- Use the Member role for recruiters and sourcing partners. This is the most common seat you’ll assign. The Member role is able to search, create and manage projects, review and shortlist candidates, and run outreach sequences.
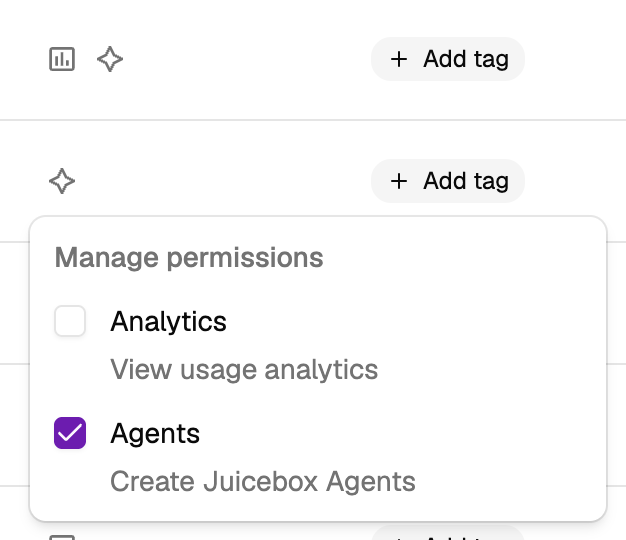
- Analytics: Typically reserved for anyone who needs to track overall team activity (for example, a recruiting leader). When users have this permission, they will be able to see all users’ Juicebox activity, usage trends, and funnels for each project and outreach sequence.
- Agents: Give this permission to anyone who needs to create Agents to conduct searches and candidate outreach on their behalf. Your plan includes a certain number of Agents, so not everyone may need to create them. Typically Agents are used for high-volume or “evergreen” roles that your company continuously recruits for. You can also control the number of Agents any team member can create. We’ll cover that below.
Manage Agent controls
As you saw above, you can give any member access to create Juicebox Agents. But you’ll also want to make some decisions about how this works in your organization. Go to Account Settings, then look under the Organization header, and go to the Agents section (or use this link and log directly into Juicebox).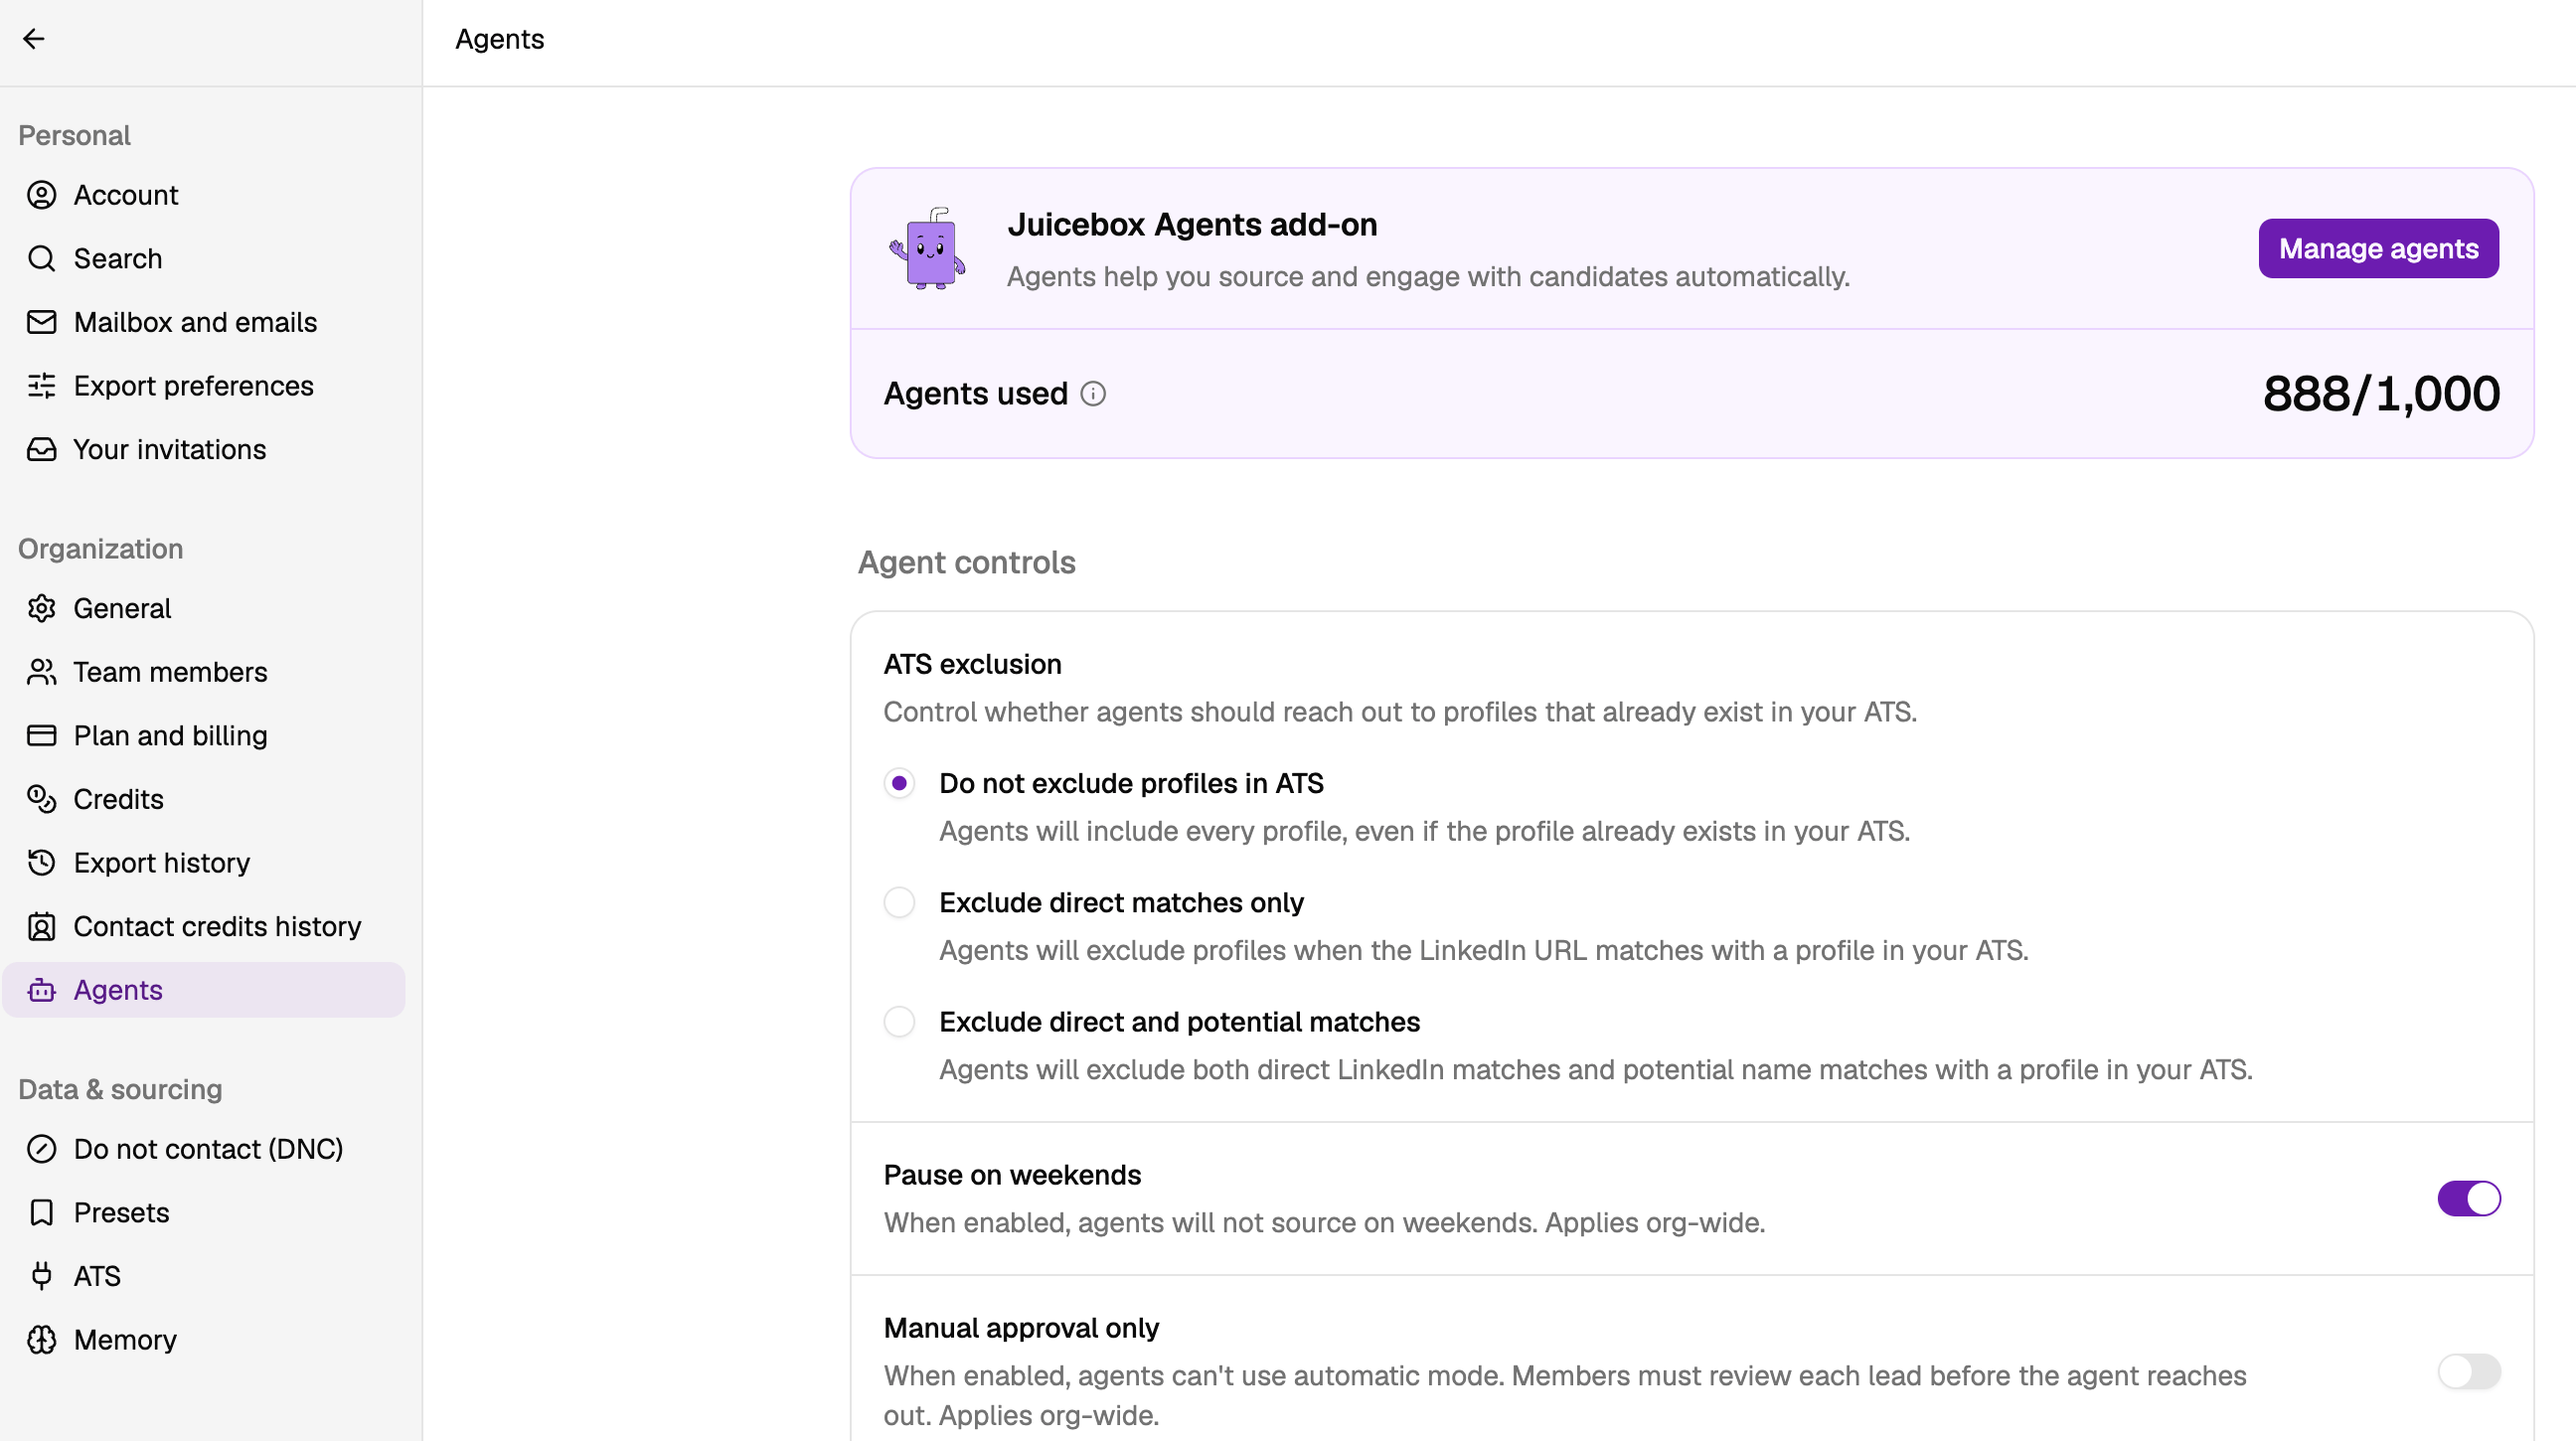
- ATS exclusion: Using the ATS integration you set up above, Juicebox Agents can include or exclude candidates who are already in your ATS. By default, we recommend including ATS candidates, and letting users exclude them on an Agent-by-Agent basis. Exclude them globally only if you want all Agents to focus on finding net-new candidates who have never applied to your company.
- Pause on weekends: Helps your recruiters manage their workload and manage candidate experience. Recruiters won’t get new candidates over the weekend, so they won’t be overwhelmed with new candidates on Monday morning. And candidates won’t receive automatic outreach sequences over the weekend and get the impression that recruiters are working over the weekend.
- Active agent limit: Caps the number of active agents each user can run at once. By default, anyone with Agent permissions can create and run as many Agents as they want, but these count against the number of Agents included in your plan. Setting an agent limit prevents any given user from monopolizing your allotted Agents.
Set up Juicebox for Slack
So far, you’ve set up your team to work productively in Juicebox. In these next sections, you’ll help your team bring data and insights from Juicebox into other places that your team works. If your team uses Slack, Juicebox integrates directly into channels where your recruiters and hiring managers already collaborate. This gives hiring managers visibility into sourcing and recruiting progress without needing to log into Juicebox. It also lets your recruiting team take actions in Juicebox directly from Slack to keep processes moving quickly. To set it up:-
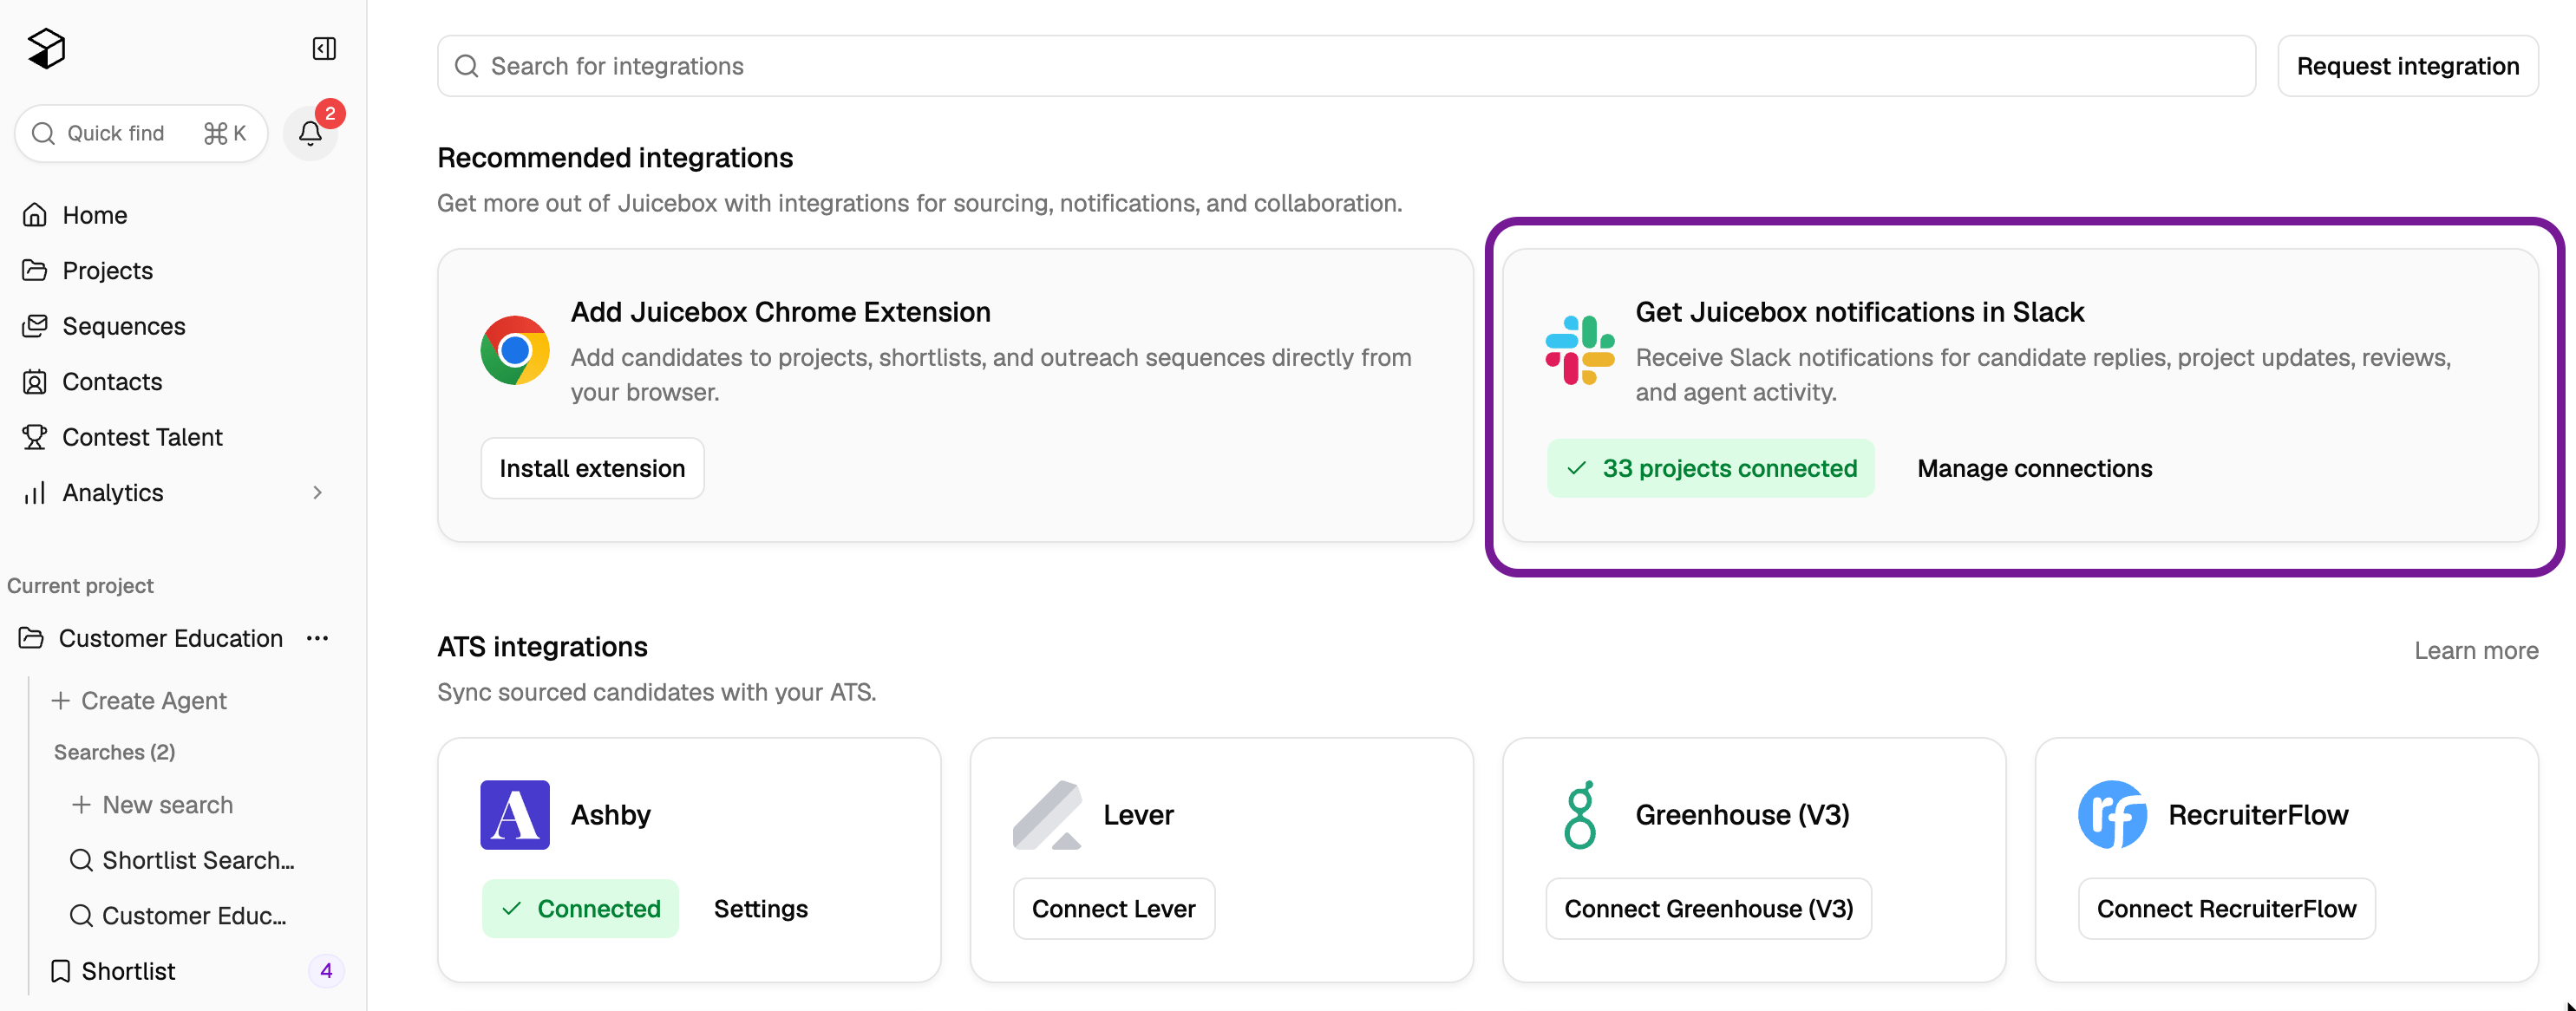
Go to Integrations in the left-hand nav and connect the Slack integration. The first time you do this, it creates a 1:1 connection between your Juicebox organization and your Slack workspace.
-
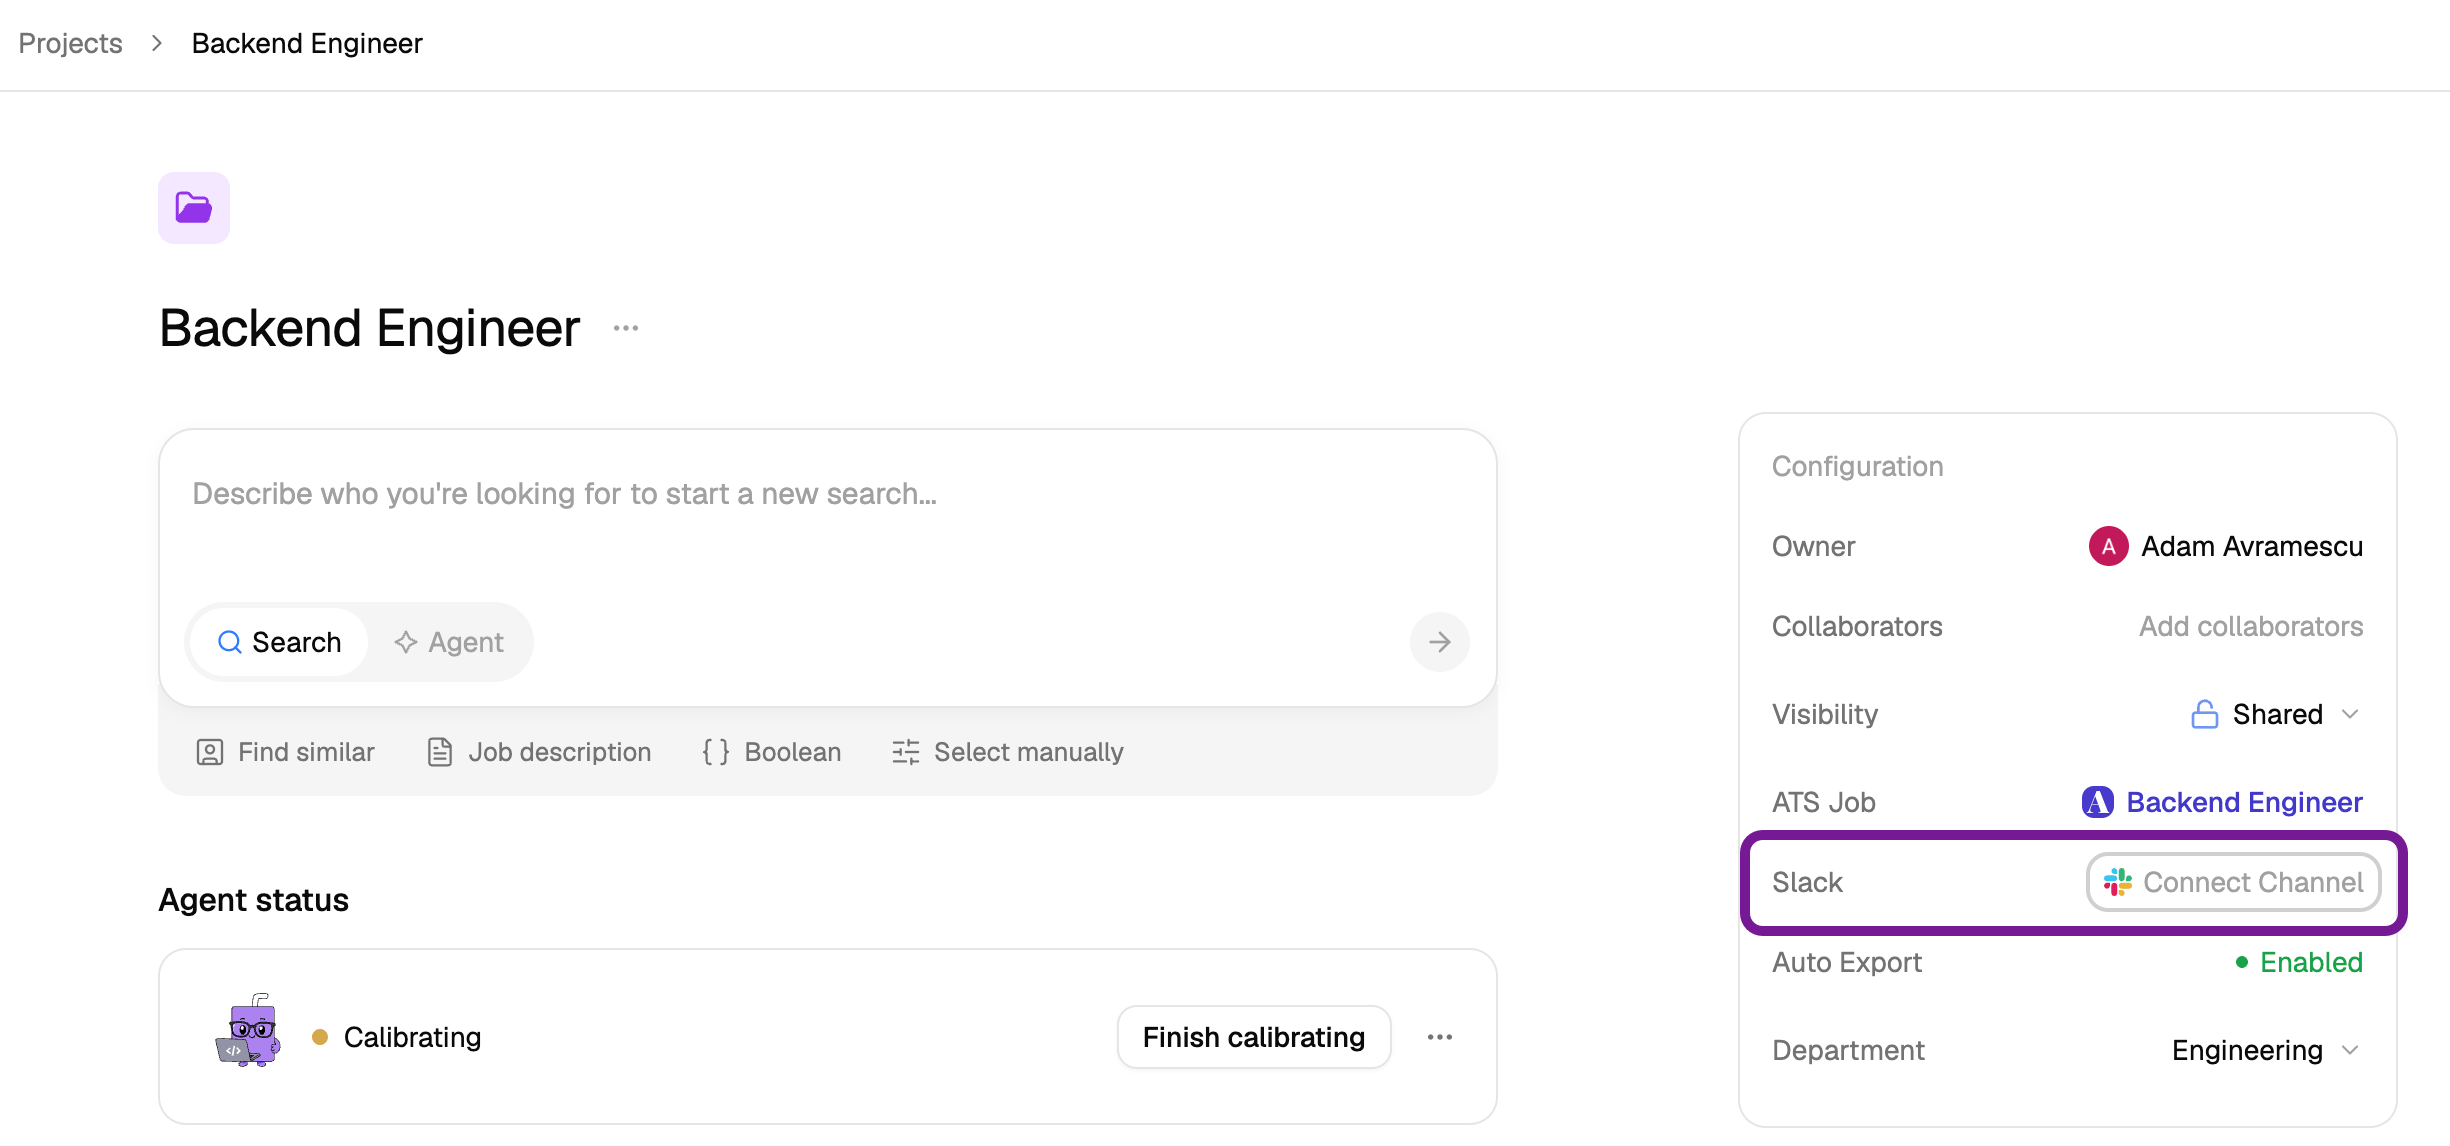
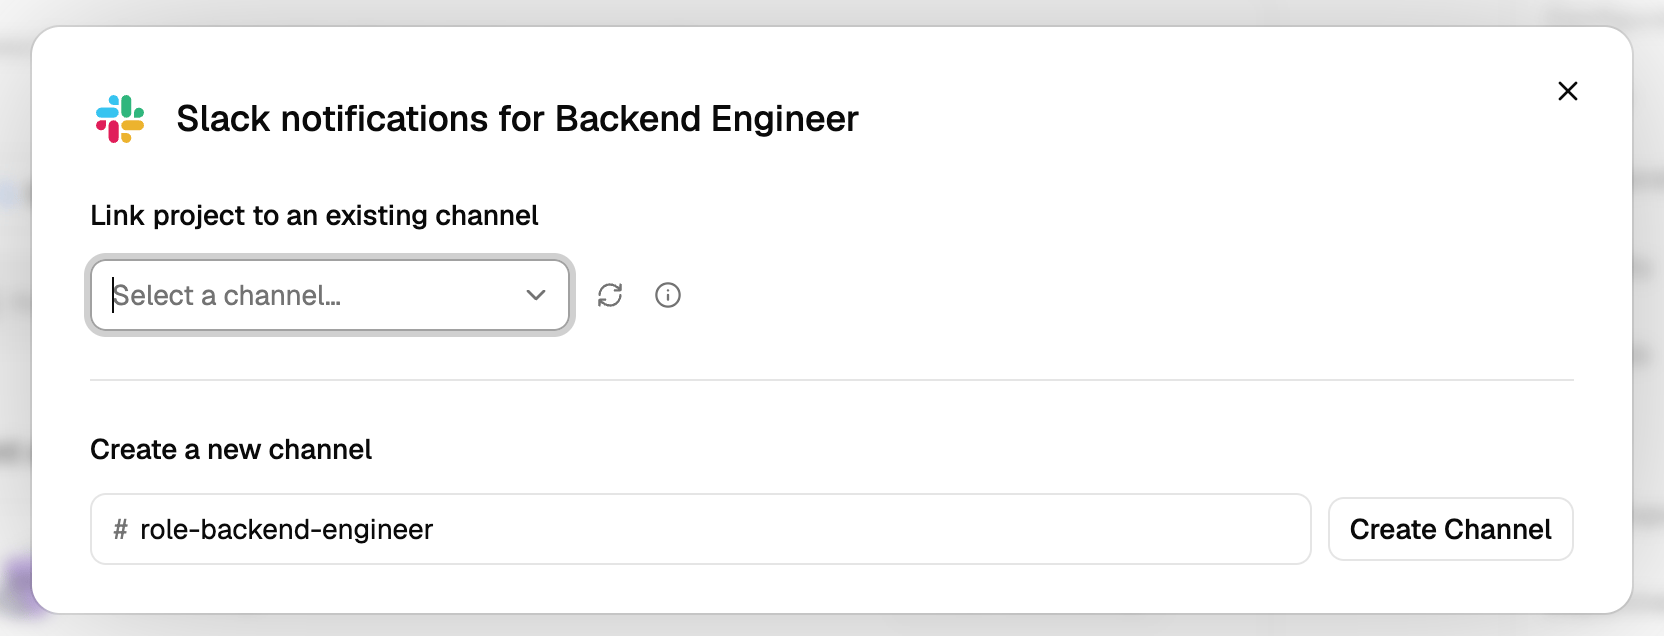
Once your organization is connected, you can link individual projects in Juicebox to individual Slack channels. Generally your team will create a project for each role they’re recruiting. If no channel exists, you can create a new one from this screen.
-
Tag
@juiceboxin the Slack channel to confirm it works. Juicebox will now surface notifications, project updates, and shortlist review requests in that channel and can be tagged to answer questions or provide insights.
Set up Juicebox MCP
With the Juicebox MCP, you can integrate Juicebox data into your AI client such as Claude, ChatGPT, Gemini, or any MCP-compatible platform. This lets your team get self-service custom reporting and insights and take more contextual actions. With the Juicebox MCP, your team can:- Self-serve reports or insights about individual roles or overall sourcing activity directly from your AI tool, without admin assistance
- Kick off an Agent directly from your AI tool, using context from other tools like your ATS and notetaking tools
Want more help? Learn about Juicebox MCP.
Other settings
We’ve covered the main settings to get you and your team started, but as you continue using Juicebox, it’s helpful to be familiar with:- Credits: Certain actions in Juicebox use credits, such as Contact credits (reveal a candidate’s email or profile), Export credits (export profiles to a CRM or ATS), and Smart reports (generate a smart report). Learn more about credits.
- Export history: See a log of all exports your team has made. Learn more about export history or see it directly in Account Settings → Export History.
- Enforce footer addendum: If legal or compliance requirements dictate that you need to add a privacy policy link, regulatory disclosure, or “This email was sent using Juicebox” footer with every email, this setting ensures the footer is attached to every email sent to candidates via Juicebox. Configure it directly in Account Settings → General → Outreach and sequences.
- Email limits: By default, individual users can send up to 100 automated outreach emails per day, but you can raise or lower this limit to between 20 - 200 emails per day (and up to 500 for Business plans). The lower the number, the better the signal to email providers. Learn more about email limits or change them directly in Account Settings → General → Email limits.
- Monthly user reports: You can automatically send a Juicebox usage summary to all admins on the 1st of the month, including individual team member activity. Configure this in Account Settings → General → Reports.
- Email settings:
- In Account Settings → Mailbox Settings, users can enable Email Strict Mode to use verified email addresses for sequences and ATS exports. The trade-off: this is better for sender reputation and bounce rates, but it also reduces email data coverage. This is a user-level setting.
- As an admin, you can also turn on Enforce Email strict mode under Account Settings → General → Outreach and sequences to lock strict mode on for everyone in the organization. When it’s on, every user’s per-user toggle is forced on. Agent outreach and ATS exports also send only to verified addresses. No user can turn strict mode off until you turn the org setting back off. Use this when you want a single, enforced verification standard across the whole team. See Enforce Email strict mode across the organization for the full behavior.
- At the organization level, you can also use Account Settings → General → Email settings to control whether personal or professional email addresses can be used for candidate outreach. The best practice is to use candidates’ personal emails, as this is better for bounce rates. So you may want to check Prefer personal emails, fallback to professional emails and Only use personal emails and make those the options your team can use.
- Learn more about email deliverability best practices.
- Knowledge Vault: Juicebox stores what it learns from your team’s usage to personalize searches, tailor results, and give Agents more context for their searches. In Account Settings → Knowledge Vault you can see both the Company Memory and User Memory. You can enable, disable, or edit these at any time. We recommend checking and updating this periodically to make sure the information is up to date and accurate. Learn more about the Knowledge Vault.