

Introduction
Use sequences to send emails from a connected mailbox and organize outreach across LinkedIn and phone calls. Email steps send automatically. LinkedIn and call steps create tasks for you to complete. Connect a mailbox from Integrations before sending email. See Email Integrations for setup and mailbox access.Sequences overview
Open Sequences from the left-hand menu. This page shows your sequences, outreach performance, and scheduled activity. Select a sequence to view its candidates and results, or select New sequence to create one.Creating a sequence
- Open Sequences and select New sequence.
- Choose how to start:
- Select a suggested project, or use Choose project, to generate a sequence with AI using that project’s context.
- Select Build from scratch to start with a blank sequence.
- Use Clone existing sequence to start from a sequence you already have.
- Review and edit the sequence in the composer.

- Composer chat: use the side panel chat to draft or revise your outreach in natural language. Answer its questions when more context is needed.
- Sequence canvas: edit the title, messages, senders, step types, and timing directly. Use the numbered step rail to move between steps.
Changes save automatically. Check the Last saved at indicator, then select Done to close the composer. Creating a sequence does not enroll candidates; add profiles when you are ready to start outreach.

1: Title · 2: Steps · 3: Step type · 4: Sender · 5: Subject · 6: Message · 7: Signature · 8: Unsubscribe · 9: Preview. Example sequence.
Title the sequence
Select the sequence title at the top of the composer and enter a name. Use a name that helps your team recognize the role or project.Edit the number of steps and each step’s schedule cadence
Select Add step in the step rail or below the sequence to add a step. Use Delete step on a step’s card to remove it. You can also ask Composer chat to add or remove a step; it asks you to confirm before removing one. Use the timing control above each step to set its schedule:- First step: open Start immediately to choose immediately, next business day, soonest at, or after. Configure the timing for the option you select.
- Later email steps: open the Wait control. Set the delay in days, business days, weeks, or months, then review Send at and Timezone.
- Manual tasks: use the Create timing control to choose when the task is created.

Blackout dates
If an admin has set blackout dates for your organization, Juicebox schedules every sequence around them:- A step that lands on a blackout date moves to the next allowed day at the same send time.
- Later steps keep their spacing from the moved step.
- Business-day delays don’t count blackout dates, just as they don’t count weekends.
- Email, LinkedIn, and call steps all follow blackout dates. Juicebox doesn’t send emails or create tasks on those days.
- Candidates enrolled before an admin added a blackout date also follow it.
Select the step type
Open the step-type dropdown beside the step number. Select Email, Connection Request, LinkedIn Message, or Call.Choose the sequence sender
Use From on each email step to choose a connected mailbox. Mailboxes without access are identified in the dropdown. You need permission to send from a mailbox before starting outreach; see Email Integrations for mailbox permissions. You can use a different sender for each step, such as a recruiter for the first email and a hiring manager for a follow-up. When a sequence uses multiple senders, review the Single thread and Multi thread options:- Single thread: senders participate in the same conversation. Additional senders are CC’d for awareness.
- Multi thread: each sender starts a separate thread. Review the subject for each new email. A later step from a new sender starts a new thread by default.
Customize the subject line
Edit Subject on an email that starts a thread. Use the Cc and Bcc control beside the subject to show those fields. You can insert a candidate variable, such as First Name, to personalize the subject. Review the resolved subject in the email preview before sending. You can also insert Day of Week to reference the weekday each message goes out. See Day of Week variable.Customize the email text
Edit the message directly on its step card. The formatting toolbar supports bold, italic, lists, links, images, and other text formatting. Add a scheduling link as a hyperlink when you want candidates to book time with you. As a best practice, save the scheduling link for a later step rather than the first email. Use the quick-add controls above the body to insert an AI command, a Network mention, or a variable. Open Show all variables for more choices. The inline composer also makes these tools available while you type. Select Snippet below the message to reuse saved text. Select Add attachment to attach a file to an email step. You can attach up to 3 files per step, 4 MB each.Include a signature
Use the sender signature dropdown on an email that starts a thread. Choose a saved signature, or select Add sender signature when none is selected. Review the signature in the email preview, especially after changing the sender. To create a signature, see Manage Account.Include a candidate unsubscribe link
Enable Include unsubscribe at the bottom of an email step to include an opt-out link for the recipient. Admins can set custom unsubscribe copy for the whole organization in admin settings. Individual recruiters cannot change this text.Preview and test your sequence
- Select Preview on the step you want to review.
- Use the contact selector next to To to check the message for a sample contact. Review the subject, resolved variables, AI personalization, signature, and any footer.
- Under Send yourself a test email, enter your email address and select Send Test. Test messages include [TEST EMAIL] in the subject.
- Close the preview to return to editing.

Generate with AI
To create an AI-generated sequence, choose a project when creating a sequence. Use Composer chat, the side panel on the left, to provide details and refine the result. When available, AI uses your project’s intake notes, linked job, and search criteria, along with company information, your writing style, and relevant past team sequences. Search results and shortlisted profiles can help it understand the target audience. It can also consult the web and tools you have connected for additional context. Describe what you want in the chat. Useful details include:- The role, company, and reasons a candidate might be interested.
- The number and type of steps, and the spacing between them.
- The tone, length, and language of the messages.
- Whether to ask for a reply or include a scheduling link.
- “Make the first email more concise.”
- “Wait three business days before step 2.”
- “Send the final email from our hiring manager’s mailbox.”
Review generated copy for accuracy before sending, including claims about your company and the candidate’s experience. Generating a sequence is separate from adding candidates to it.
Revise selected text
Select a passage in a message to open its editing menu:- Proofread fixes the selected copy.
- Make concise shortens it.
- Adjust tone offers Casual, Direct, and Warmer.
- Ask the Composer lets you give custom instructions in Composer chat.
Create or edit a sequence with a sourcing Agent
You can also work on outreach in your Juicebox Agent conversation. Ask the Agent to create a sequence for the role or revise an existing one—for example, “Create a three-email sequence for this role” or “Make the first email shorter.” The sequence opens in a Sequence side pane beside your existing Agent chat. Give feedback in that conversation or edit the messages, senders, and timing directly in the pane. Changes save automatically; review each step with Preview before using the sequence for outreach. This workflow uses your sourcing Agent conversation. Composer chat is the side panel you use when opening the standalone composer from Sequences. See Juicebox Agents for outreach setup and sourcing settings.Inline composer (slash menu)
Type / in a message body to open quick adds. The menu includes:
Press / again if you want to insert a literal slash.

Day of Week variable
Insert Day of Week to add the weekday a message is scheduled to go out, such as Monday or Thursday. Use it for timely phrasing likeHappy {{Day of Week}} or Free for a quick call this {{Day of Week}}?. It works in subjects and message bodies.
If the preview says the weekday is unavailable, check the step’s Send at and Timezone settings and try again.
AI commands
Select the AI command chip above the message, or type / and choose AI Command. Select the Work experience or Skills preset, or write a clear, concise command and select Done. For example: “Write one sentence connecting the candidate’s relevant engineering experience to this role.”
Editing an existing sequence
From Sequences, open the sequence’s … menu and select Edit. Use the same Composer chat and step cards to revise the sequence. If Juicebox prompts you to apply edits to candidates already enrolled, review the choice before applying them. Only outstanding steps can change; a message that has already been sent is not rewritten. To make an edit for one candidate, see Add Profiles. You can also override the sender or send time for newly enrolled candidates only, without changing the sequence itself. Use this when you build a sequence outside of business hours and want the first email to go out the next morning.Non-email steps
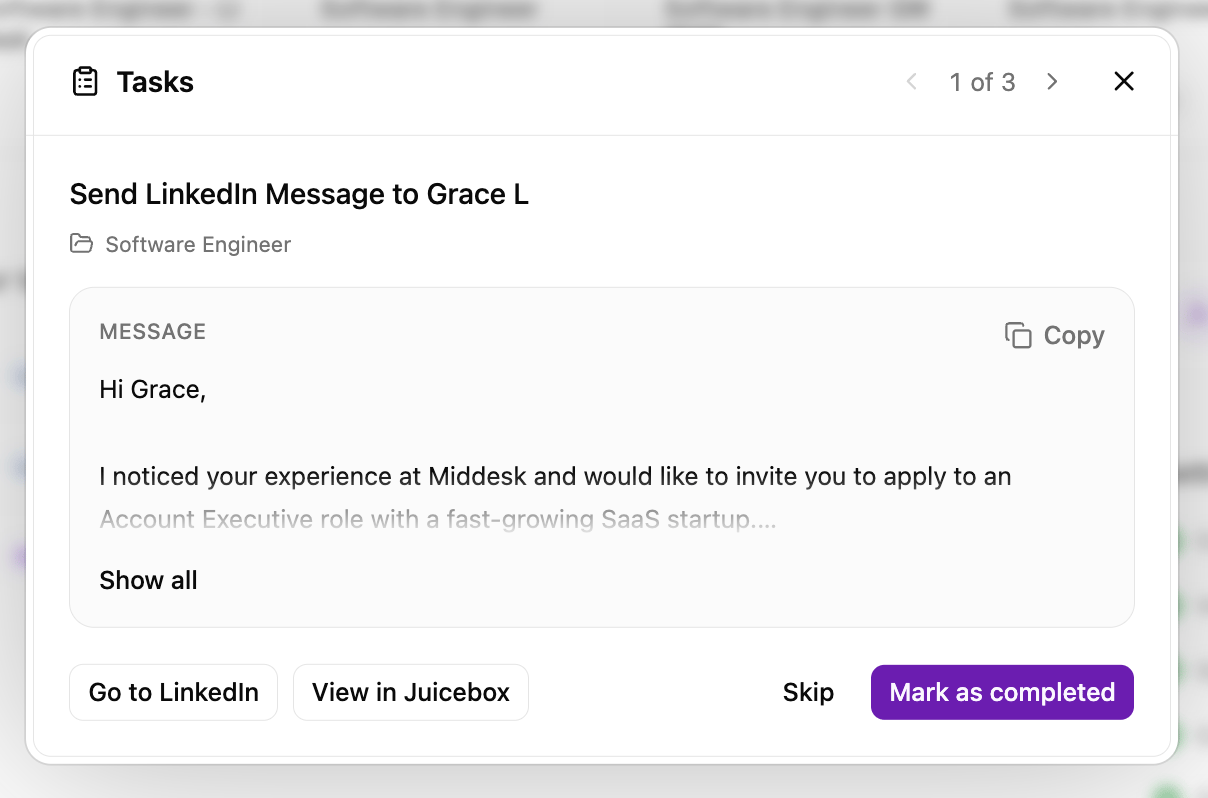
Select Connection Request, LinkedIn Message, or Call from the step-type dropdown. Use From to choose the task owner. For a connection request, enable Include custom note with connection request if you want to prepare a note. You can add a Call step even when a candidate has no phone number on file. The task is still created for the owner, who can find a number or skip the step. These steps create manual tasks. Juicebox does not send the LinkedIn message or make the call for you. When a task is due, the owner receives a notification and completes the action on LinkedIn or by phone. When a task has been triggered, it appears on your home page. From here, you can execute your task or filter by status, task type, or project.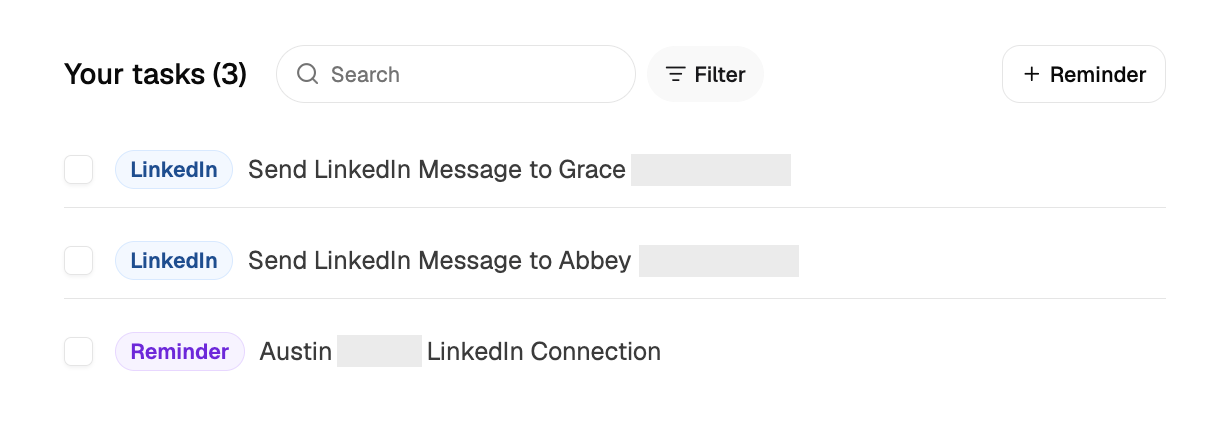
Creating a sequence from your shortlist
Select candidates in your project’s shortlist and select Add to Sequence. From the sequence picker, you can select an existing sequence or create a new one. Review the sequence in the composer, then return to enrollment to choose contact preferences and check each candidate’s personalized messages. See Add Profiles for the full enrollment flow. From the shortlist you can also select all candidates to enroll them at once. To contact candidates you have reached before, re-enroll them from the sequence page. Juicebox skips candidates contacted within the recently contacted window, which defaults to 90 days. Admins can set the window from 1 to 180 days in organization settings. If a connected mailbox is required, follow the prompt to connect one before sending email.Pausing, resuming, or stopping a sequence
If you want to stop, pause or resume a sequence, you can select the individual sequence from the Sequences homepage. Once that sequence has been selected, you can bulk select all candidates next to Full name or individually select the candidates you want to stop/resume the sequence for.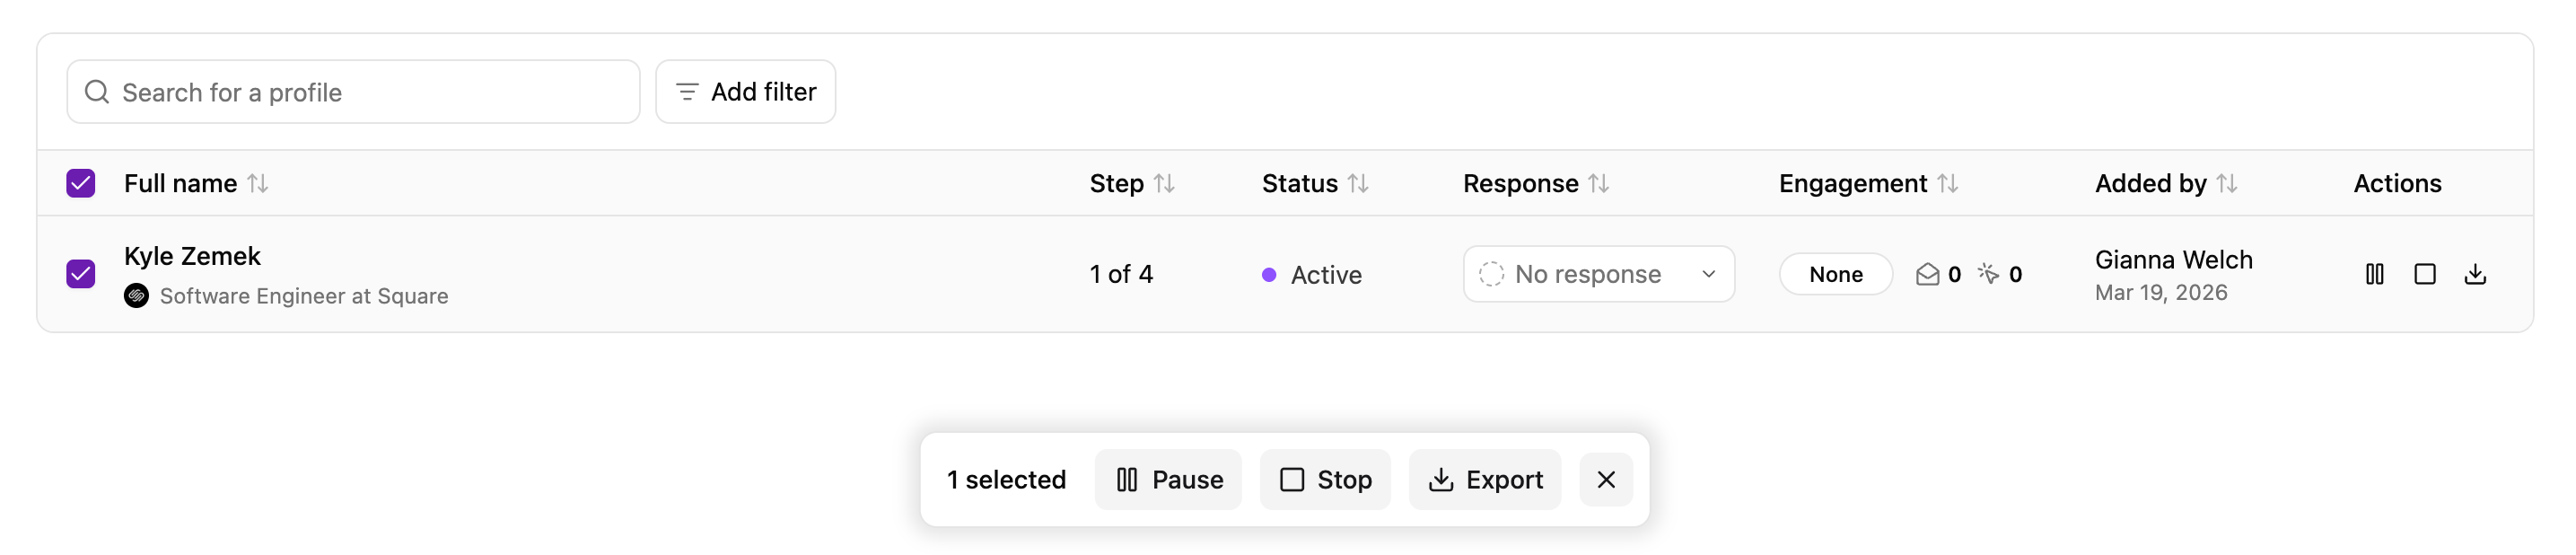
- Automatically
- When a candidate replies to your outreach, the sequence will automatically stop for that candidate. This includes both email replies and LinkedIn Recruiter InMail replies.
- If the mailbox is disconnected from Juicebox, all sequences from that mailbox will automatically pause.
- Manually
- You can manually pause, resume, or stop a sequence at any time, for a single candidate or all of them.
Juicebox detects InMail replies through the email notifications LinkedIn sends when a candidate responds to an InMail. Detection works only if both of the following are true:
- The mailbox connected to Juicebox is the same mailbox where you receive LinkedIn’s InMail reply notifications.
- Email notifications for InMail responses are turned on in your LinkedIn settings.
- Pause: Temporarily halts all remaining steps in the sequence. Use this if you want to resume sending later.
- Resume: Continues the sequence from the next unsent step for each candidate.
- Stop: Permanently ends the sequence for the selected candidate(s). No further steps will be sent. Use this when a profile is no longer relevant, has opted out, or has already engaged outside of email.