

About the integration
Juicebox’s integration with Workday allows you to:- Export Profiles to Workday: Save profiles directly into Workday, including contact details, current company and job, profile URLs, and more.
- [Configurable] Auto-Export: Juicebox has the ability to auto-export profiles to your ATS with configurable triggers, including after shortlisting, after adding to a sequence, or after an interested response.
- Link Workday Jobs to Juicebox
- Import Job Descriptions: Import a job description from Workday into Juicebox to automatically kick off a search using the job description.
- Simplify Exports: When exporting a profile from Juicebox to the ATS, it will automatically be connected to the correct job in the ATS. More details here.
- View Profiles in Workday: View profiles already in Workday within Juicebox. Avoid reaching out to the same profile twice, and instantly view your relationship history.
Start a project via the Workday integration
Open the projects page and select Import Job from ATS / CRM. You will then see your Workday jobs and can select the corresponding option.Export profiles to Workday
Follow the regular export steps and select Export to Workday on either an individual profile or a bulk export. After exporting, you will see the profile created in your Workday account.View profiles already in Workday
Juicebox will tag profiles that already exist in Workday. You will see the last modified date, as well as the option to view the profile directly in Workday by clicking the View in ATS button.Before you start
Make sure you are an admin of your Workday account:-
After logging into Workday, search for “View API Clients”.
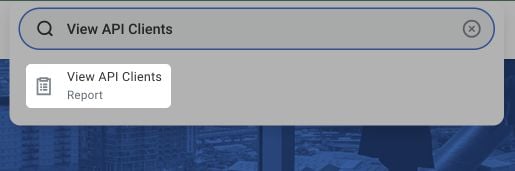
- If you cannot see this menu item, you are not an admin of the Workday account.
- In that case, find out who your Workday Admin is and ask them to give your account sufficient permissions or to take over the integration process.
- Create a new integration system user (ISU) and a security group for that user.
- Assign the required permissions to the security group and activate the changes.
- Generate a new API client.
Estimated, overall setup time: 30 minutes.
Step 1: Find your Workday service URL
- Click on the Search field at the top and enter “View API Clients”.
- Click on the task View API Clients that just appeared.
-
At the top of the page that just appeared, find and copy the Workday REST API Endpoint. The URL should follow this schema:
https://{domain}/ccx/api/v1/{tenant}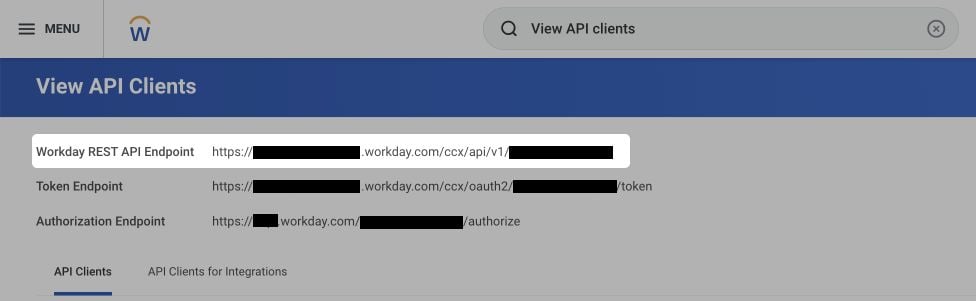
Step 2: Add an integration system user (ISU)
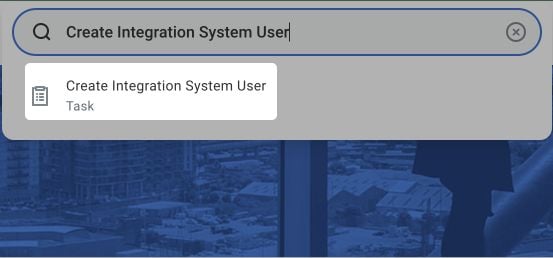
- Click on the Search field at the top and enter “Create Integration System User”.
-
Click on the task Create Integration System User that just appeared.
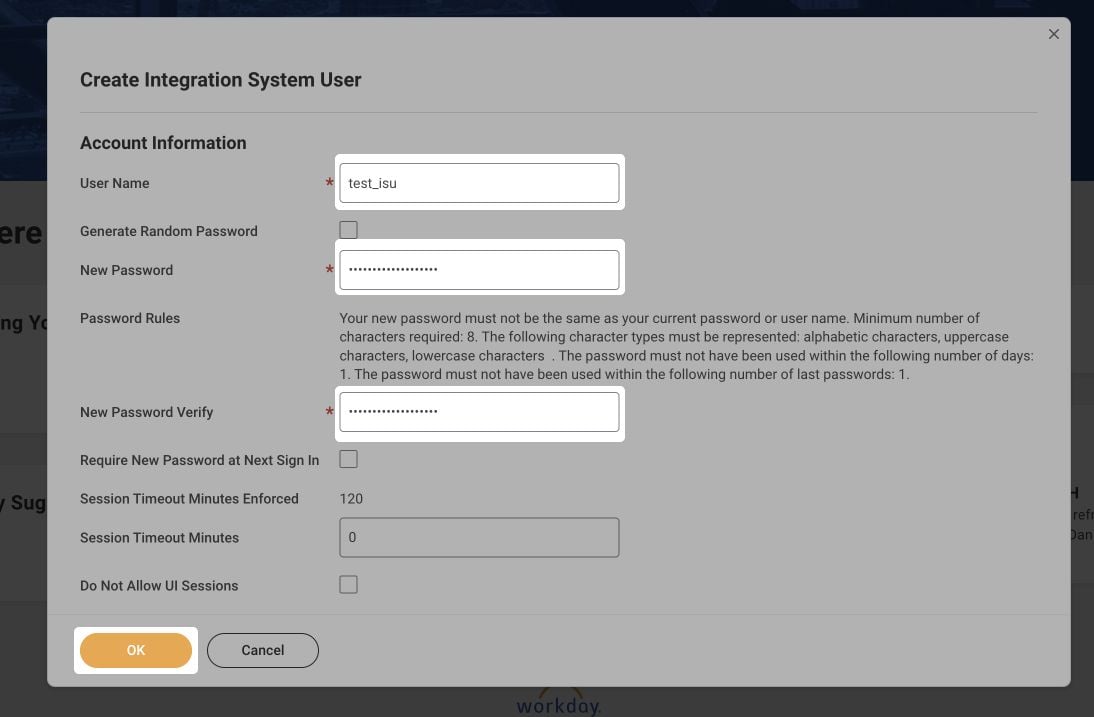
- In the dialog that just opened, enter a username and generate a secure password. You can leave the other fields untouched.
-
At the bottom of the dialog, click OK.
Step 3: Create a security group and assign the ISU to it
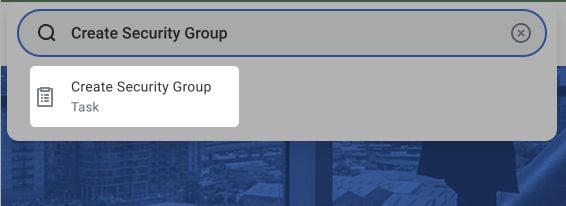
- Click on the Search field at the top and enter “Create Security Group”.
-
Click the task Create Security Group that just appeared.
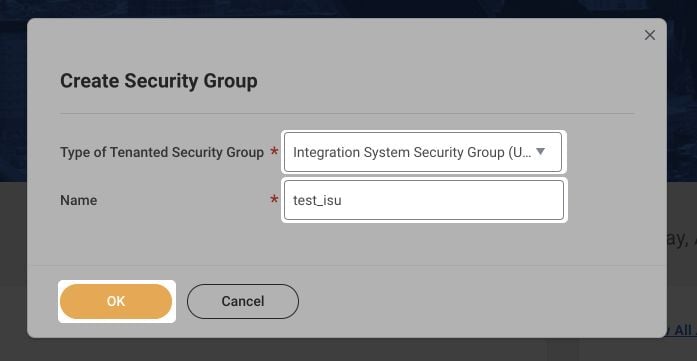
- On the page that just appeared, locate the dropdown Type of Tenanted Security Group and select Integration System Security Group (Unconstrained).
- For the Name, enter the value of the User Name from when you created the ISU earlier (in this example it is test_isu, but yours will be different).
-
At the bottom of the page, click OK.
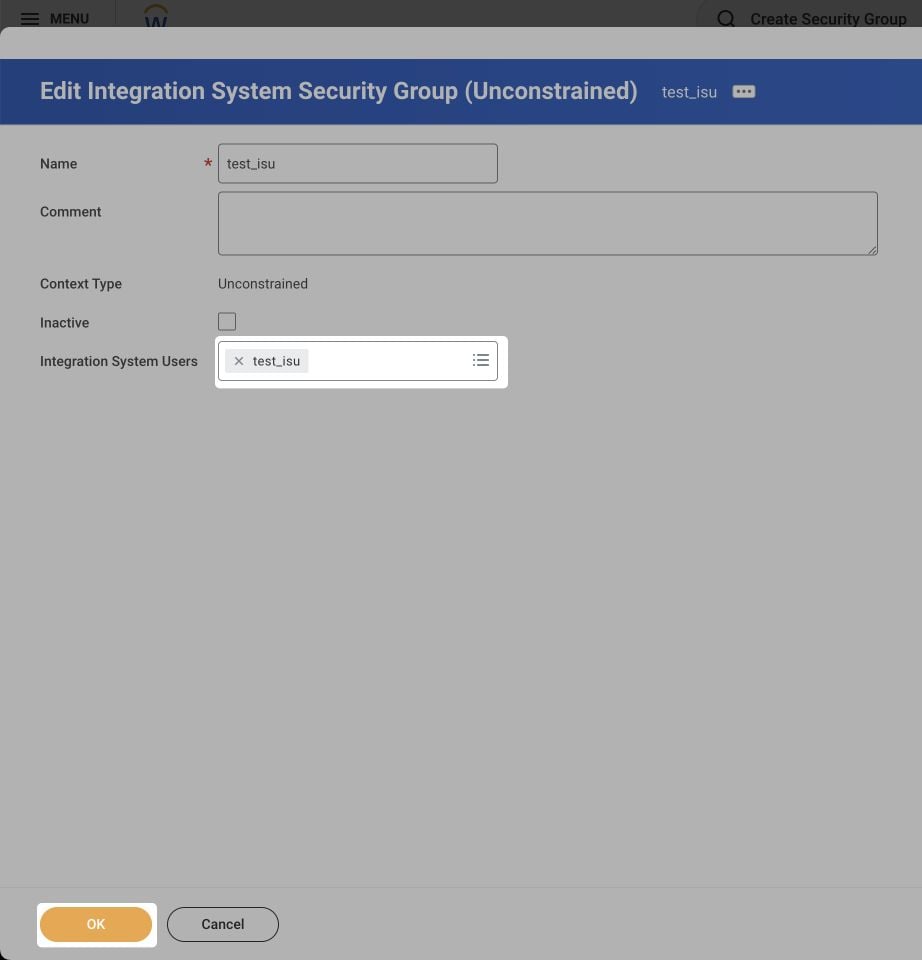
- On the edit page that just appeared, add the ISU you created to the Integration System Users field.
-
After that, go ahead and click OK.
Step 4: Add the required permissions to the security group
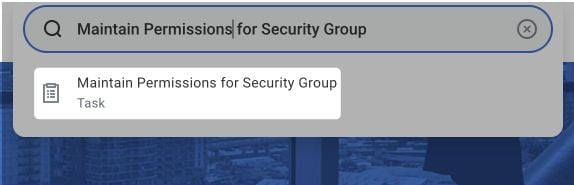
- Click on the Search field at the top and enter “Maintain Permission for Security Group”.
-
Click on the task Maintain Permissions for Security Group that just appeared.
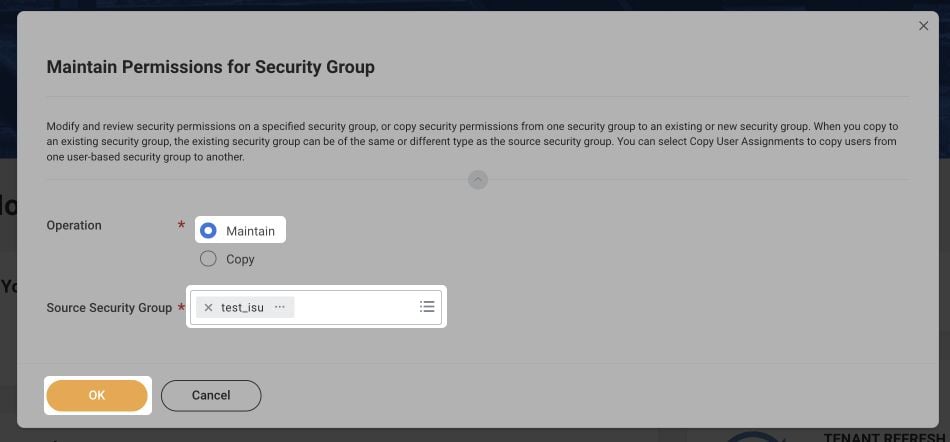
- In the window that just appeared, make sure you have the option Maintain selected.
- Click the field Source Security Group, enter the name of the group (in this example test_isu) and hit enter. Then click on the security group to select it.
-
Click OK.
-
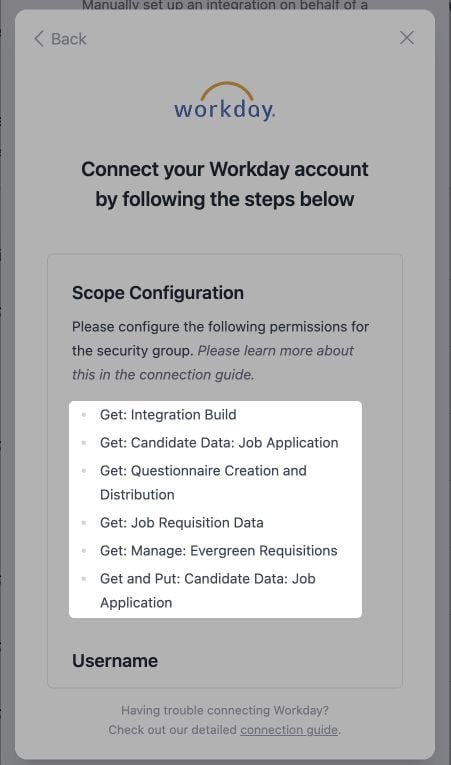
In the window that just appeared, add the permissions for the ISU. You can find the list of permissions needed in the connection flow.
For each permission, repeat the following process:
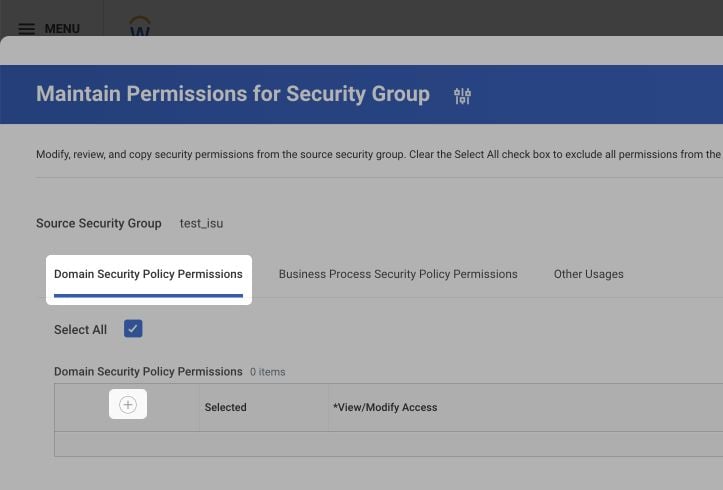
- Make sure the tab Domain Security Policy Permissions is selected.
- Click on the icon with the + on it.
-
As you’re setting up the integration, you will be shown an exact list of permissions to grant to the security group. Enter them into the table as follows:
- The first part is for the column View/Modify Access. Select the value (e.g. “Get Only”) from the dropdown.
- The second part is for the column Domain Security Policy. Type in the name of the policy (e.g. “Manage: Location”), hit enter and click on the item that just appeared in a list.
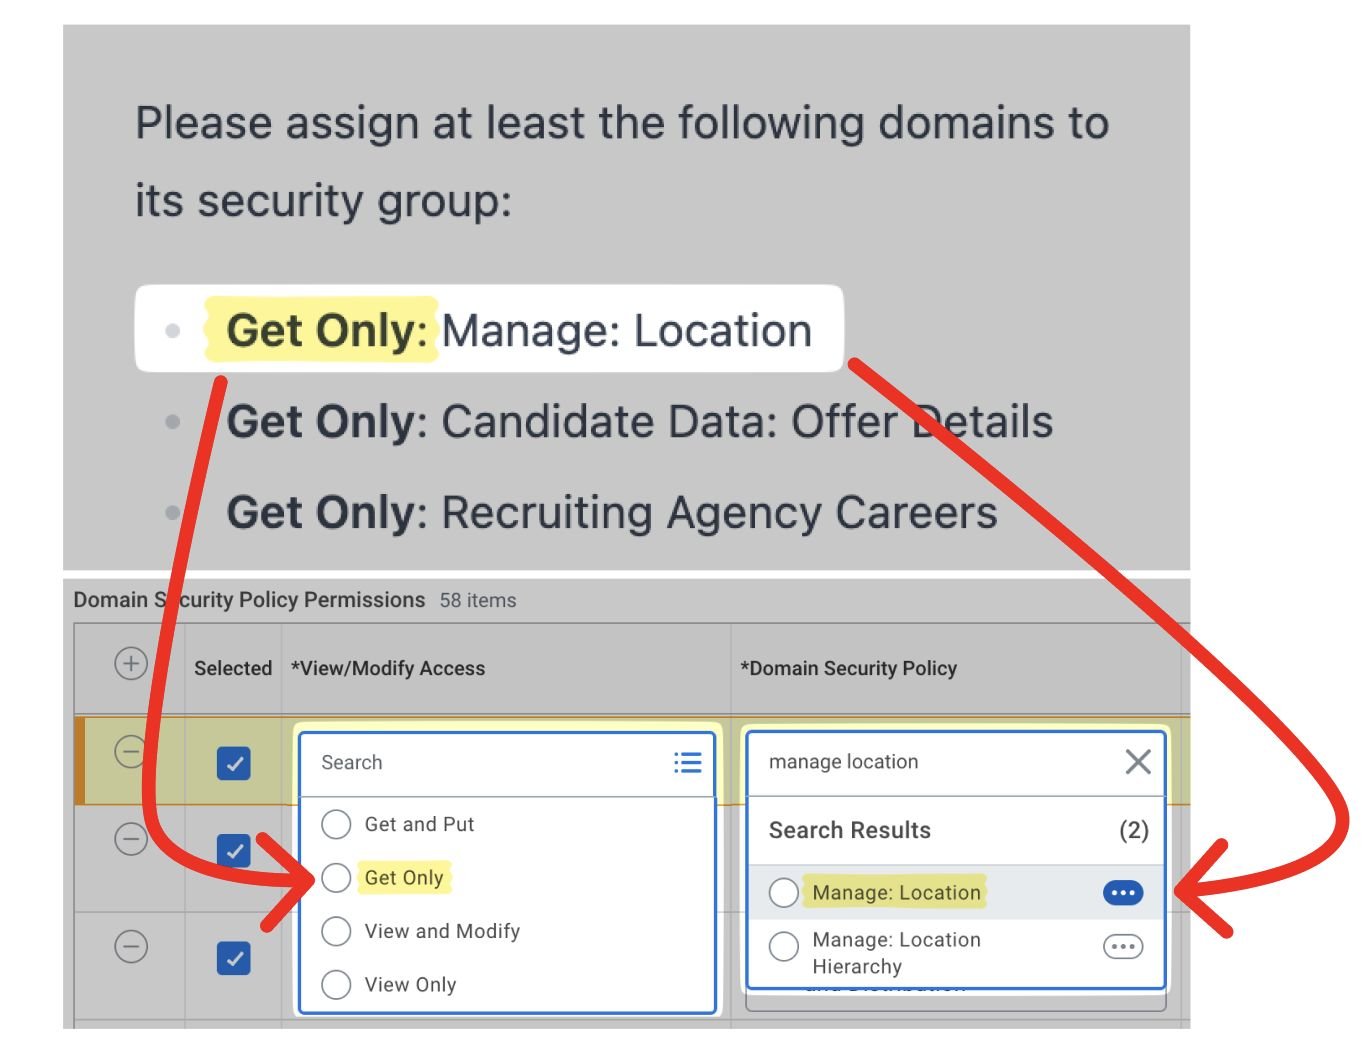
The permissions shown in the screenshots are only an example. The permissions may vary in your case. Use the exact list displayed in your connection flow.
Step 5: Activate your changes
After making any changes to your Workday security policy settings, apply those changes by executing the Activate Pending Security Policy Changes task. Without that, none of your changes will take effect.- Click on the Search field at the top and enter “Activate Pending Security Policy Changes”.
-
Click on the task Activate Pending Security Policy Changes that just appeared.
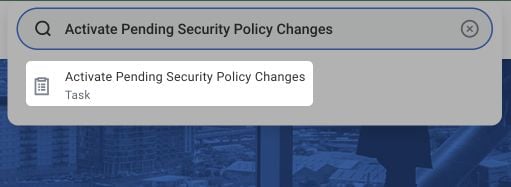
- In the window that just appeared, add any comment for applying the changes (for example, “Grant ISU test_isu necessary permissions for integrations”).
-
Click OK.
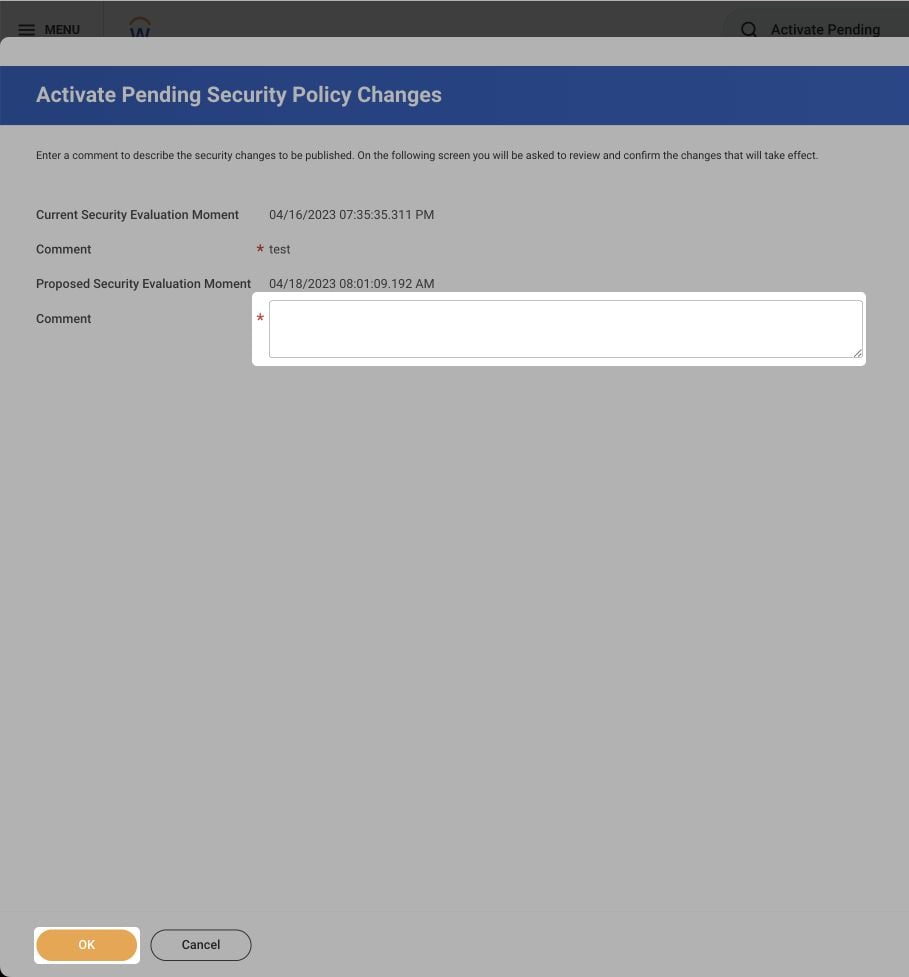
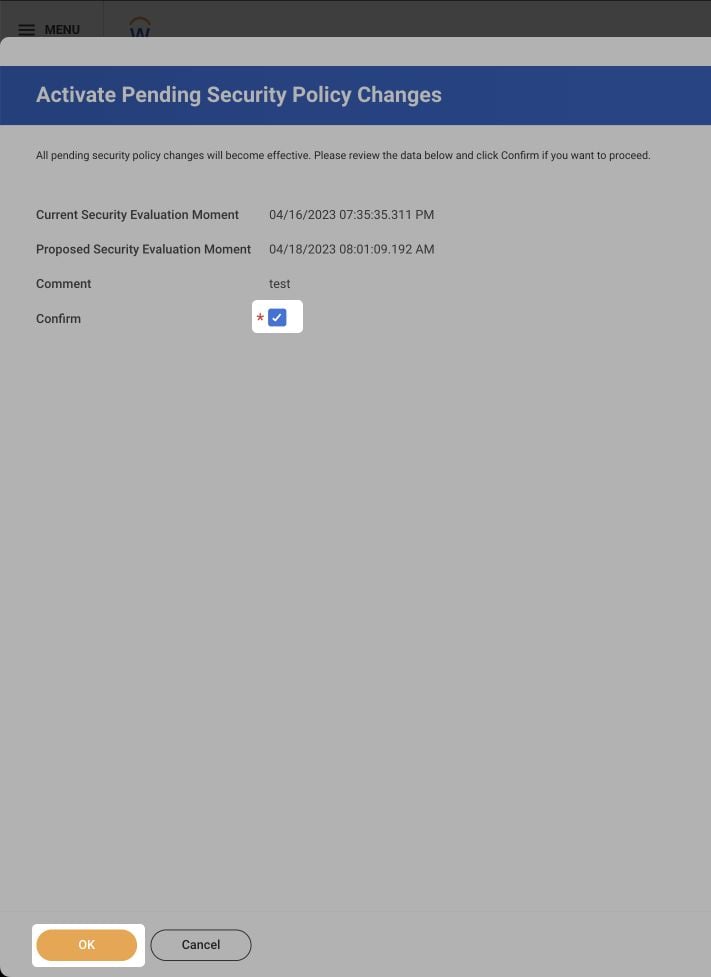
-
In the new window, check the box Confirm and click OK.
Step 6: Create an API client
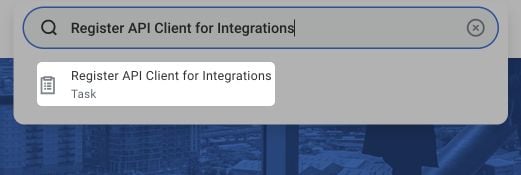
- Click on the Search field at the top and enter “Register API Client for Integrations”.
-
Click on the task Register API Client for Integrations that just appeared.
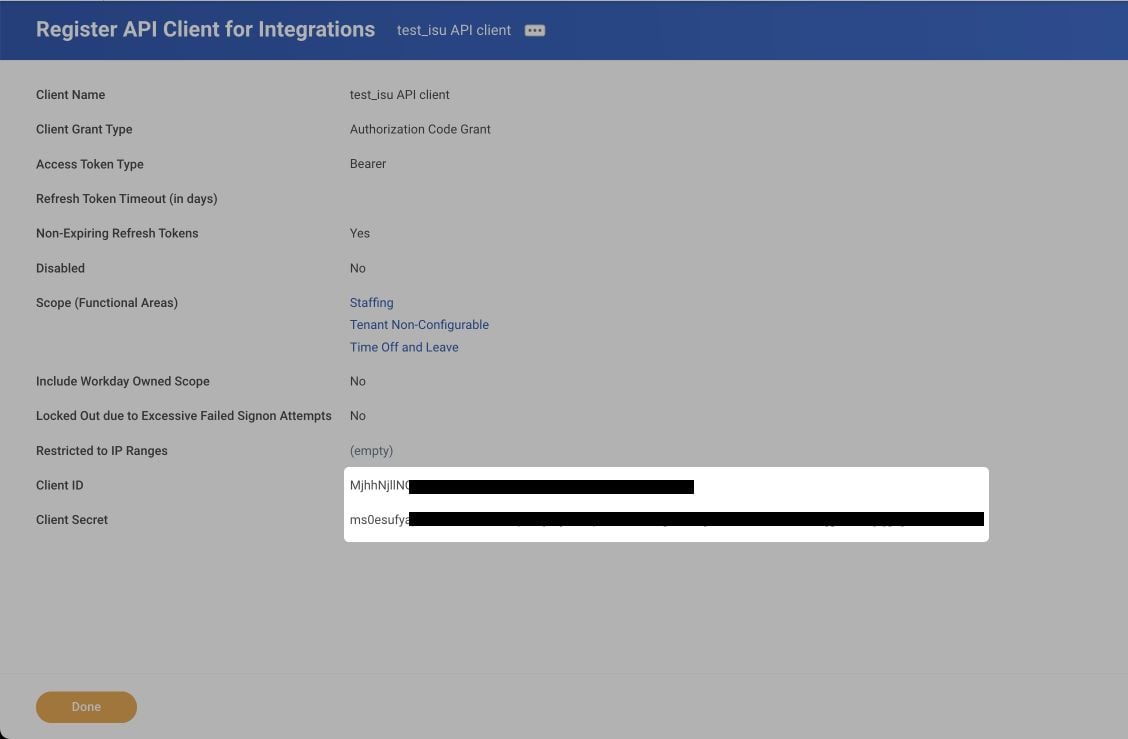
- In the window that just appeared, enter a Client Name, for example “test_isu API client”.
- Make sure the option Non-Expiring Refresh Tokens is turned on.
- For the field Scope (Functional Areas), enter the values that are displayed to you within the connection flow.
-
Click OK.
 The scopes shown in the screenshot are an example. Use the permissions that are requested inside of your connection flow.
 -
In the new window, copy the Client ID and Client Secret for later use, then do not click Done.
-
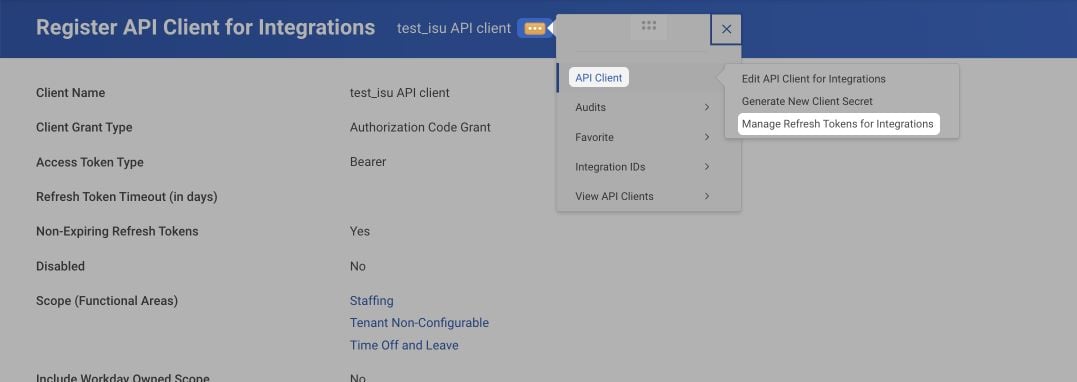
Still on the same page, click the three dots at the top, then API Client > Manage Refresh Tokens for Integrations.
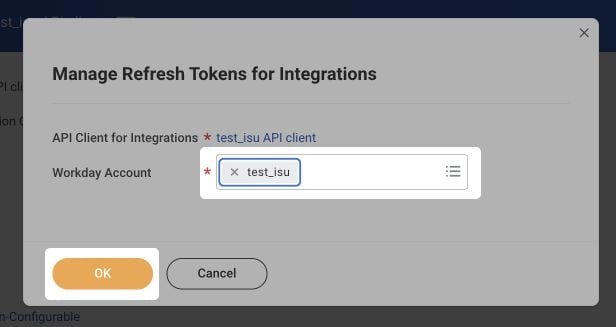
- In the new window, enter the name of the ISU that you created earlier.
-
Click OK.
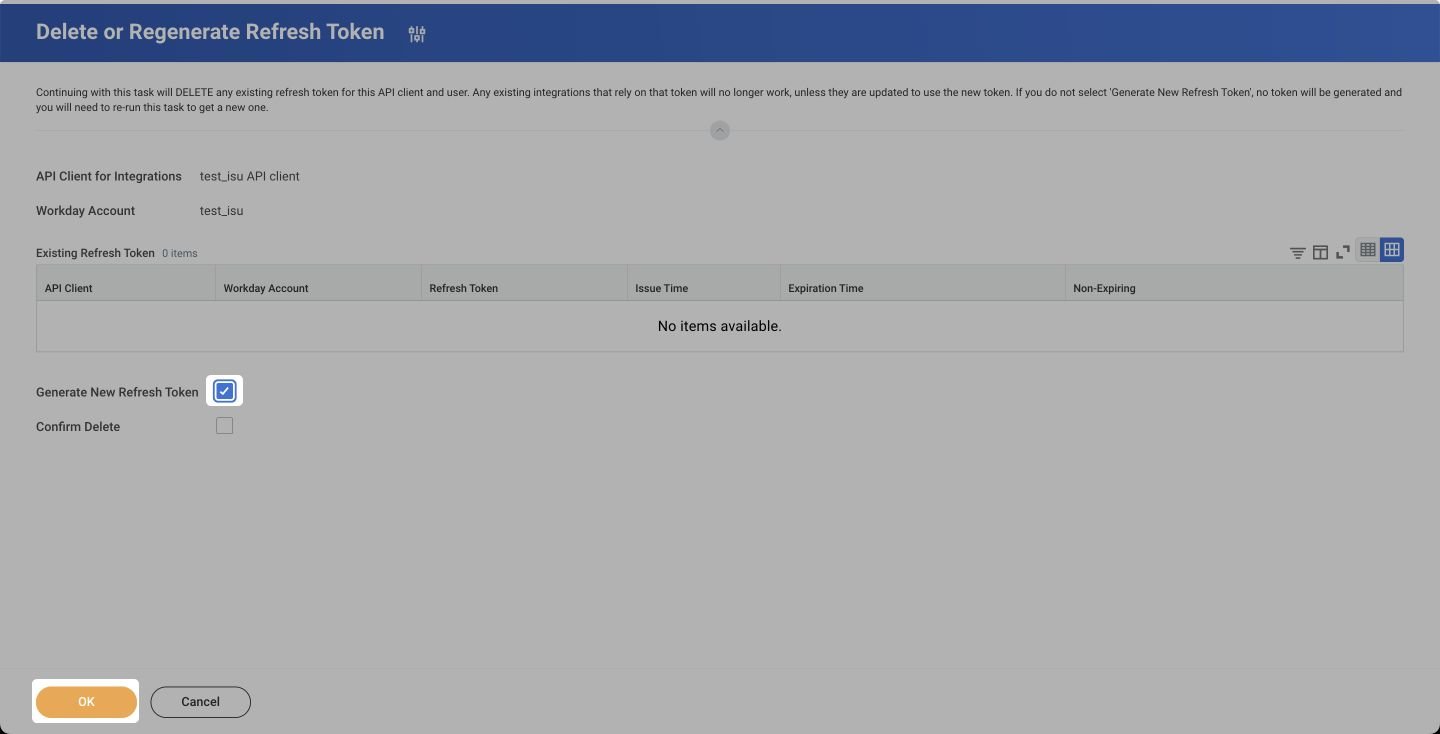
- In the new window, check the box for Generate New Refresh Token.
-
Click OK.
-
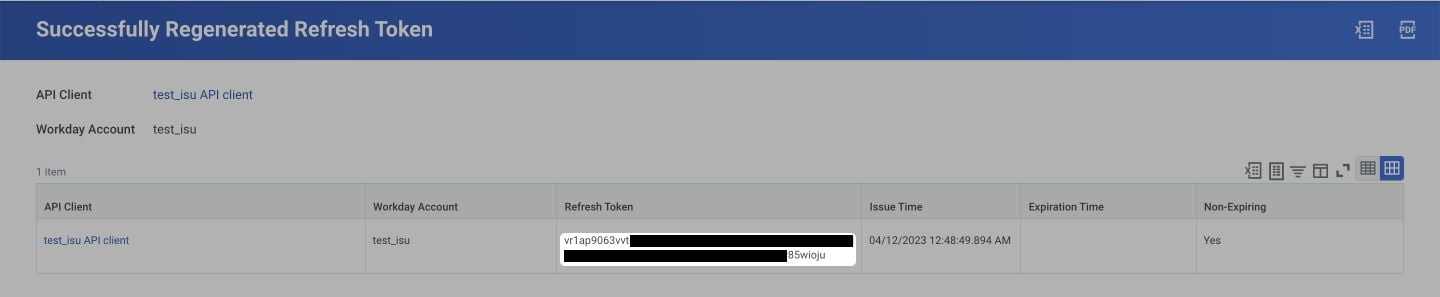
In the new window, copy the refresh token and store it for later use.
Setting up the integration
- Navigate to the Integrations tab on the Juicebox platform.
- Select Workday and click Activate. You can also use the search bar at the top.
- Follow the instructions in the connection pop-up, entering the values you collected: your Workday service URL, the ISU username and password, the Client ID and Client Secret, and the refresh token.
- After you have clicked through the remaining pages of the pop-up, the configuration will be completed. If successful, you will see a green Connected button in your Integrations marketplace.
It may take a few minutes for all data to sync between Juicebox and Workday.
Troubleshooting “Invalid username or password!” issues
If you are experiencing trouble logging in due to an error “Invalid username or password!”, try the following:- Search for “Manage Authentication Policies” in the top bar.
- Click on Edit next to the policy.
- Create a new Authentication Rule by clicking on the + in the top left.
- Assign the security group that was made earlier to this new rule, and name the rule something relevant.
- Click the + next to Authentication Condition Name, and name it something relevant.
- Ensure that the Allowed Authentication Types is either set to Specific: User Name Password or Any.
- Finally, search for “Activate All Pending Authentication Policy Changes” in the top bar, then confirm the changes made.