

About the integration
Juicebox’s integration with Oracle Recruiting Cloud allows you to:- Export Profiles to Oracle Recruiting Cloud: Save profiles directly into Oracle Recruiting Cloud, including contact details, current company and job, profile URLs, and more.
- [Configurable] Auto-Export: Juicebox has the ability to auto-export profiles to your ATS with configurable triggers, including after shortlisting, after adding to a sequence, or after an interested response.
- Link Oracle Recruiting Cloud Jobs to Juicebox
- Import Job Descriptions: Import a job description from Oracle Recruiting Cloud into Juicebox to automatically kick off a search using the job description.
- Simplify Exports: When exporting a profile from Juicebox to the ATS, it will automatically be connected to the correct job in the ATS. More details here.
- View Profiles in Oracle Recruiting Cloud: View profiles already in Oracle Recruiting Cloud within Juicebox. Avoid reaching out to the same profile twice, and instantly view your relationship history.
Start a project via the Oracle Recruiting Cloud integration
Open the projects page and select Import Job from ATS / CRM. You will then see your Oracle Recruiting Cloud jobs and can select the corresponding option.Export profiles to Oracle Recruiting Cloud
Follow the regular export steps and select Export to Oracle Recruiting Cloud on either an individual profile or a bulk export. After exporting, you will see the profile created in your Oracle Recruiting Cloud account.View profiles already in Oracle Recruiting Cloud
Juicebox will tag profiles that already exist in Oracle Recruiting Cloud. You will see the last modified date, as well as the option to view the profile directly in Oracle Recruiting Cloud by clicking the View in ATS button.Before you start
To set up this integration, you must have the necessary permissions (IT Security Manager) to access the Security Console. The first steps below show how to reach the Security Console. If you don’t have access, contact whoever has the necessary permissions in your company before continuing.Your connection pop-up is personalized. The roles, privileges, and data security policies shown in your pop-up might differ from the ones shown in the screenshots below. Always use the values from your own connection pop-up.
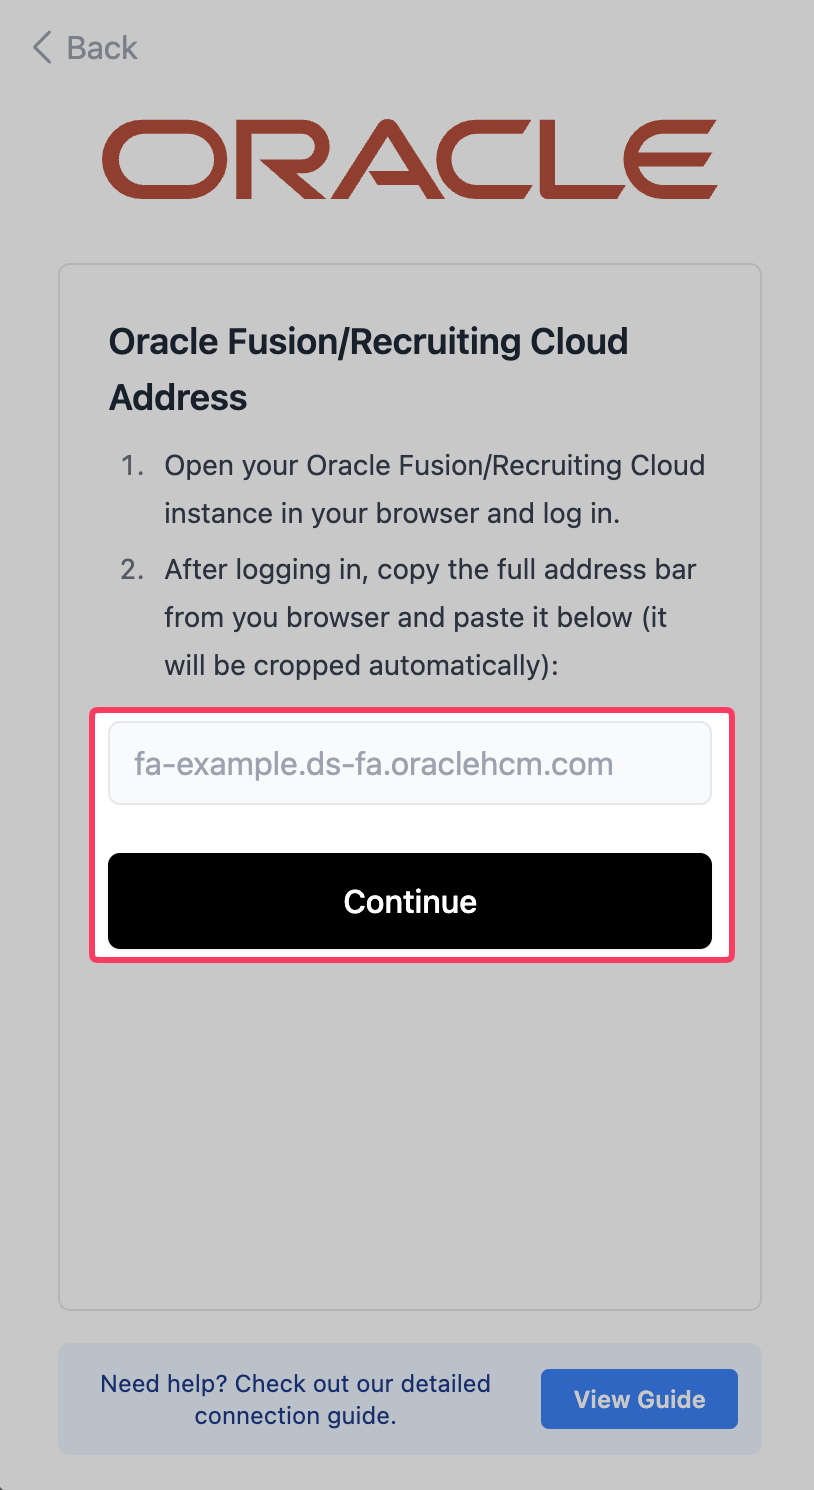
Find your Oracle Recruiting Cloud address
- Log in to your Oracle Recruiting Cloud instance.
-
Copy the value of the URL and paste it into the connection pop-up. The URL is cut to the right format automatically for your convenience.

Create a new custom role for this integration
-
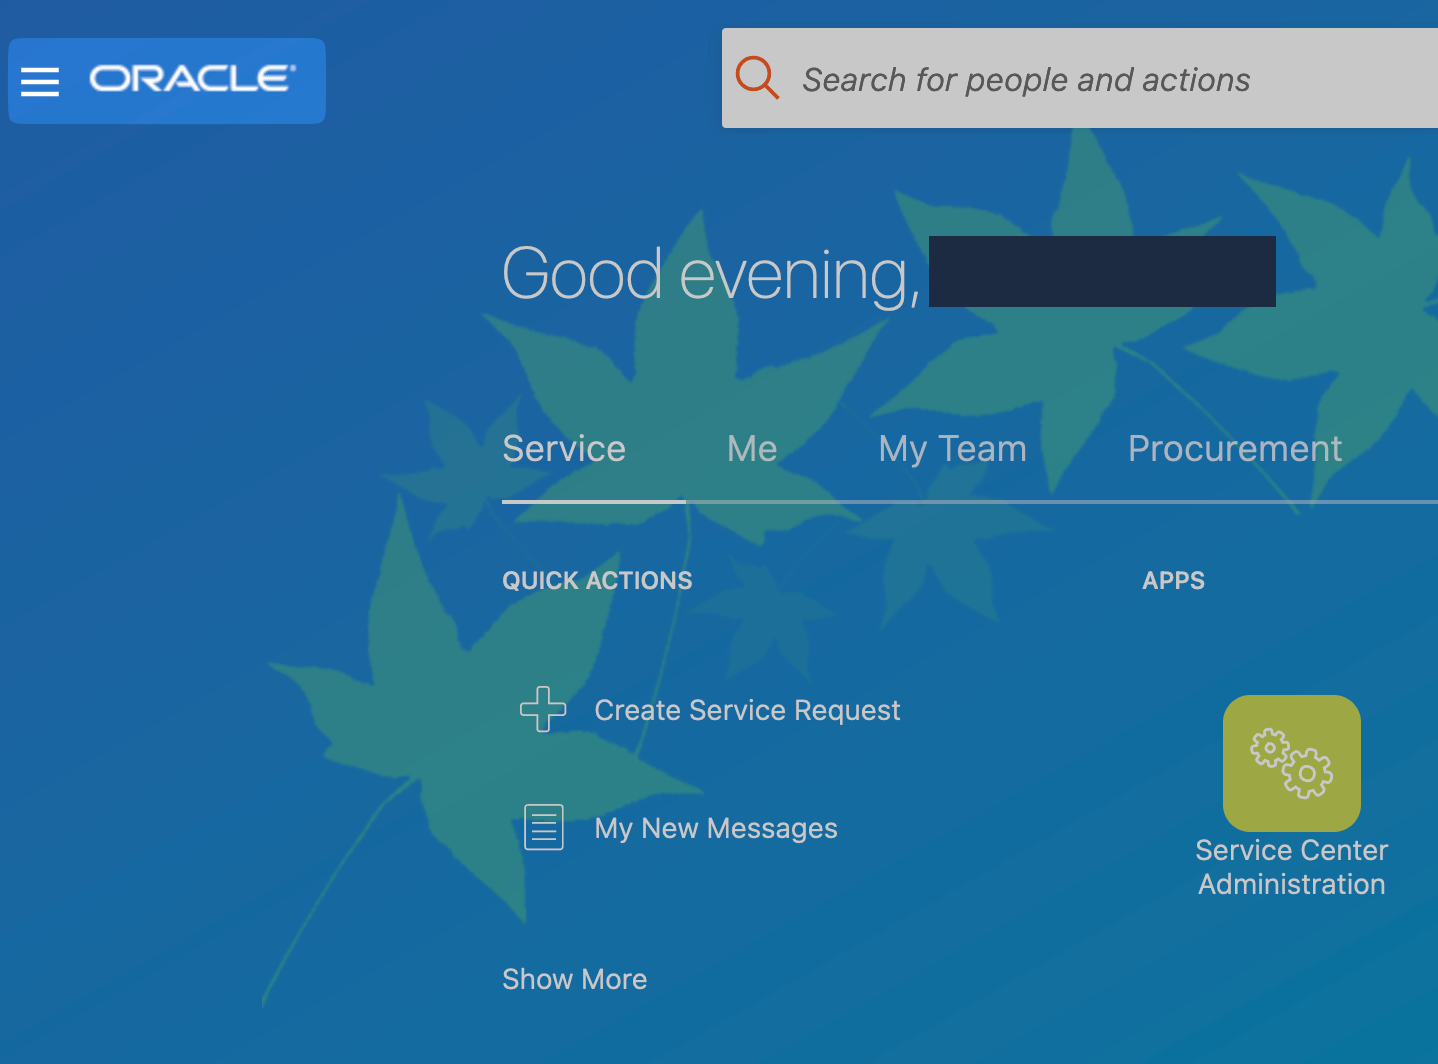
Click the 3-bar menu in the top left of your Oracle Recruiting Cloud instance.
-
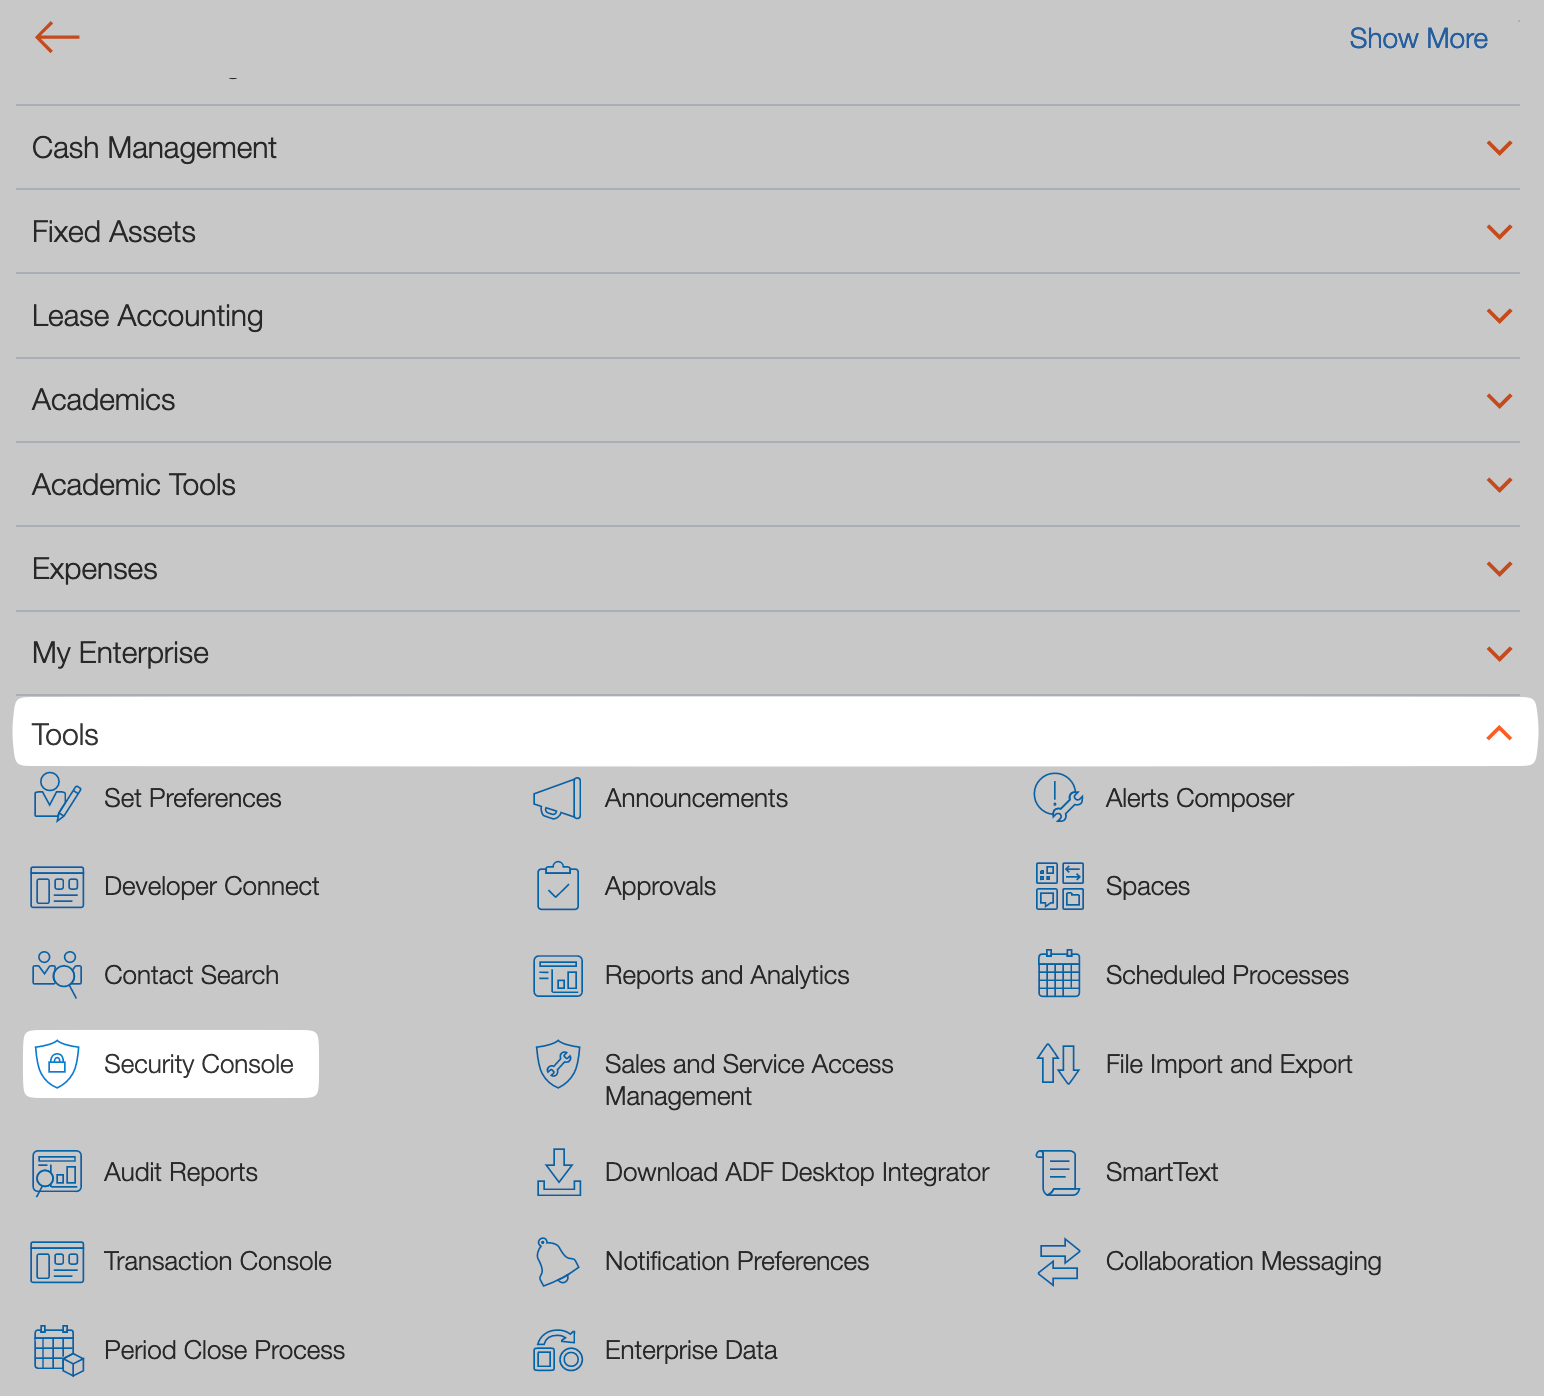
Scroll down to Tools, open the menu, then go to Security Console. If you don’t see the Security Console setting, you don’t have the right permissions to complete the connection.
-
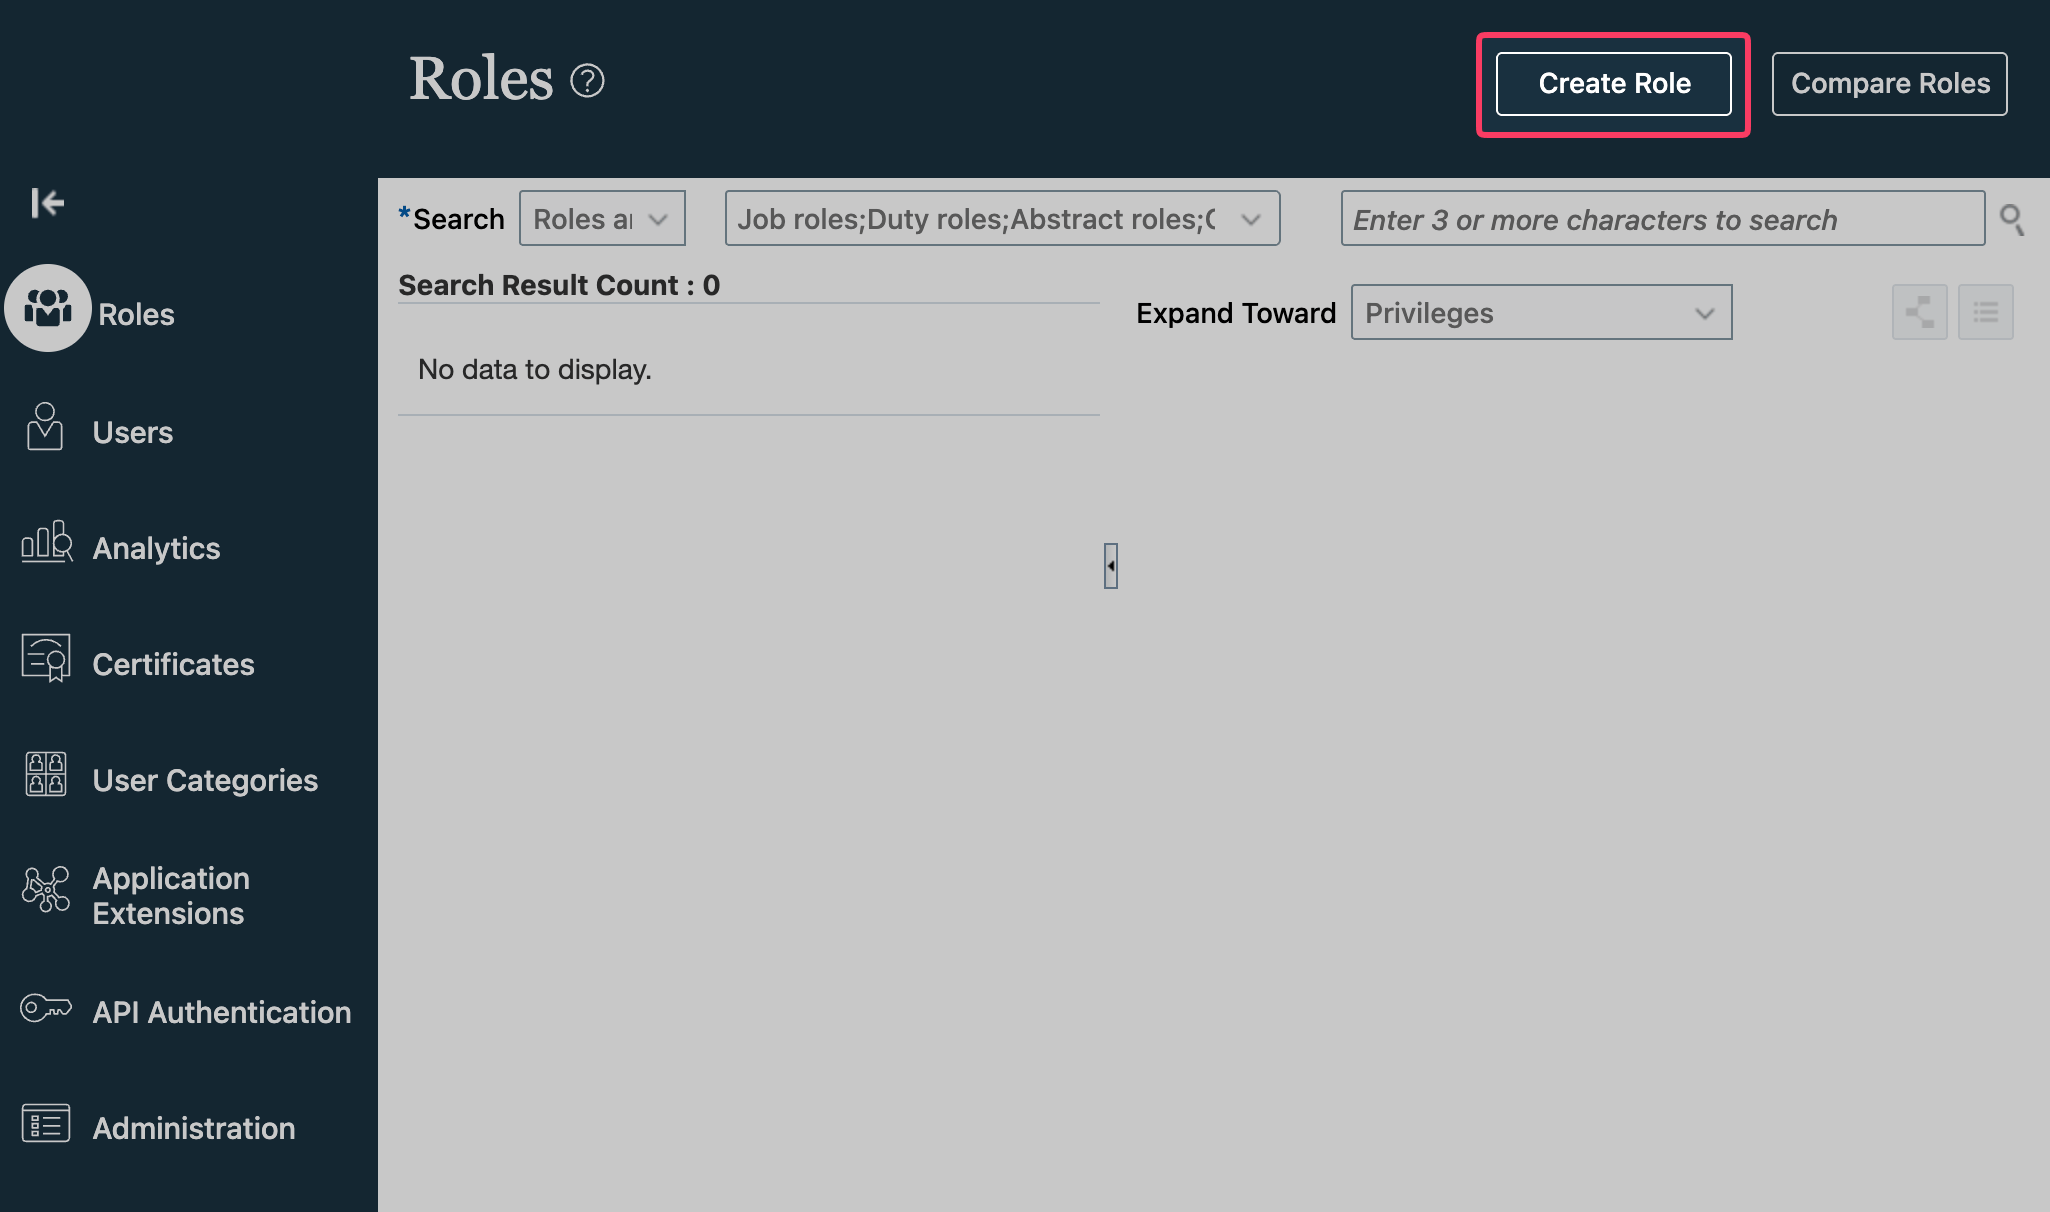
In the Security Console, click Create Role.
-
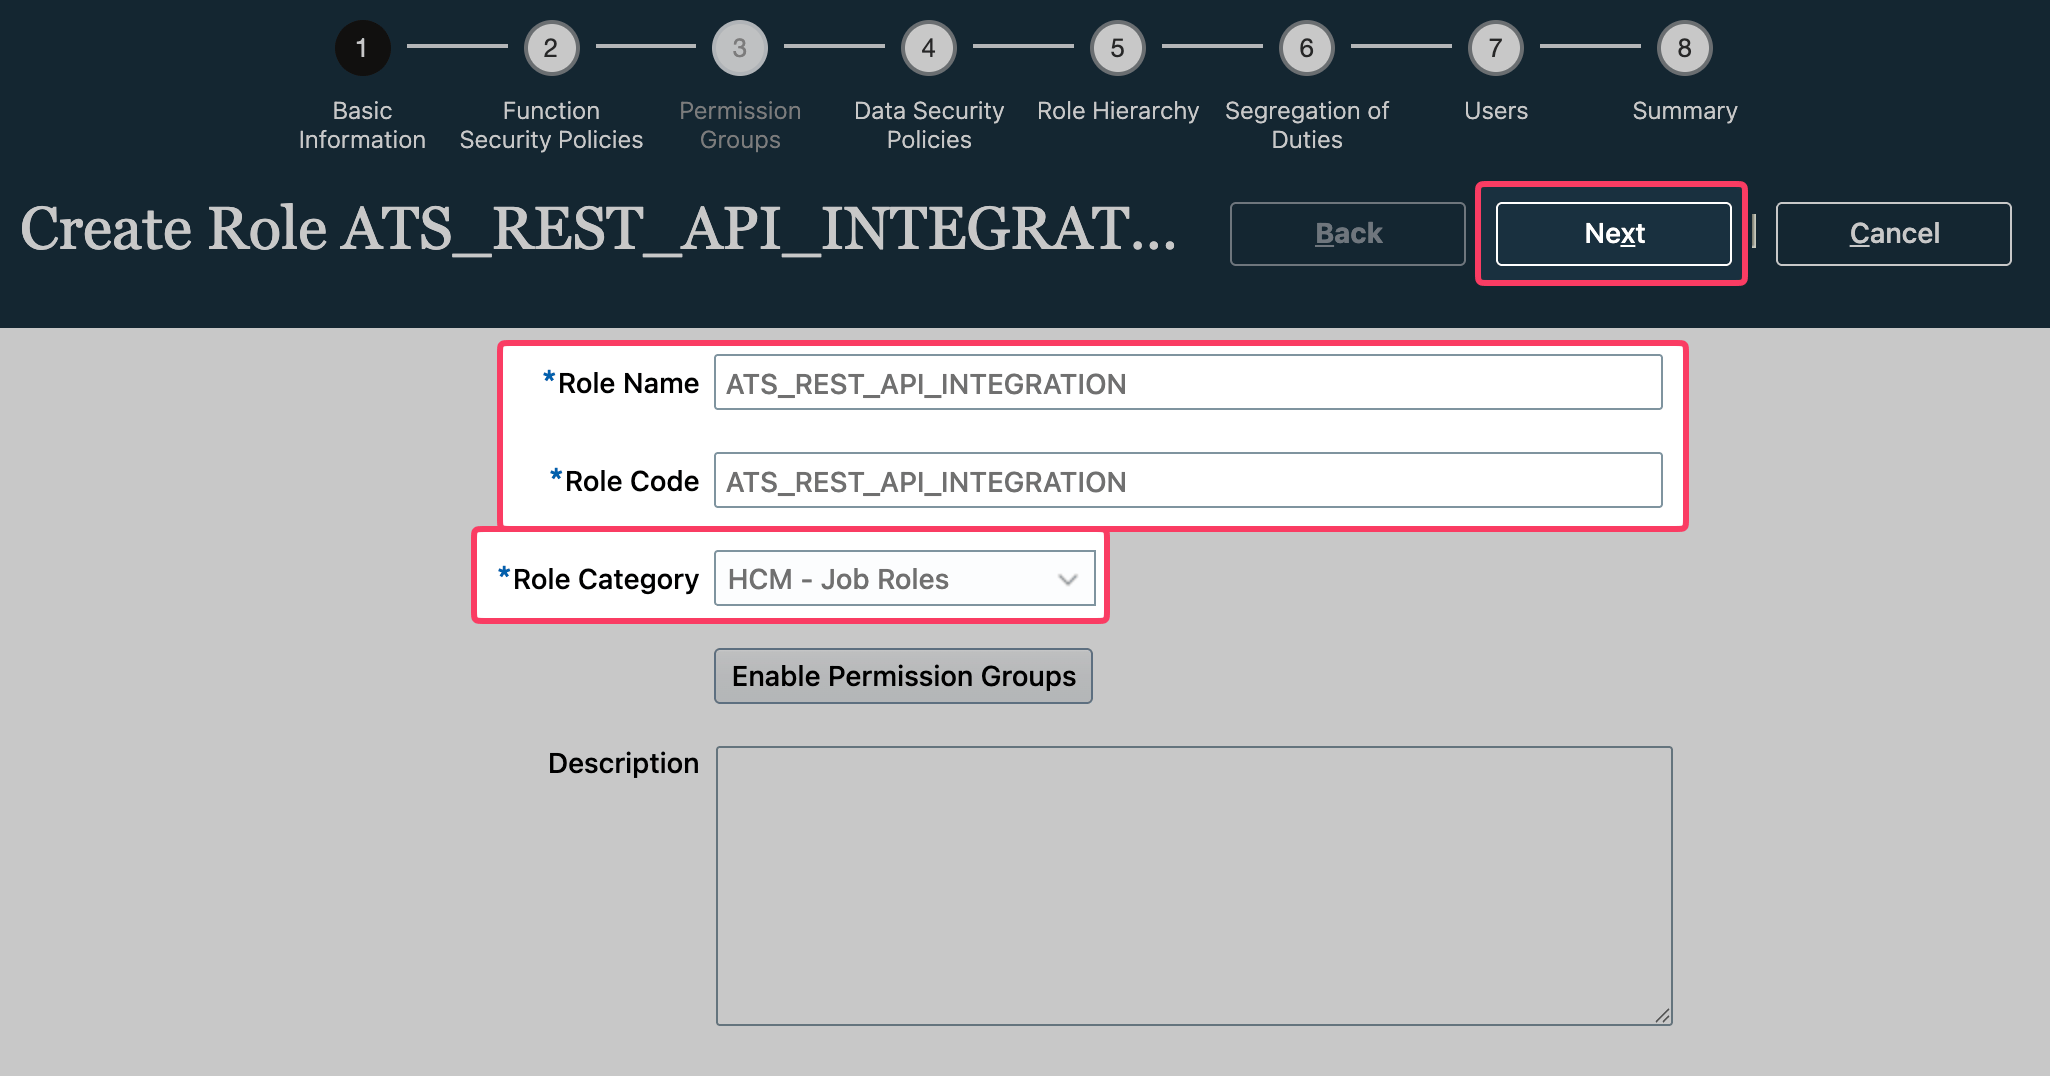
Follow your enterprise’s naming and code conventions for custom roles. You cannot change the code or delete the role after creation. For Role Category, select HCM - Job Roles.
-
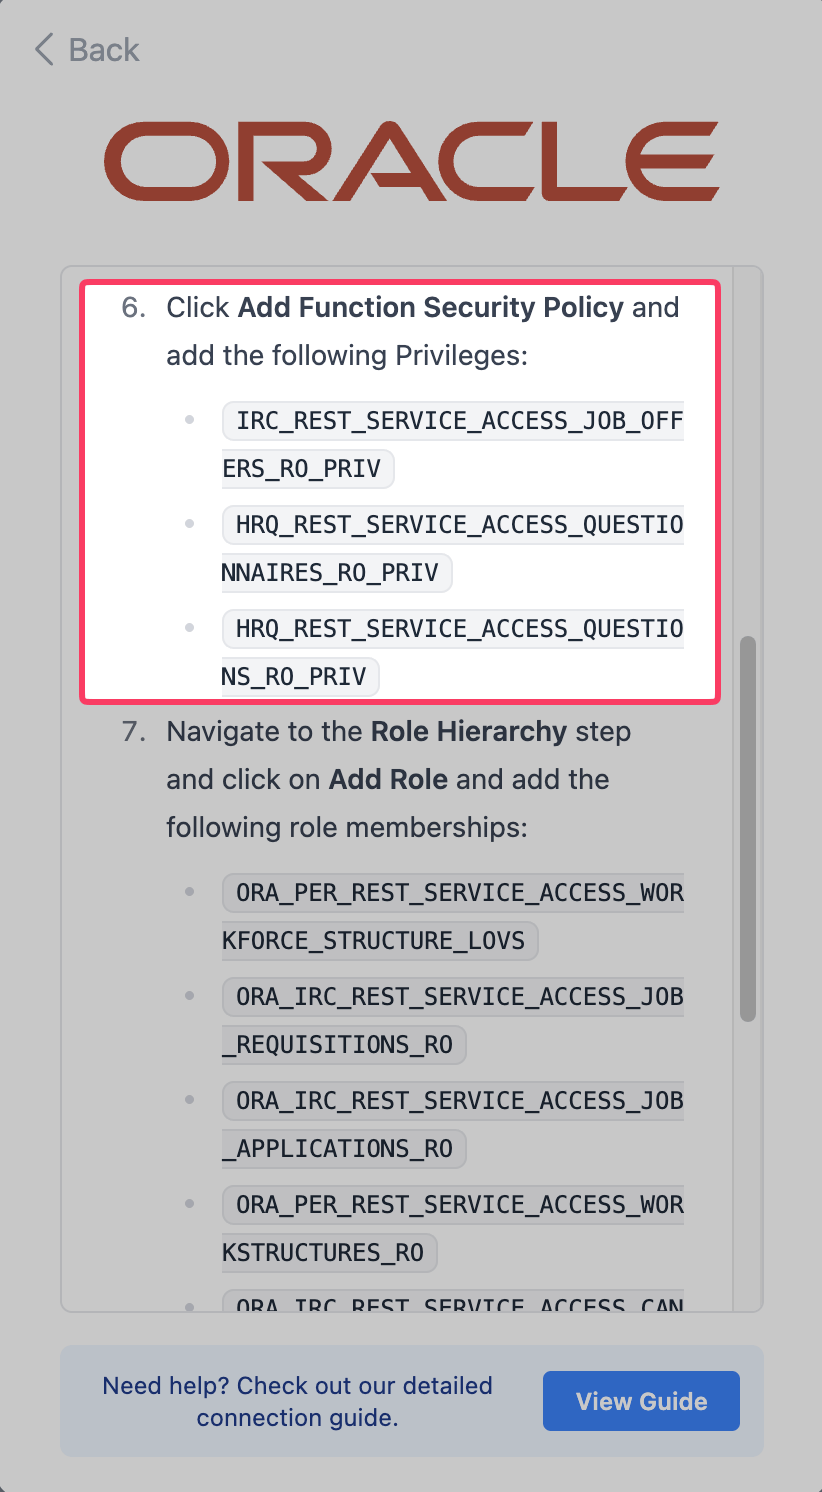
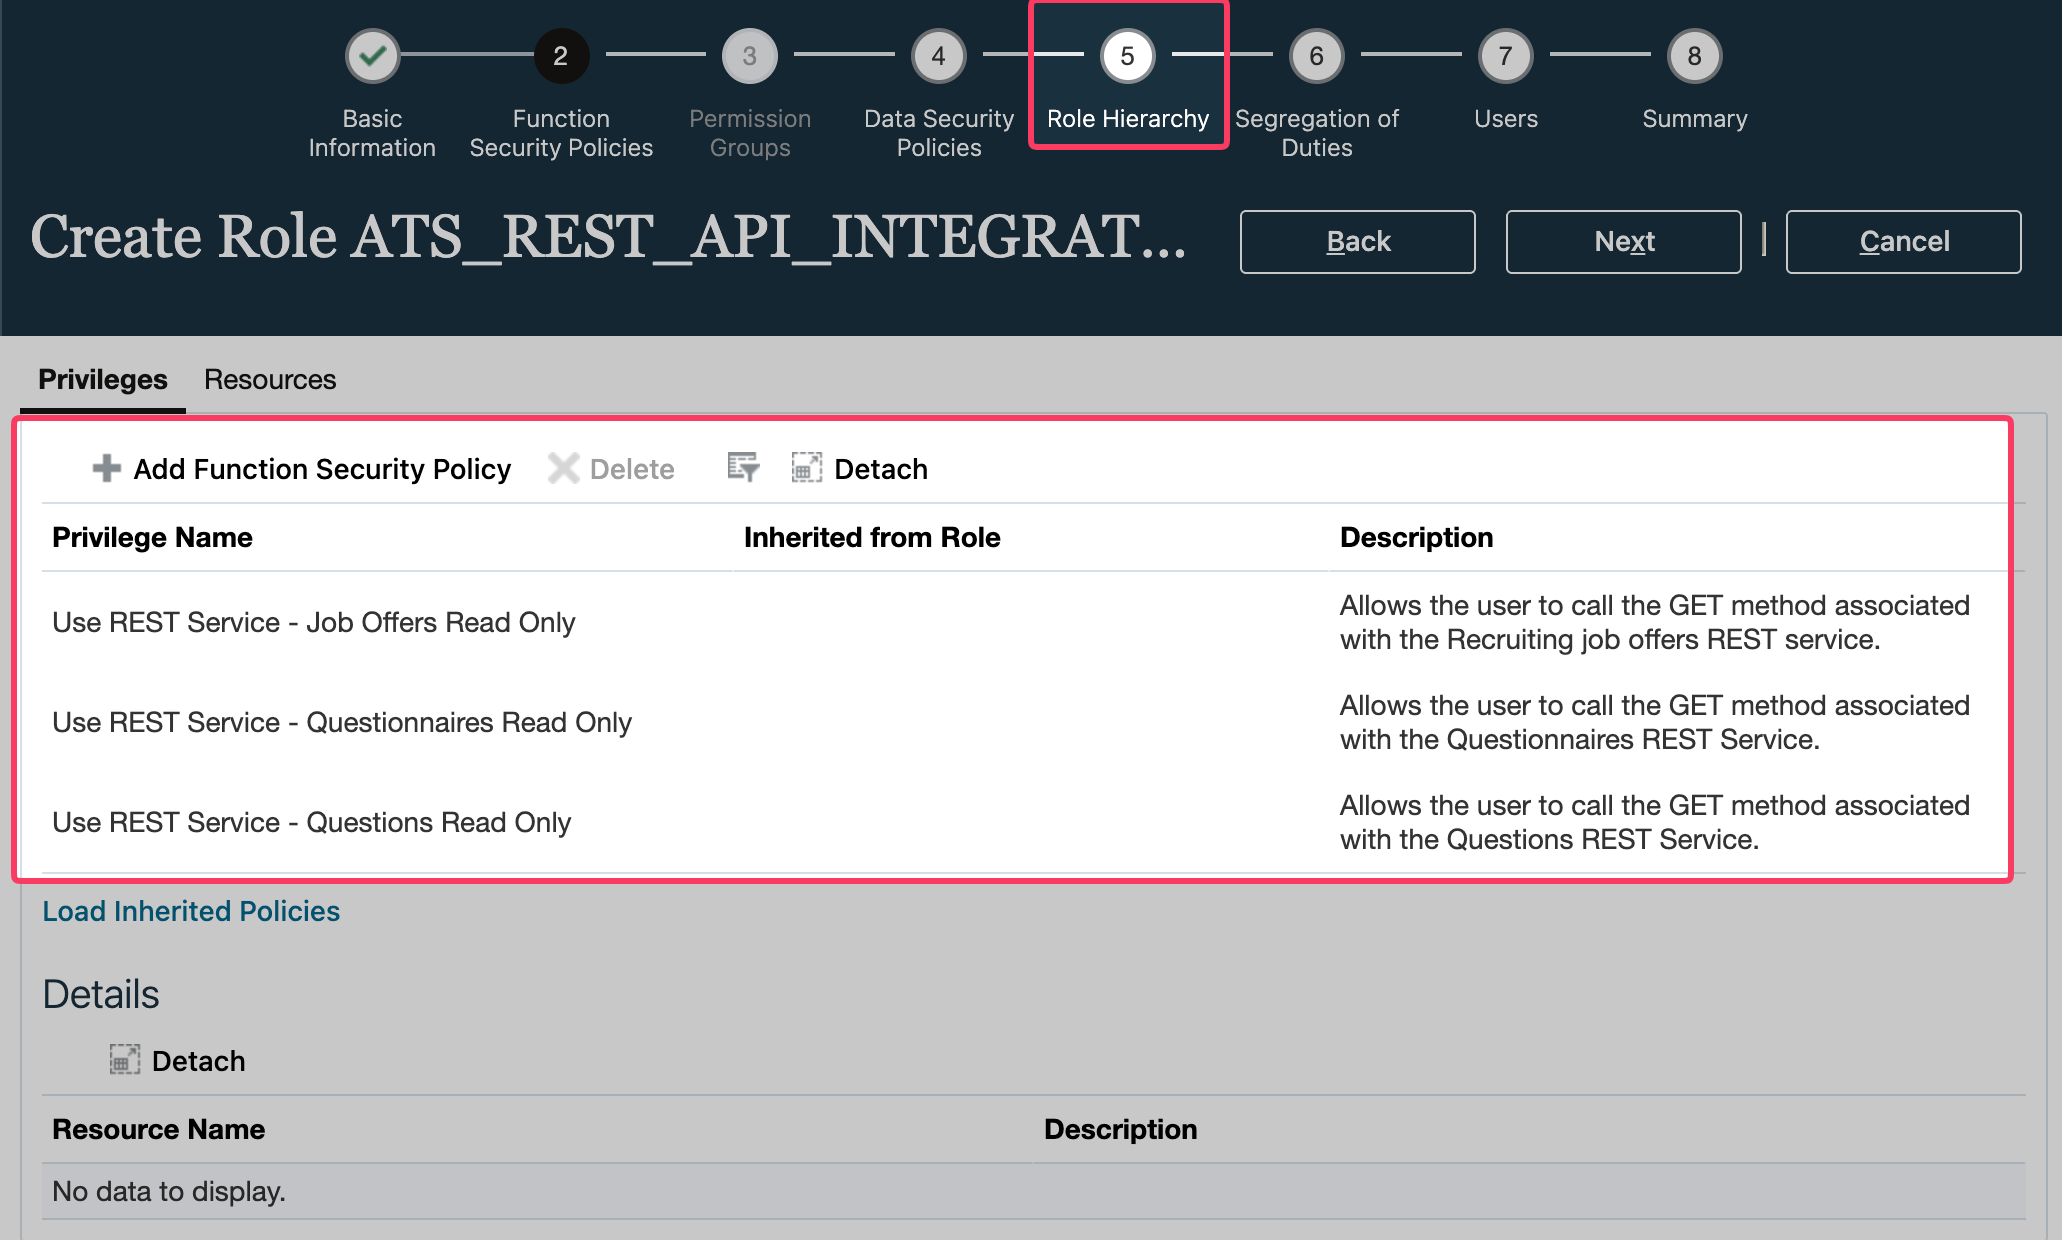
Click Add Function Security Policy and add the privileges shown in your connection pop-up.
-
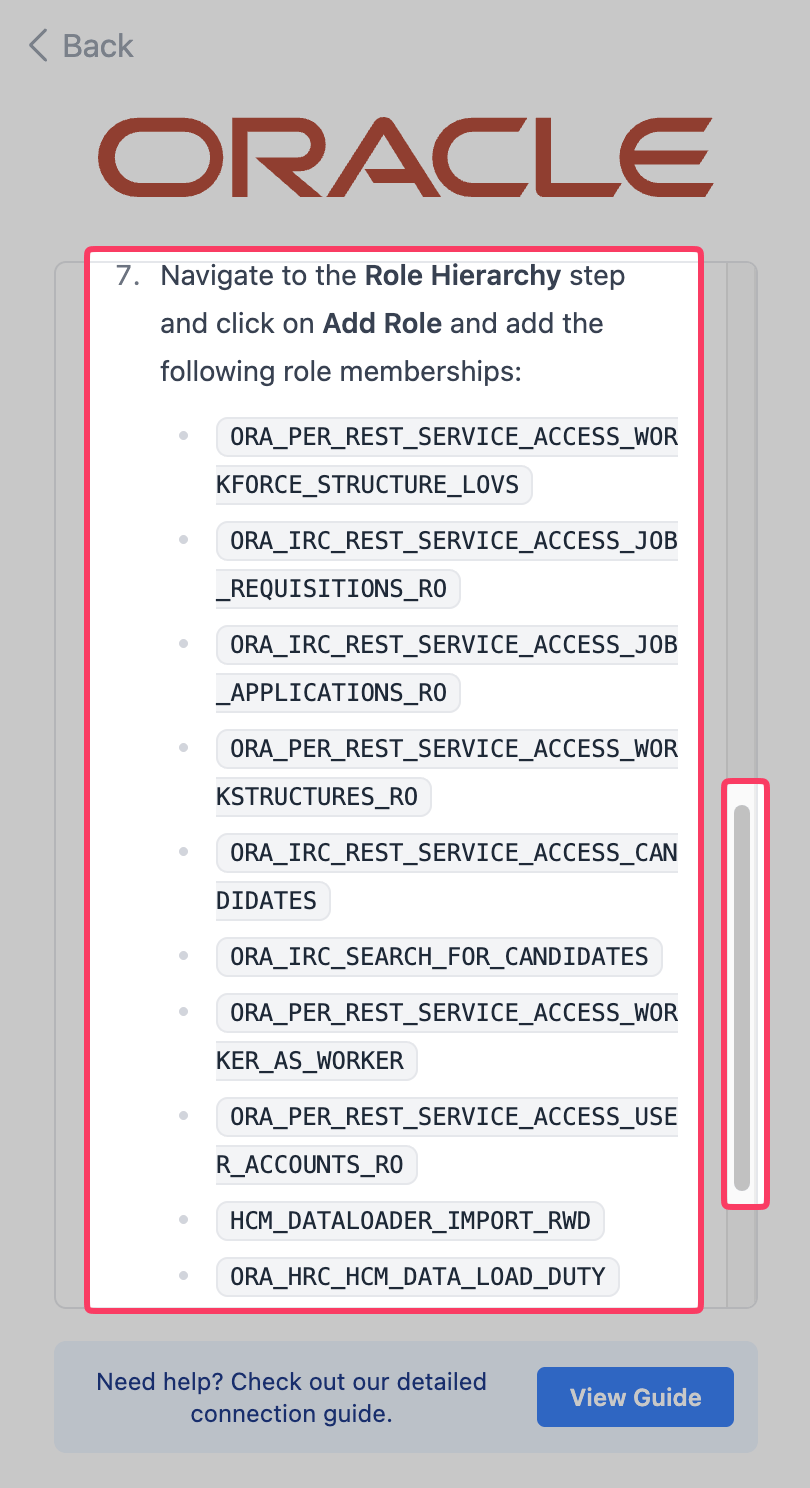
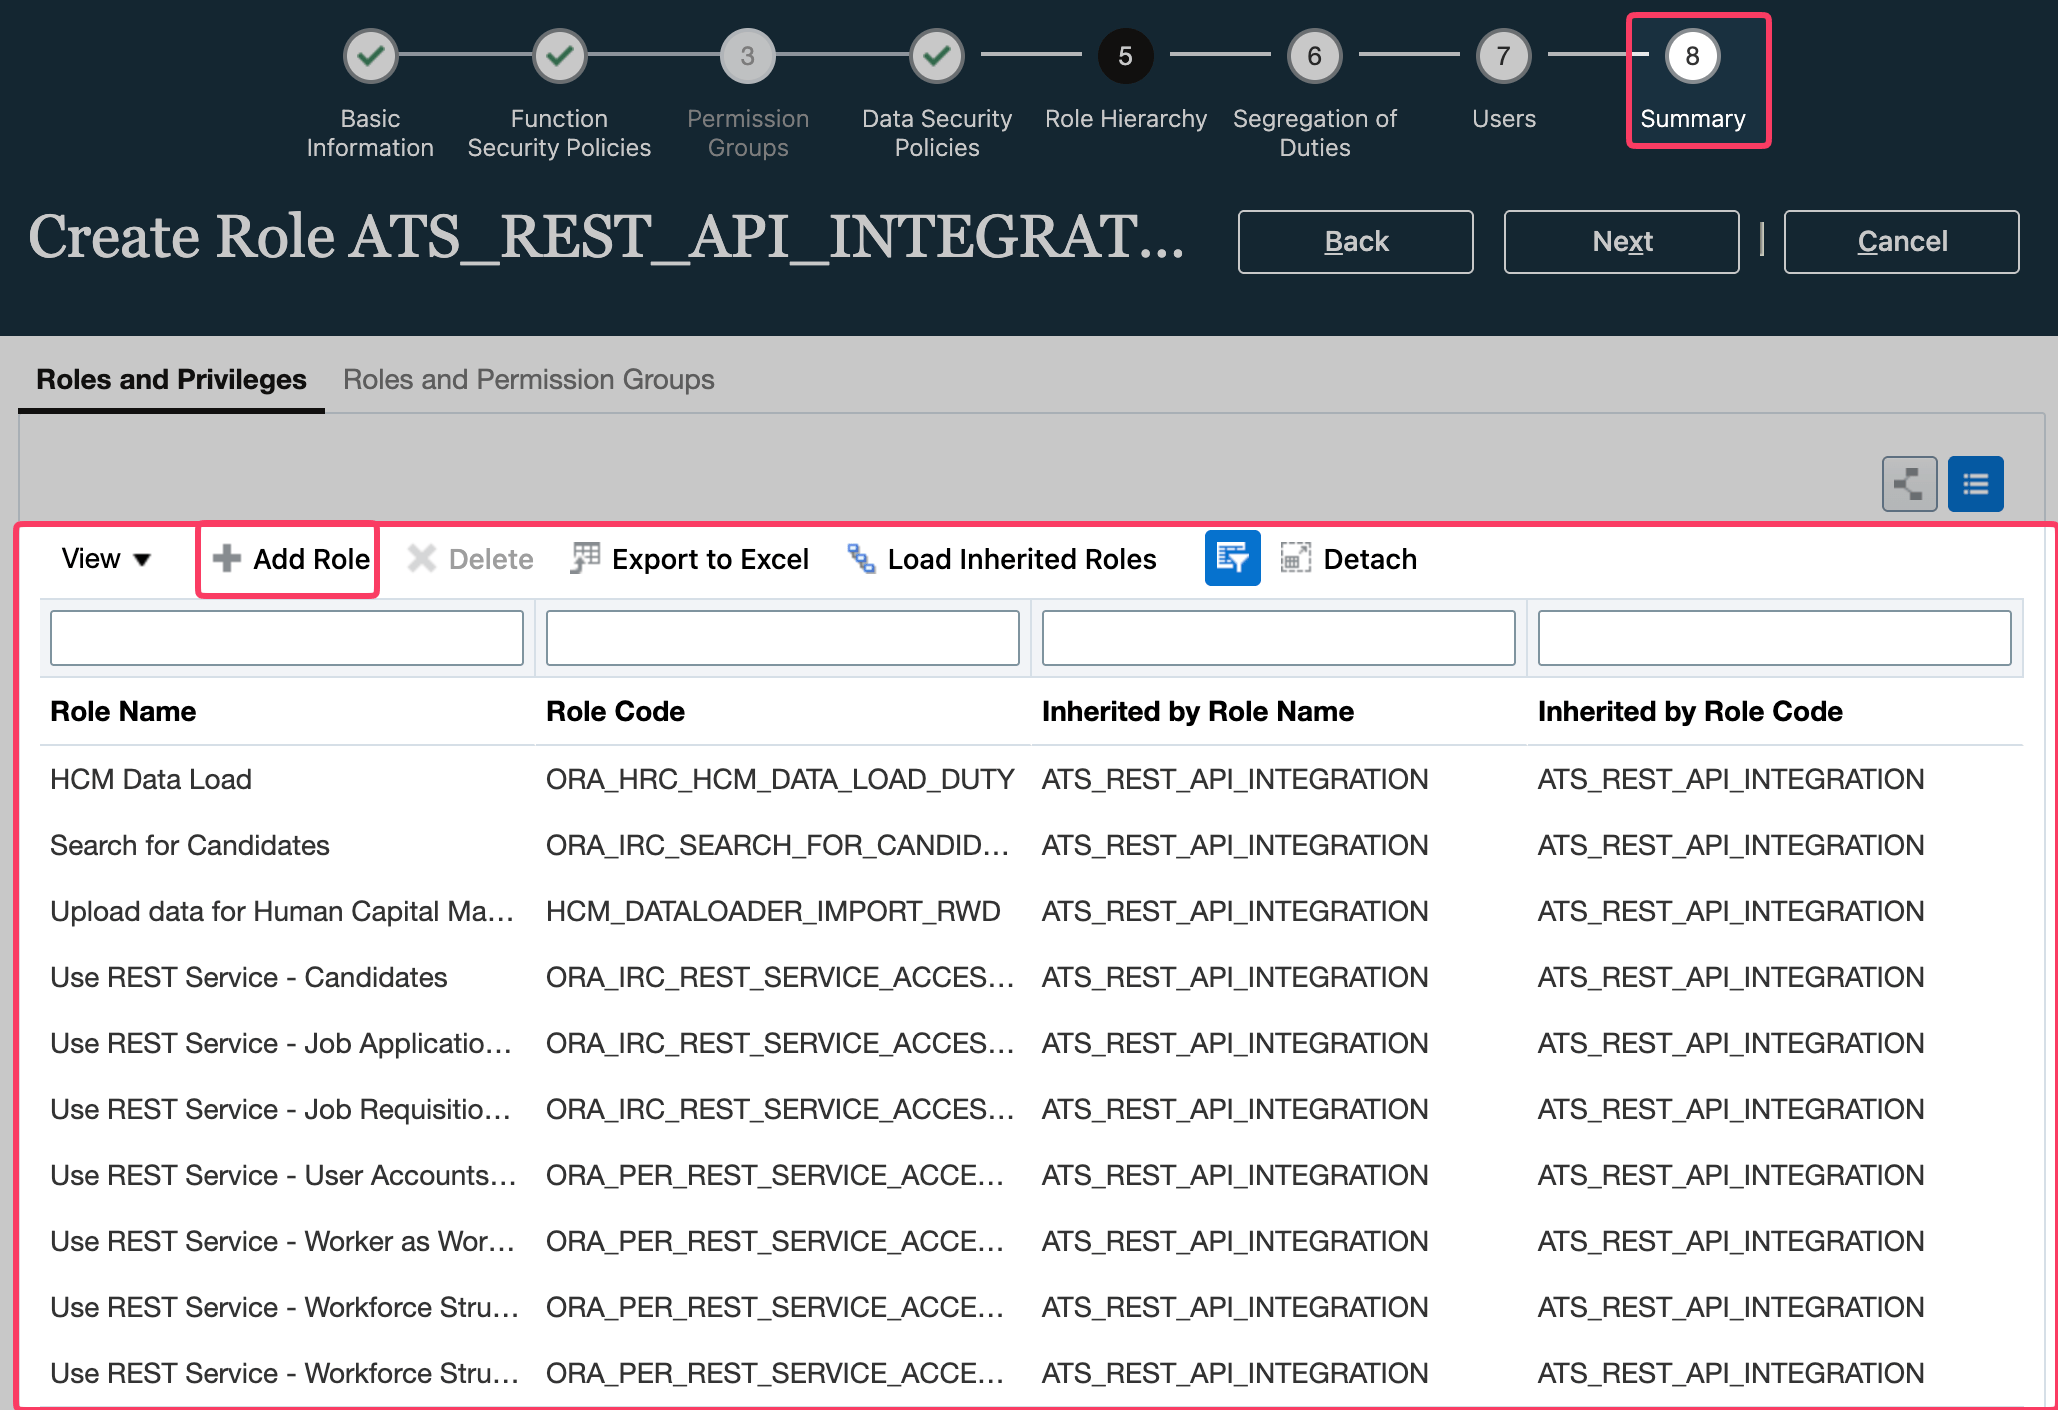
Navigate to the Role Hierarchy step and add the roles shown in your connection pop-up.
-
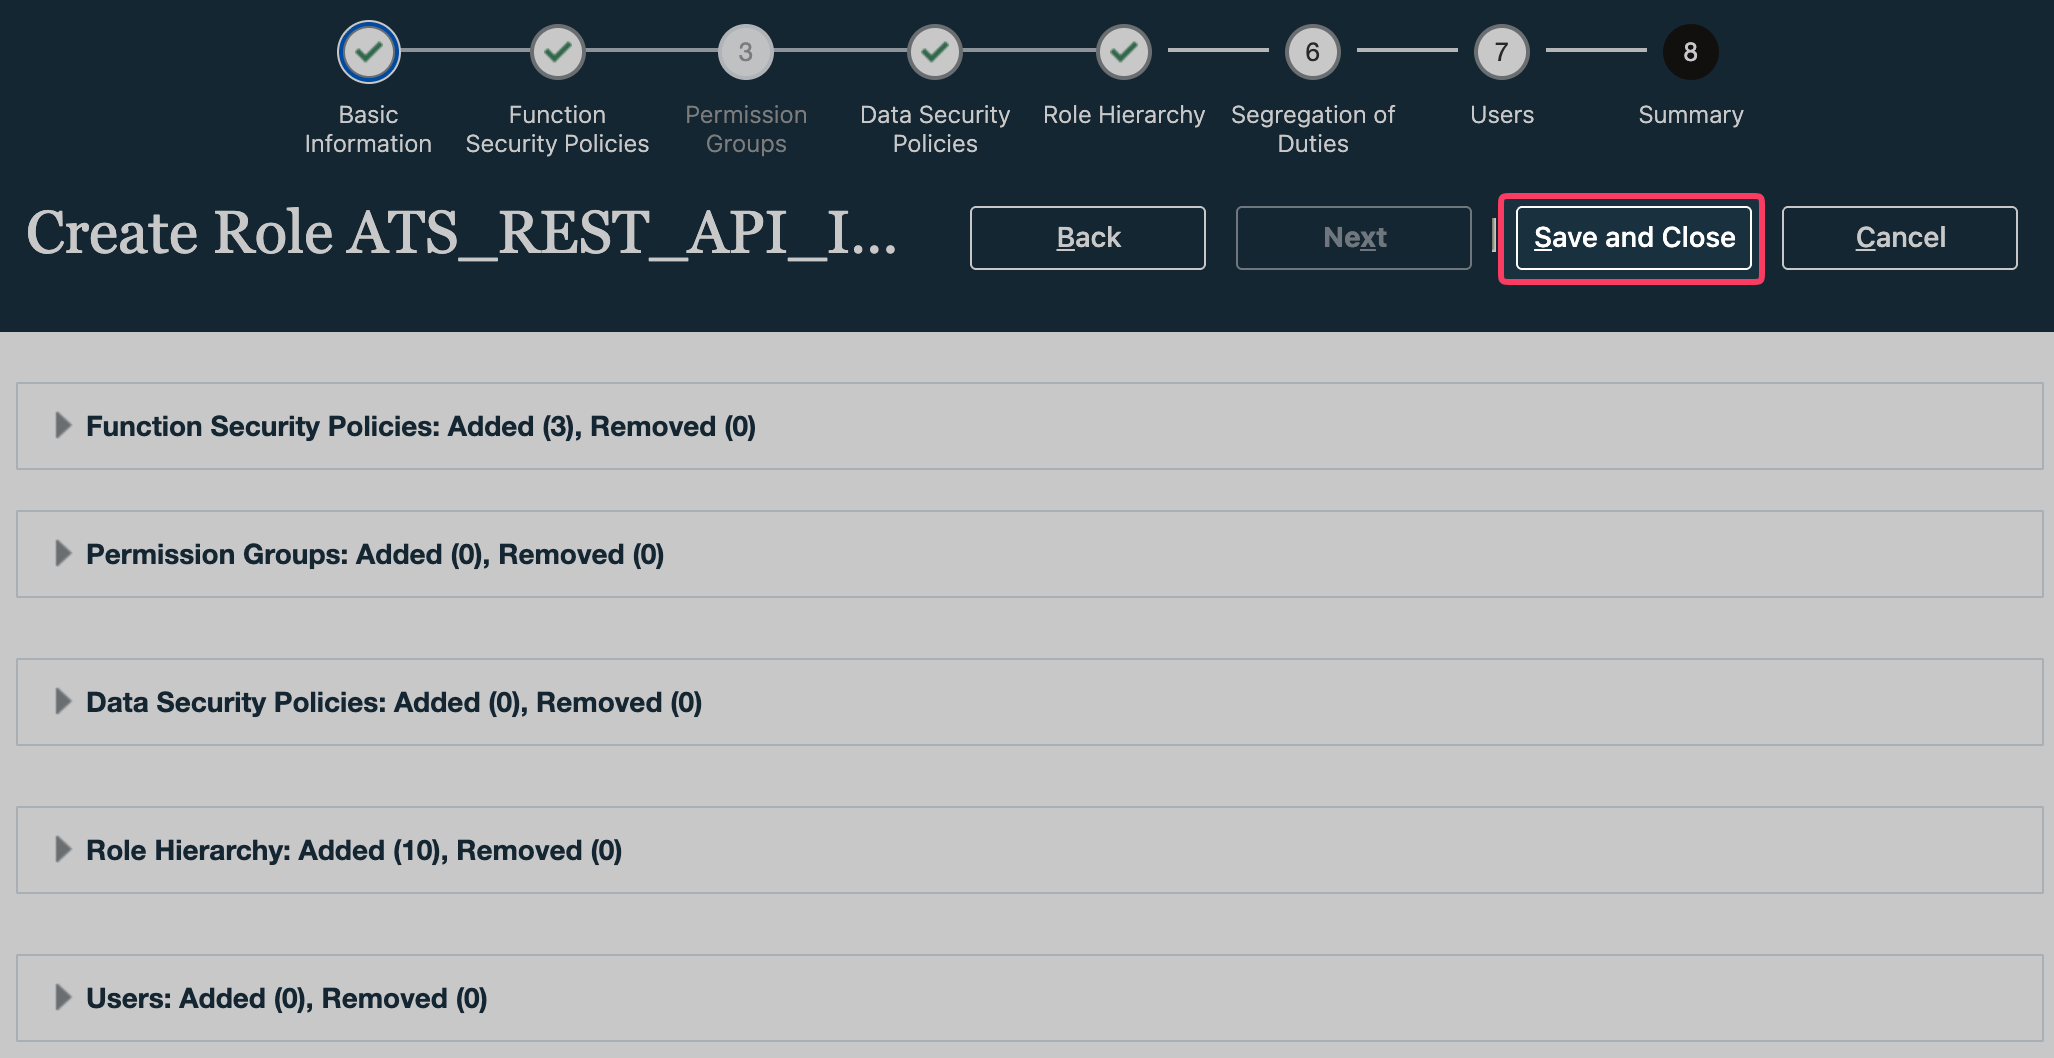
Navigate to the Summary step and click Save and Close.
-
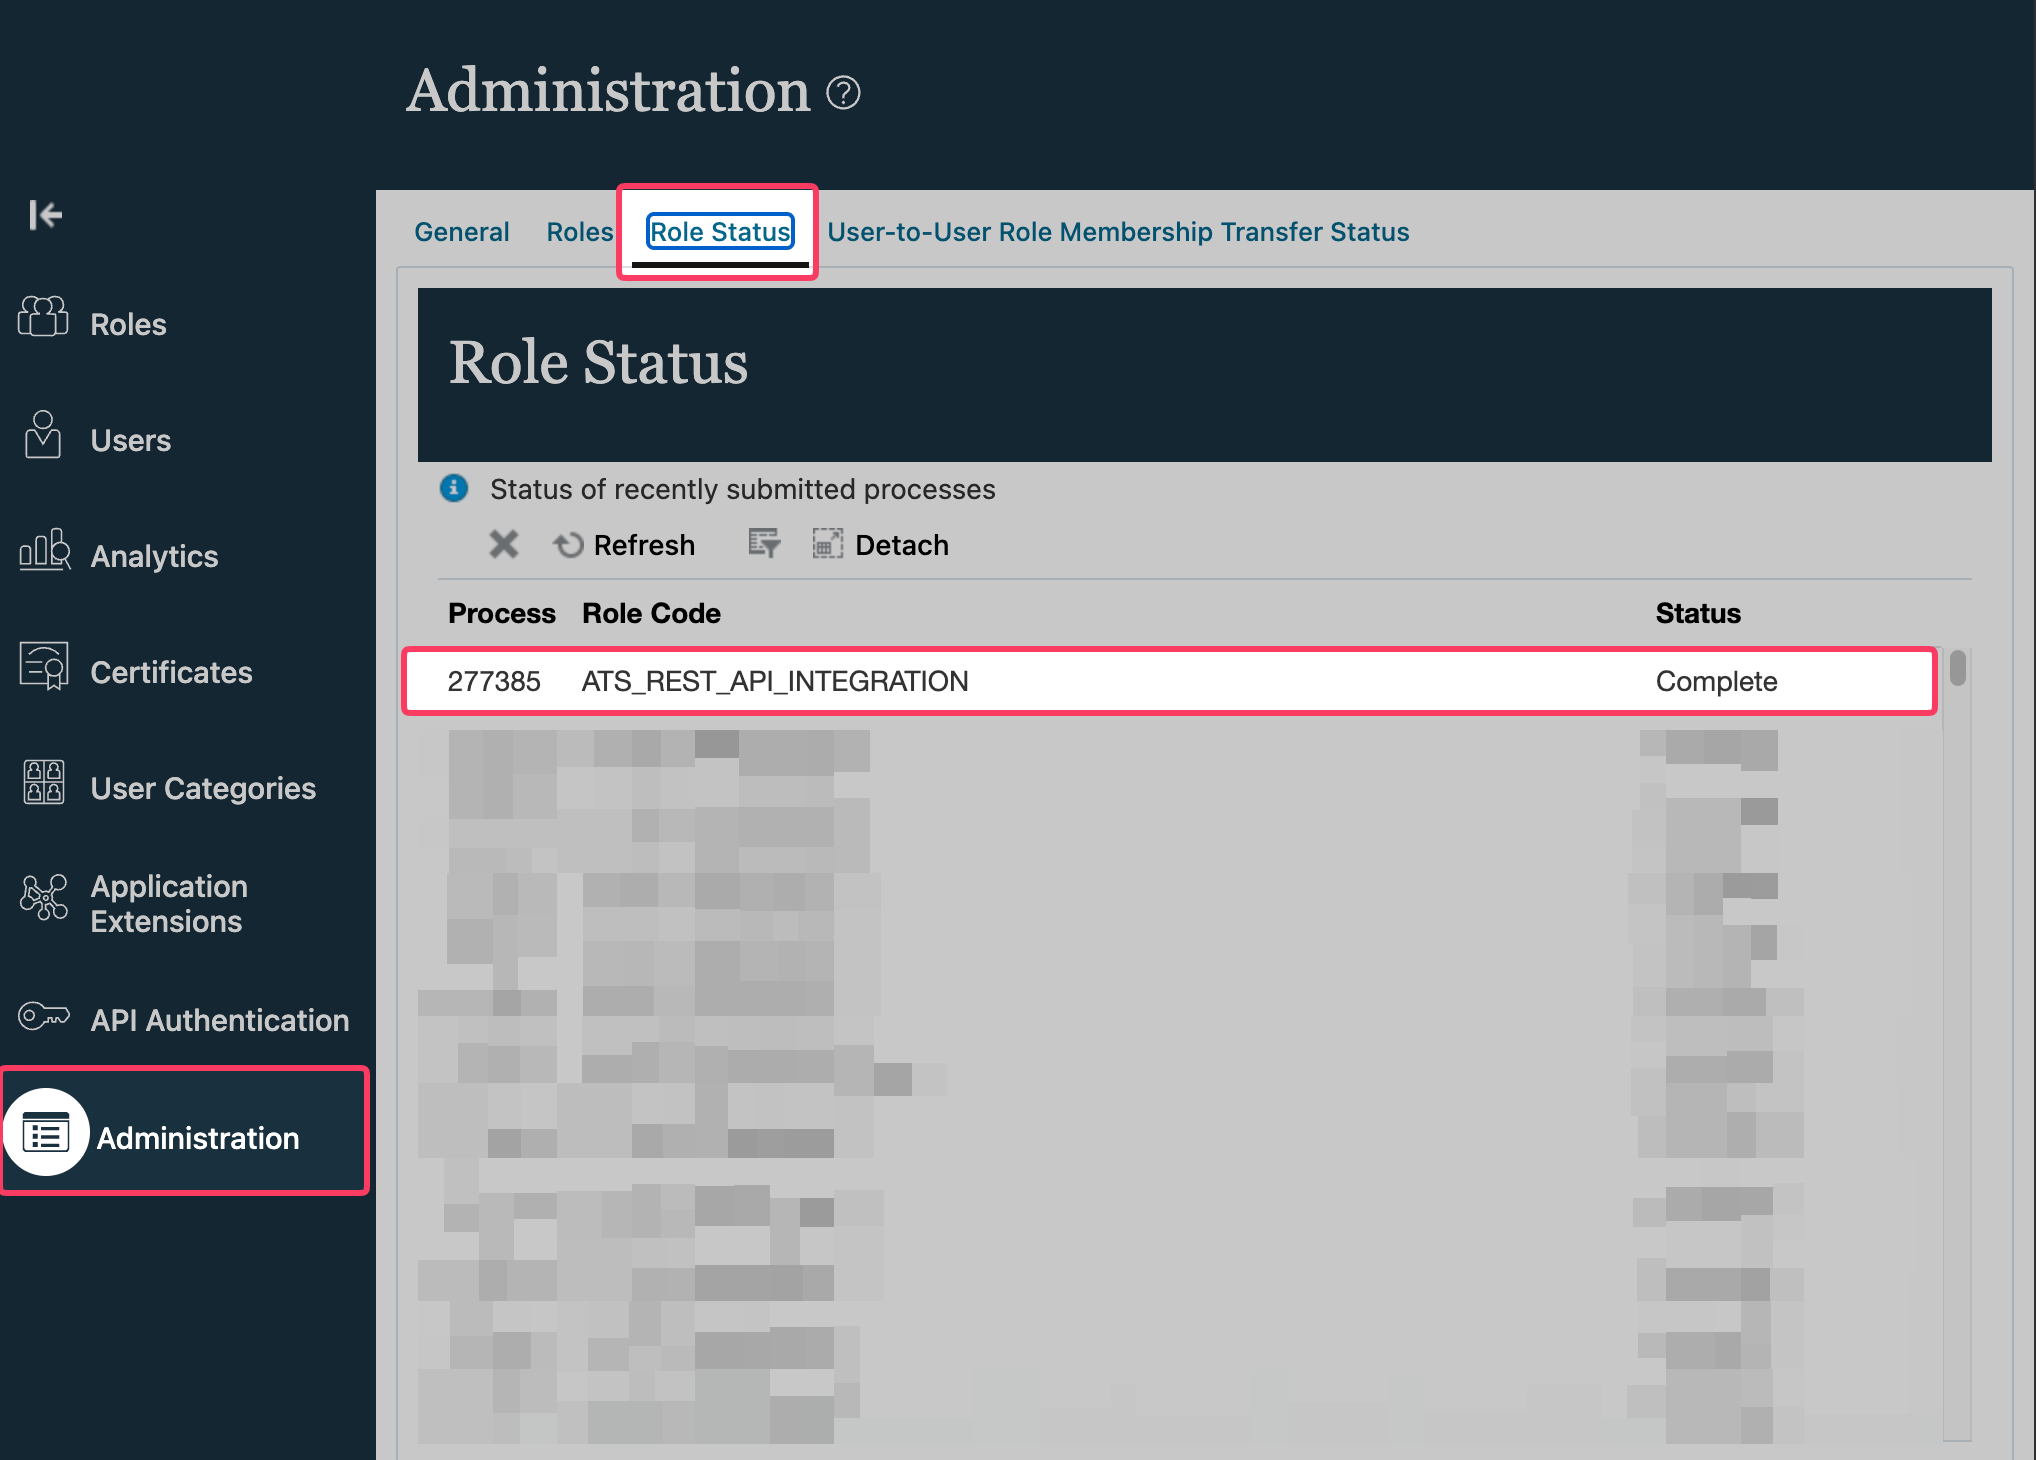
Wait for the custom role to be created. You can monitor the progress in the Administration tab of the Security Console.
Assign a security profile to the custom role
-
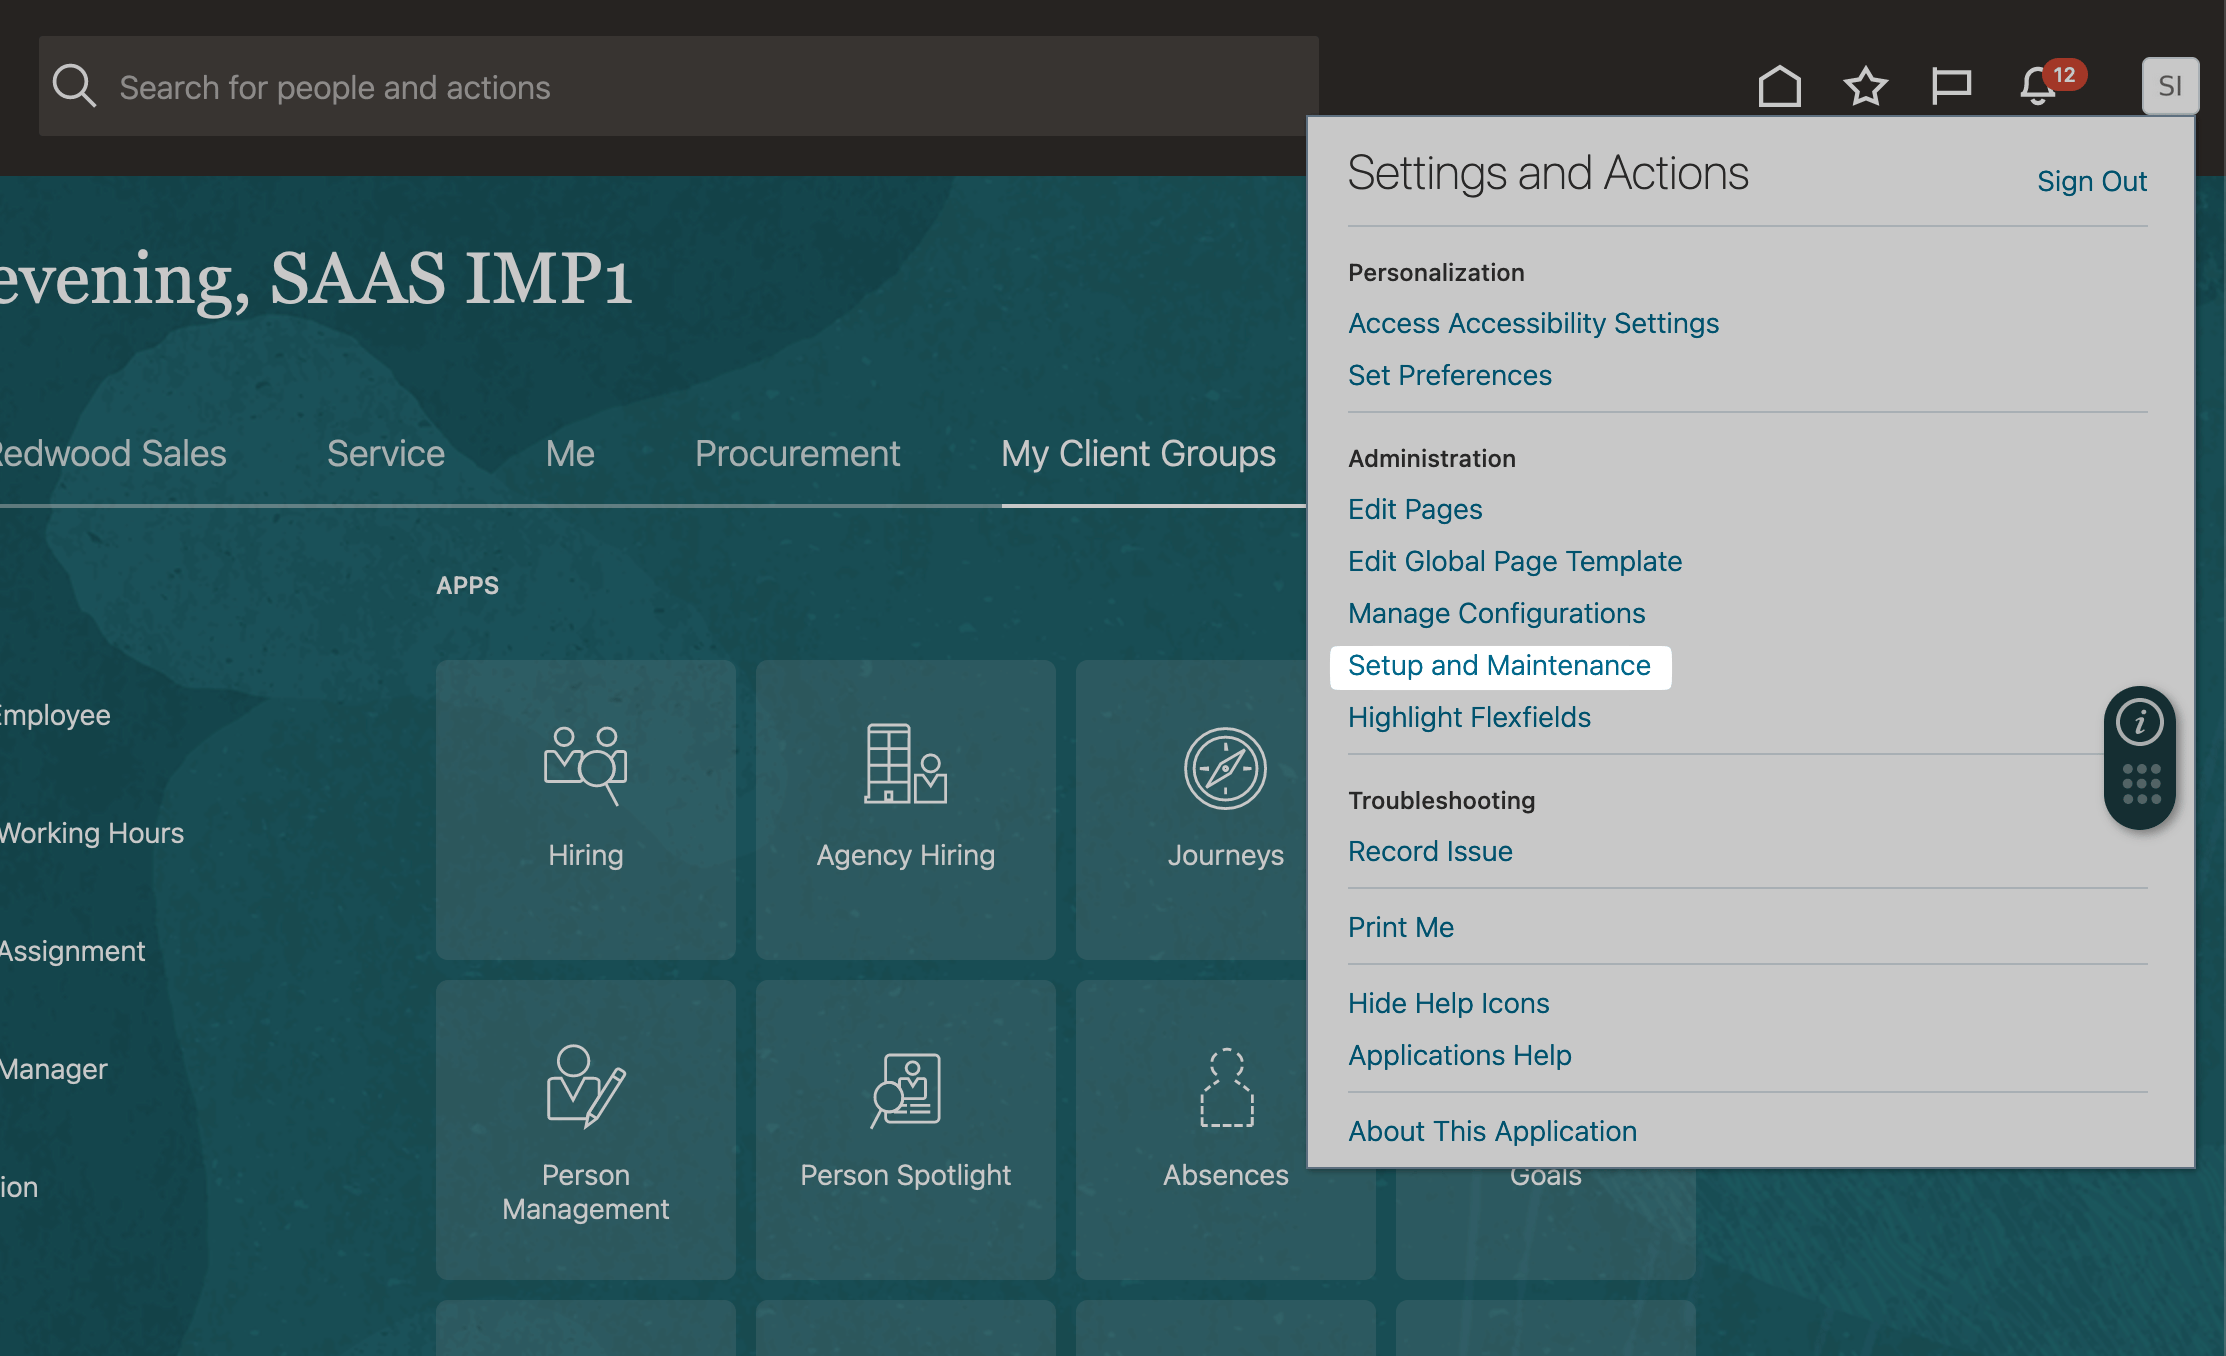
In the top right menu, click Setup and Maintenance.
-
Click the box on the right side and click Search.
 Or use the global search if you are using Redwood: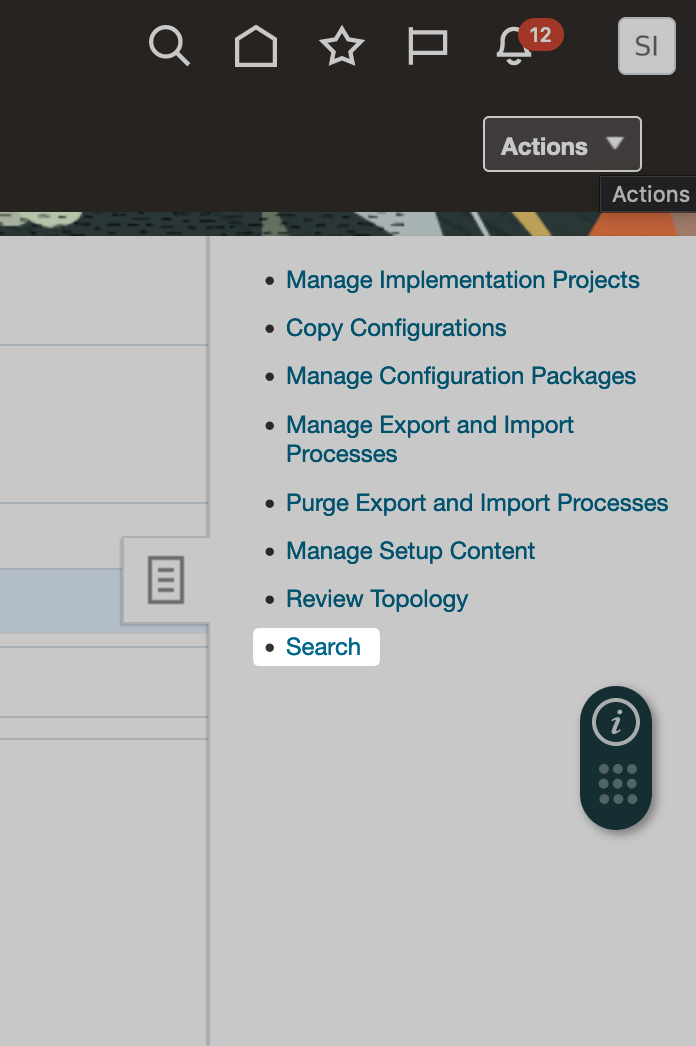
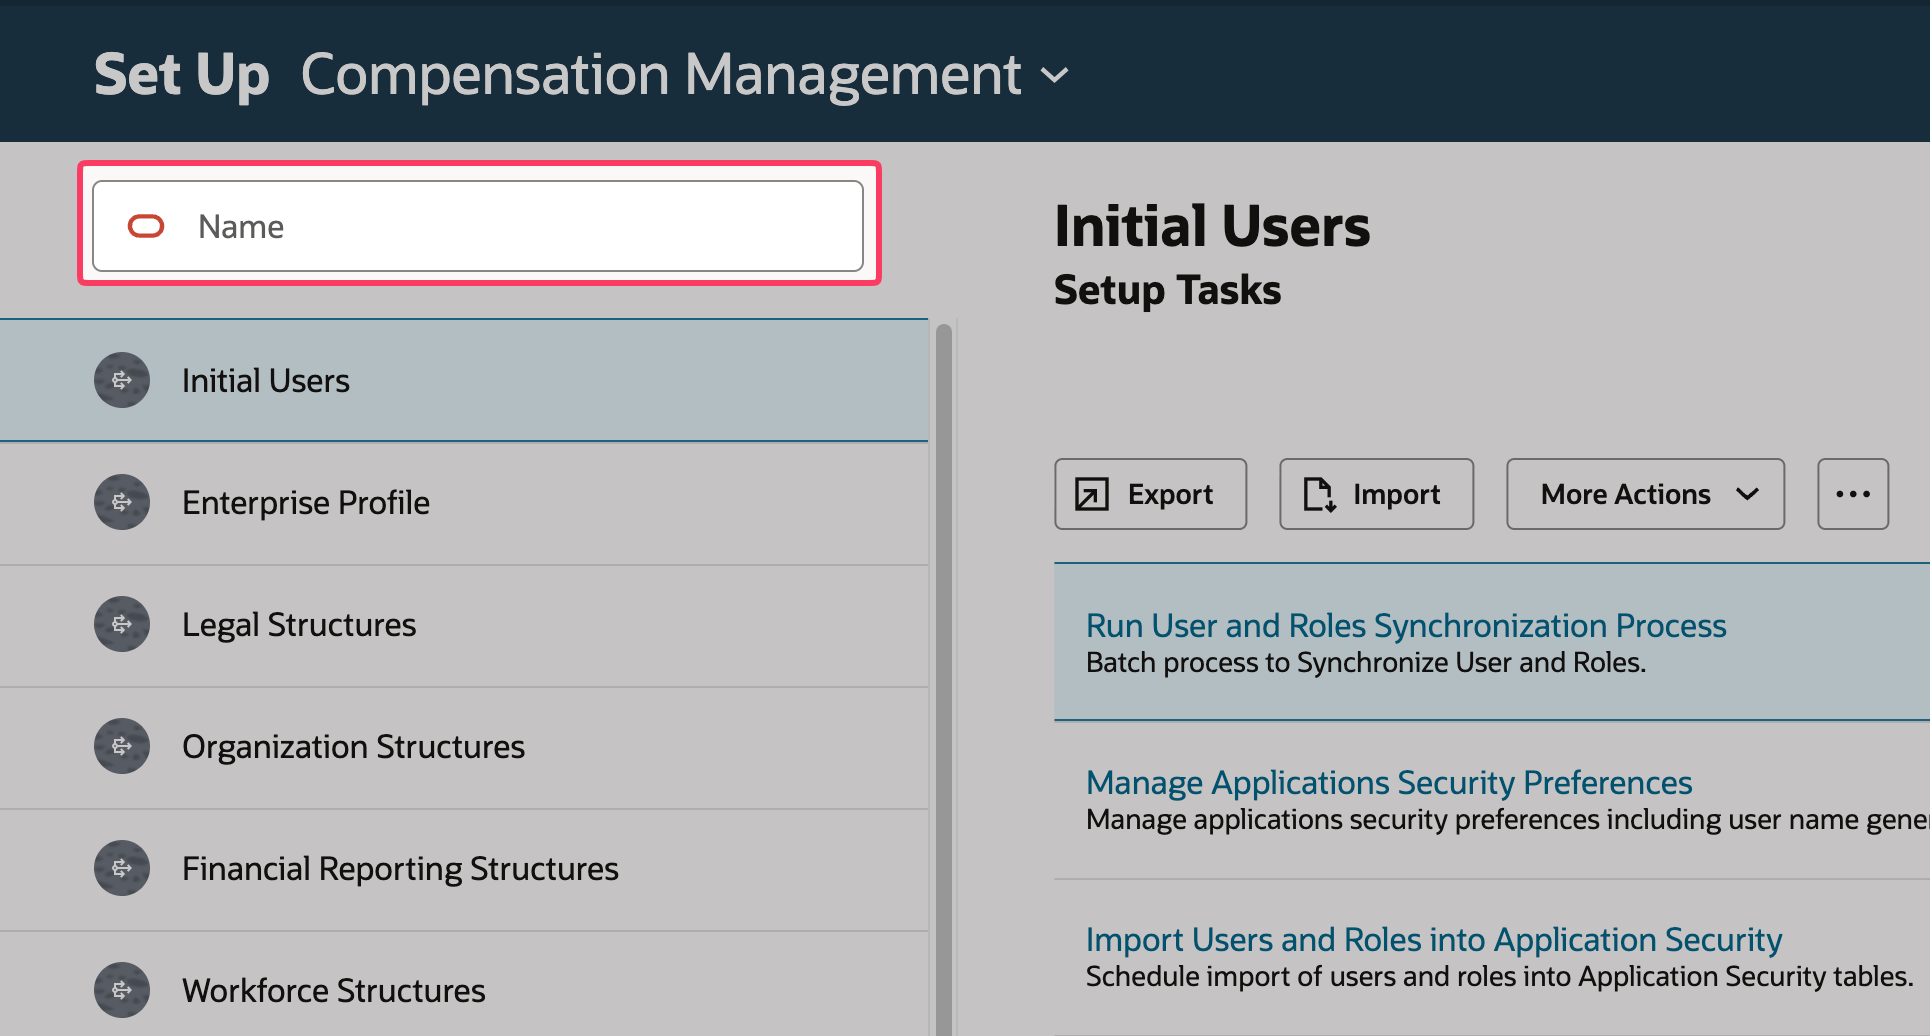
-
Search for Assign Security Profiles to Role in the search bar, press enter, and select the entry as pictured.
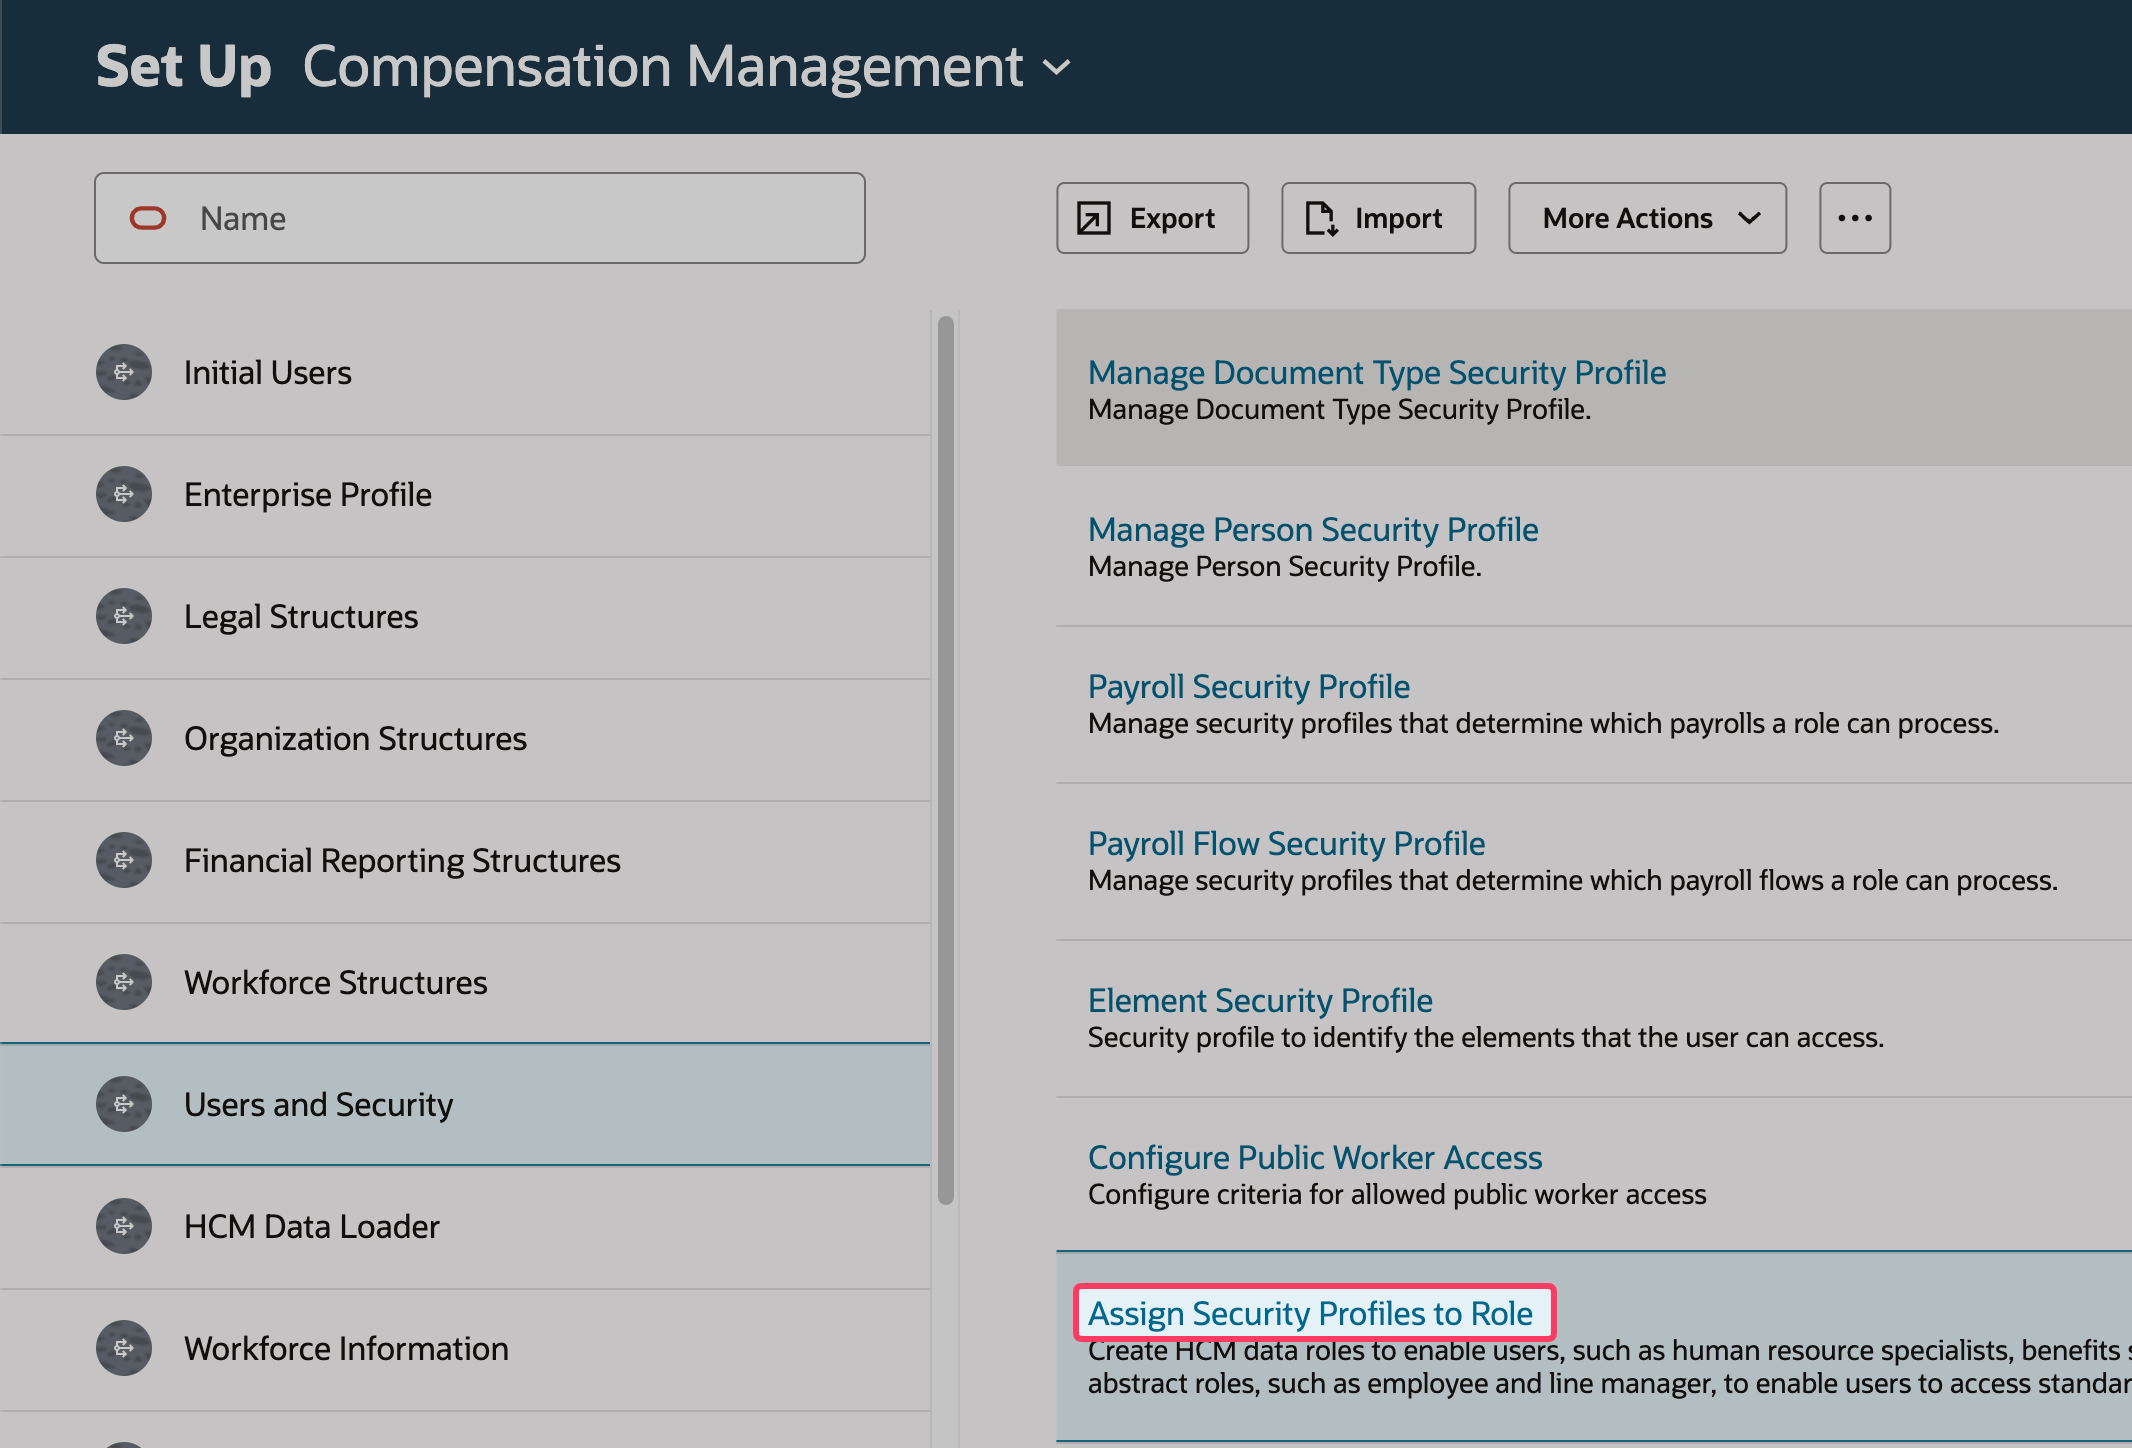
-
Search for the role you created earlier. Select the entry as it appears and select Edit.
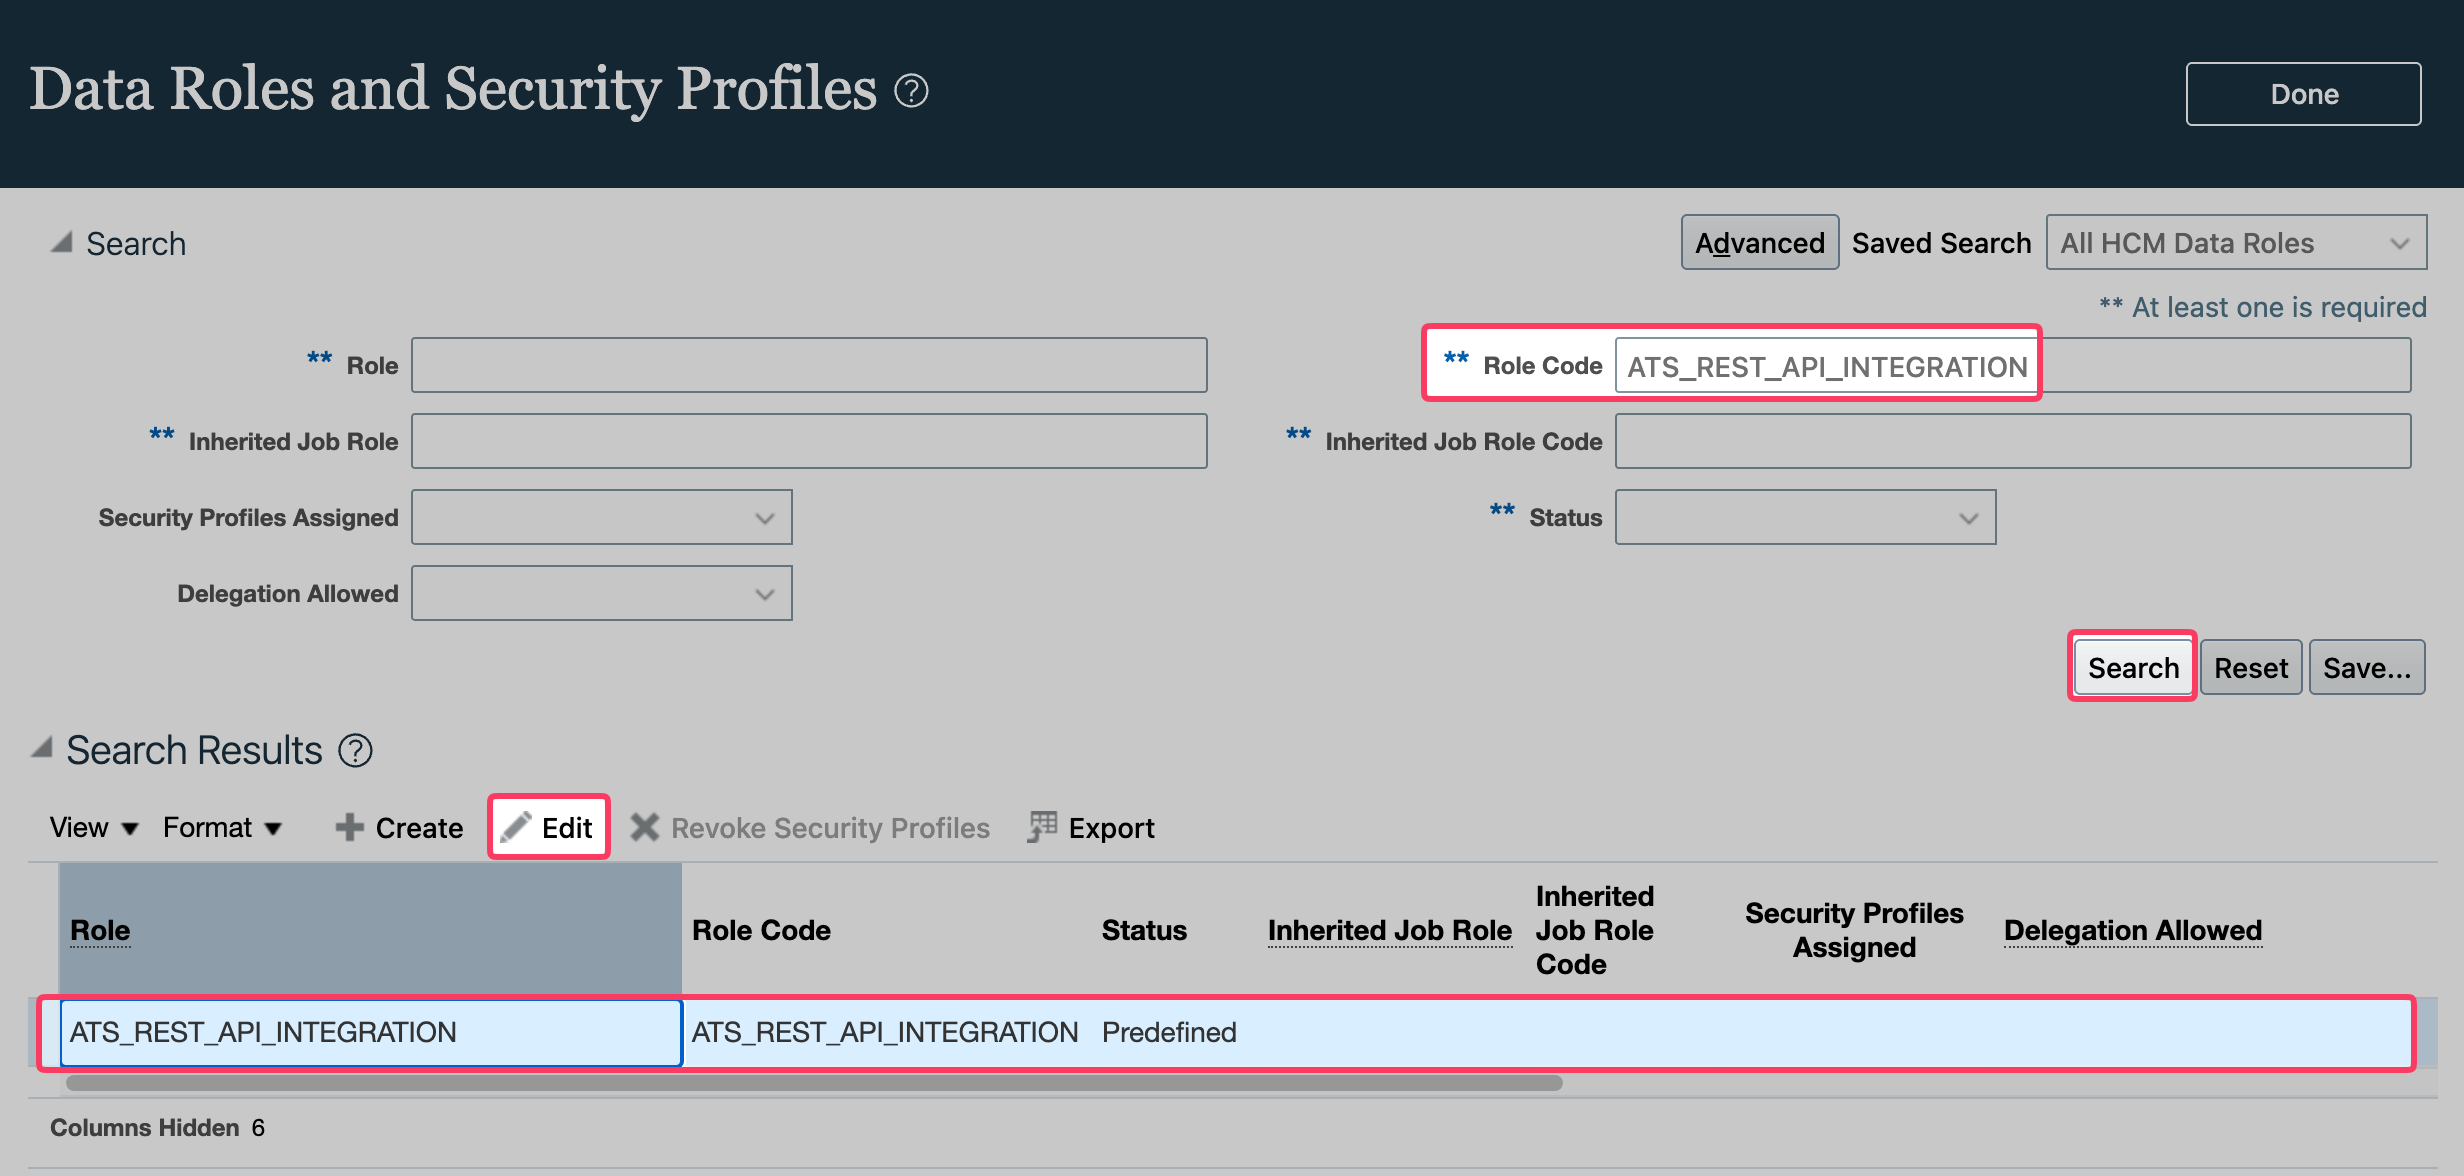
-
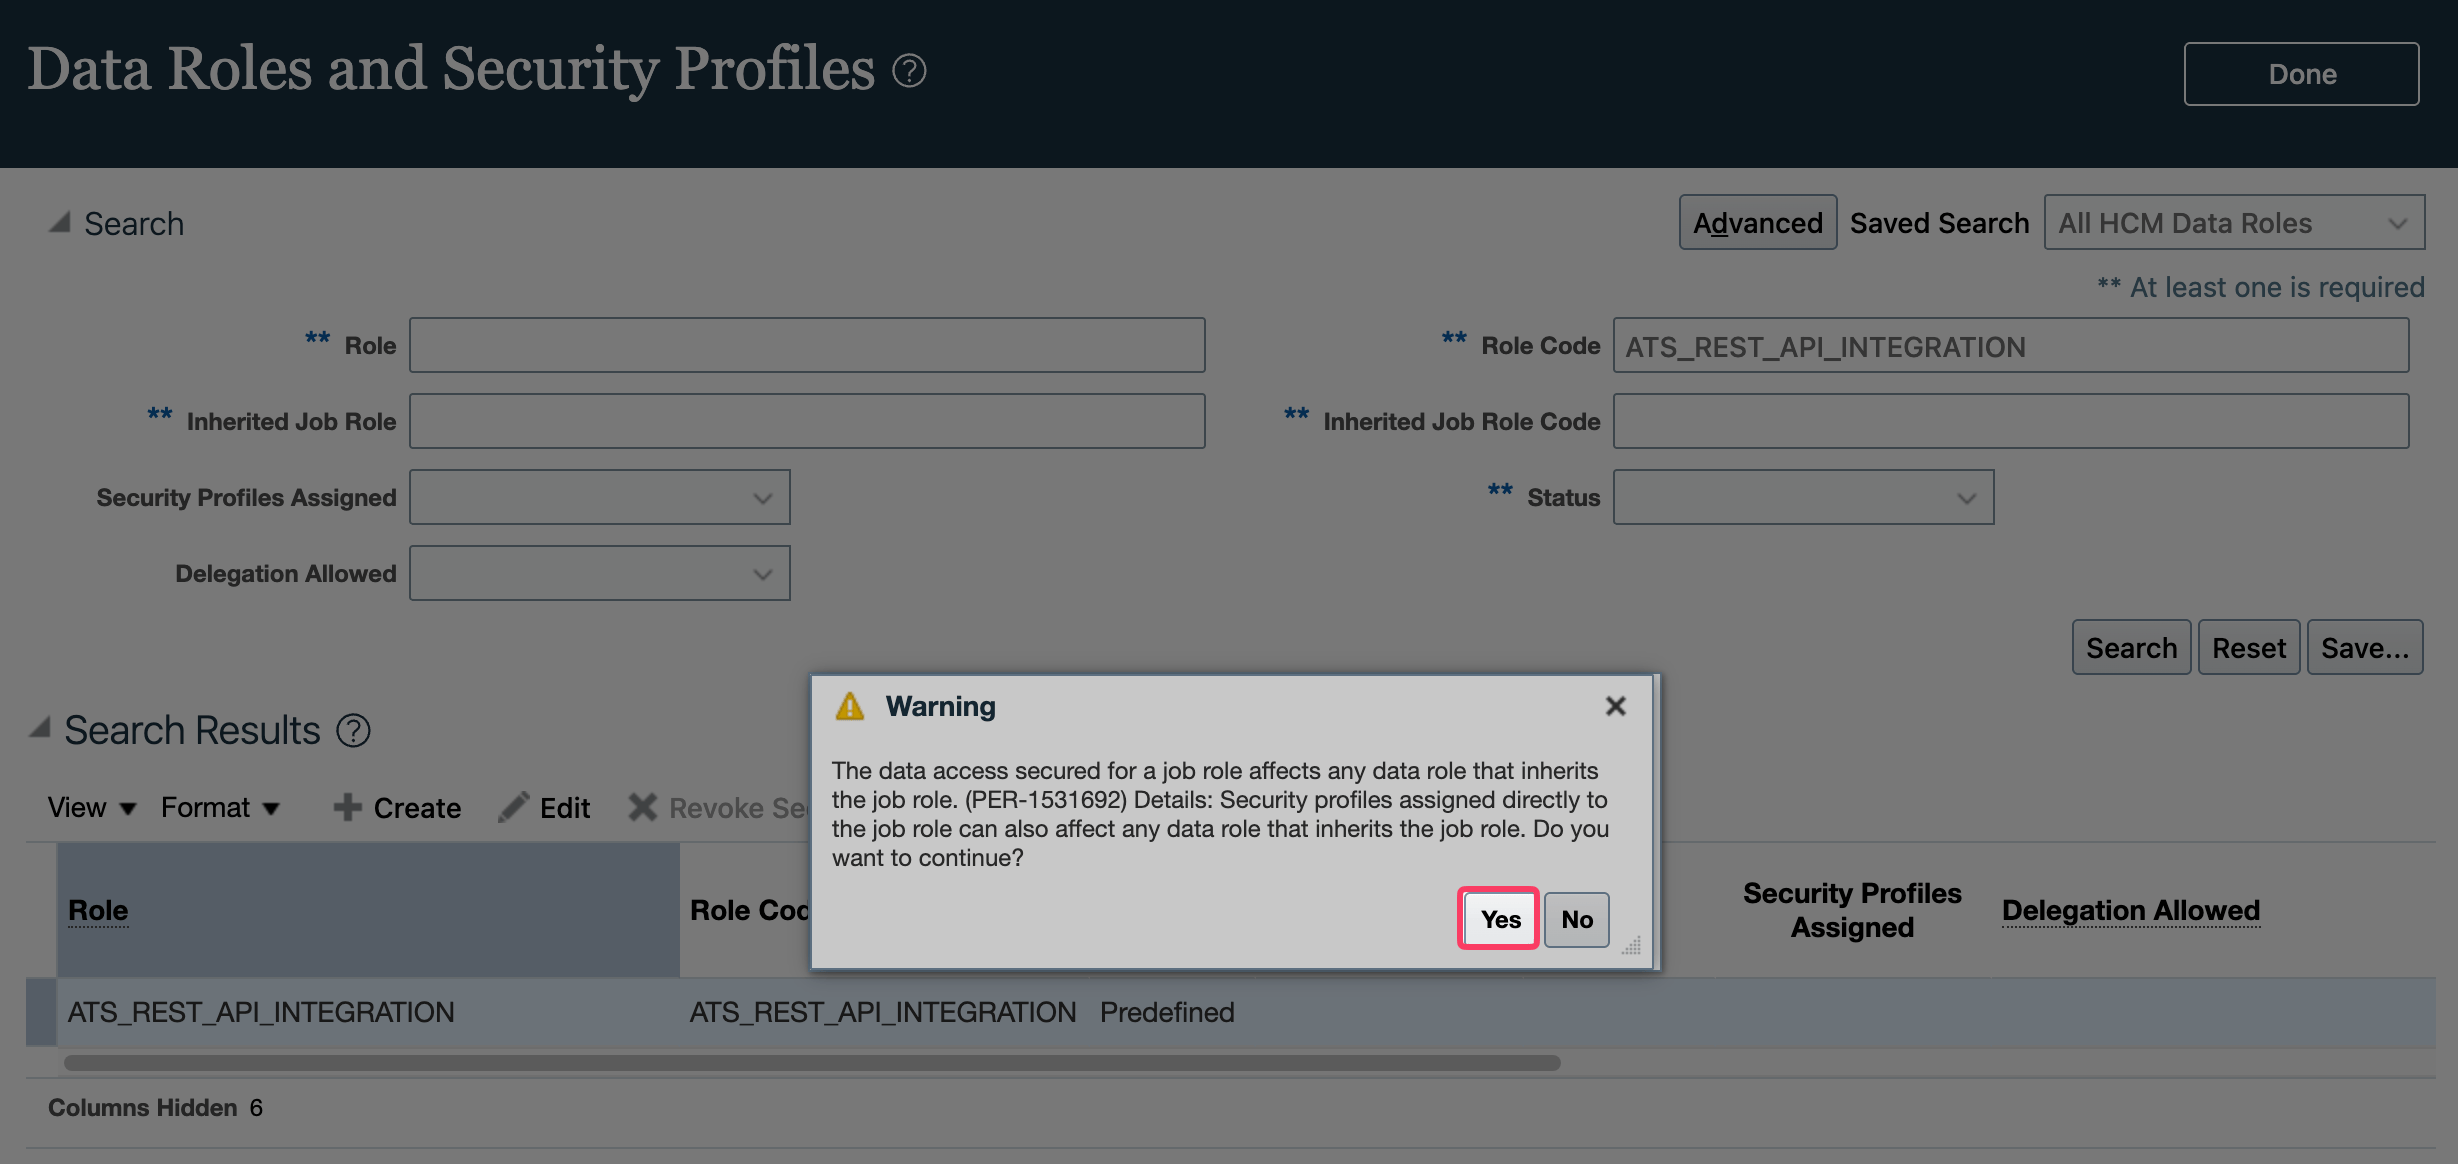
Click Yes when prompted.
-
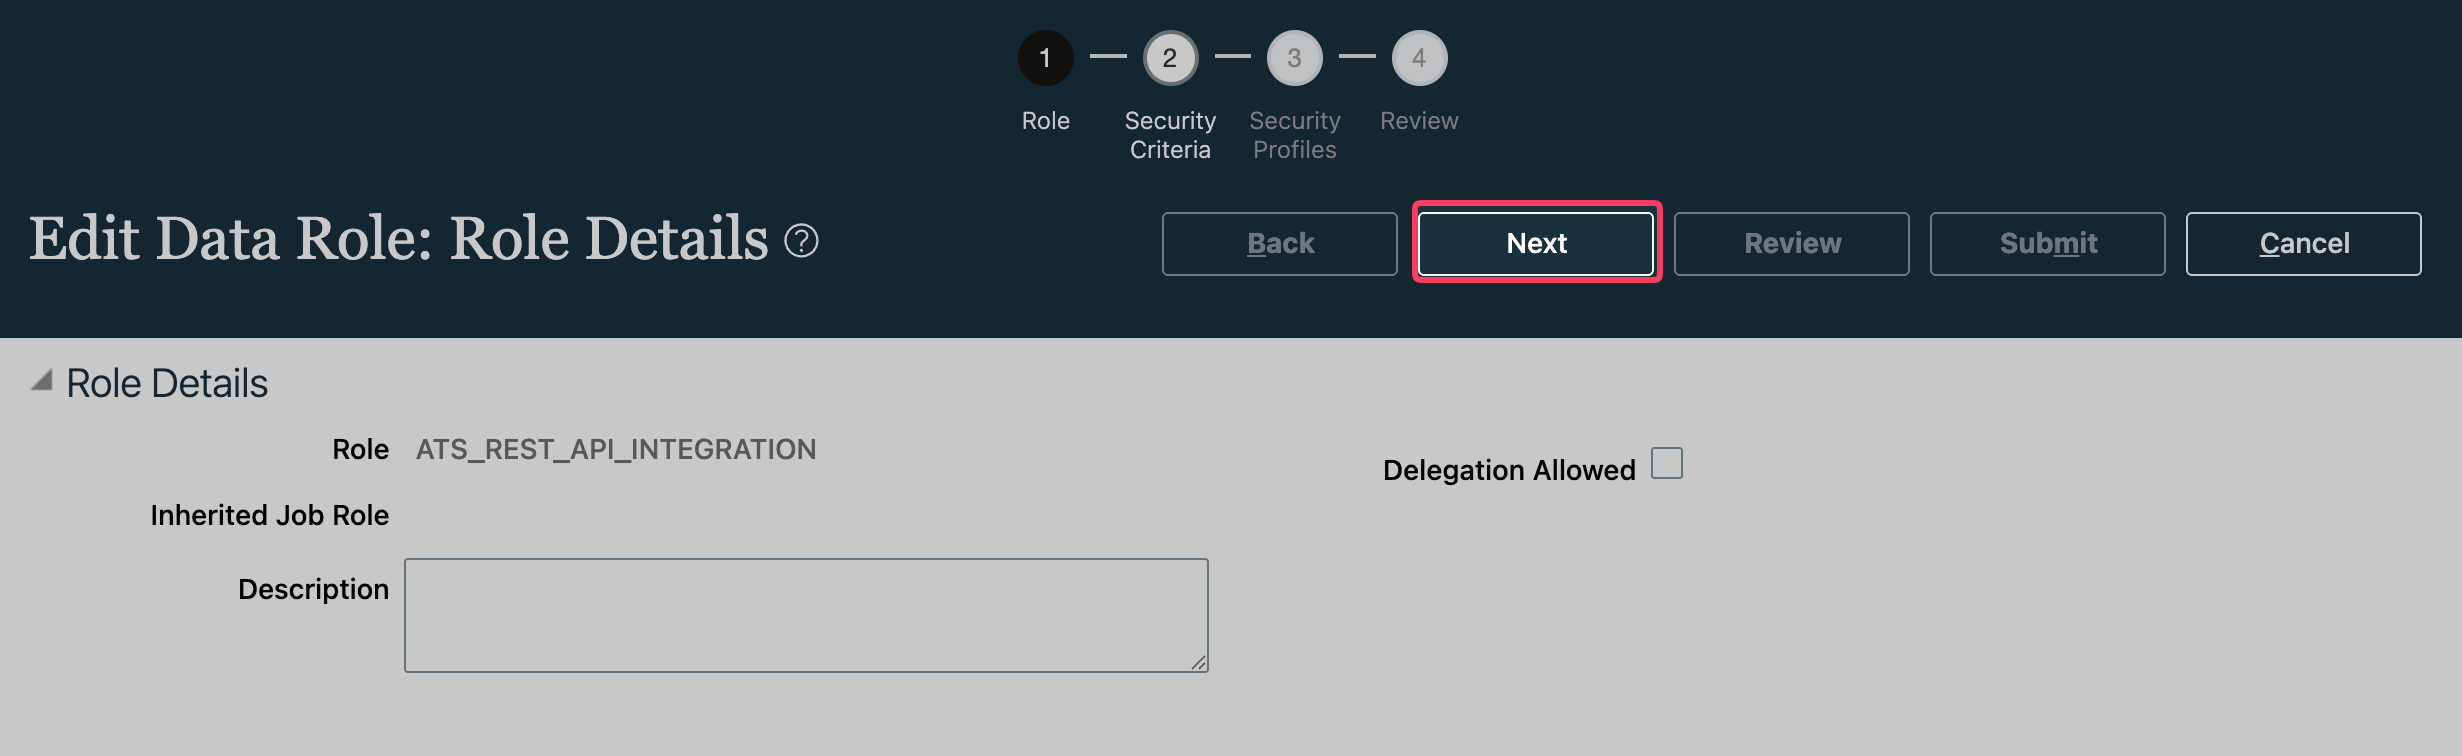
Click Next to go to step 2.
-
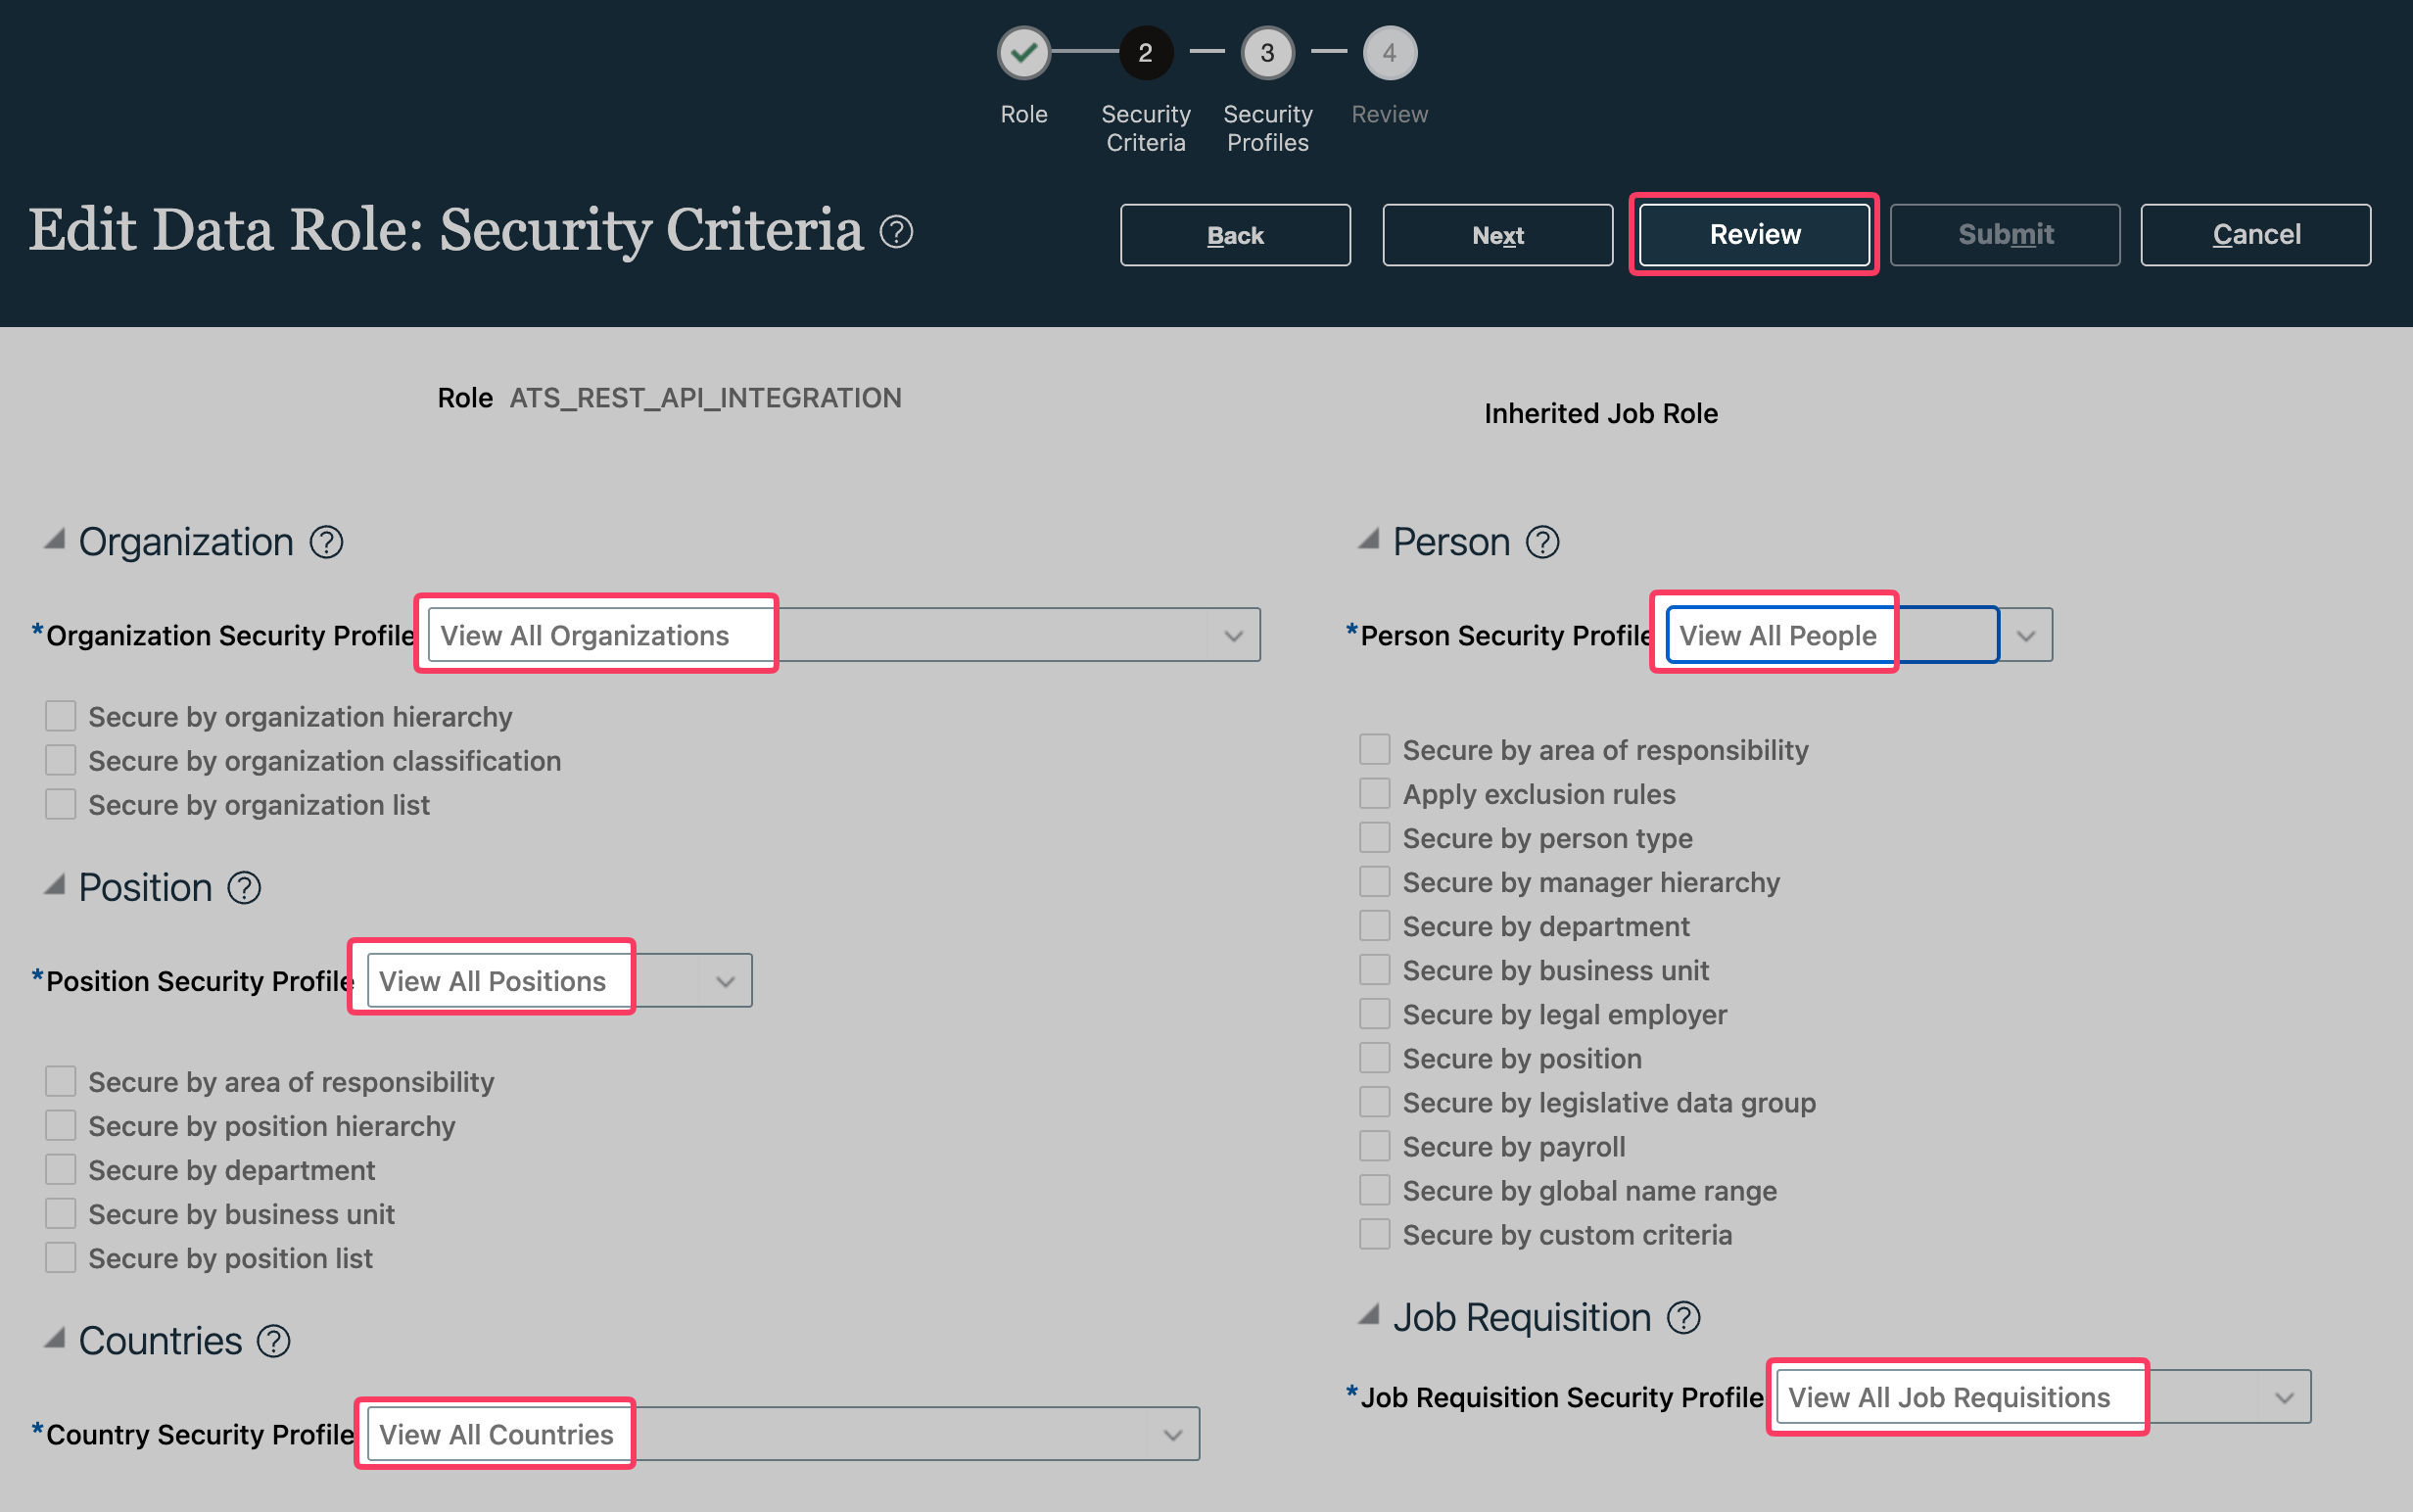
The Security Criteria shown depend on the roles added in the previous steps. Select the following default criteria if shown:
- Organization Security Profile: select View All Organizations
- Person Security Profile: select View All People
- Position Security Profile: select View All Job Positions
- Country Requisition Security Profile: select View All Job Countries
- Payroll Security Profile: select View All Job Payrolls
- Person Security Profile: select View All Job People
- Job Requisition Security Profile: select View All Job Requisitions
-
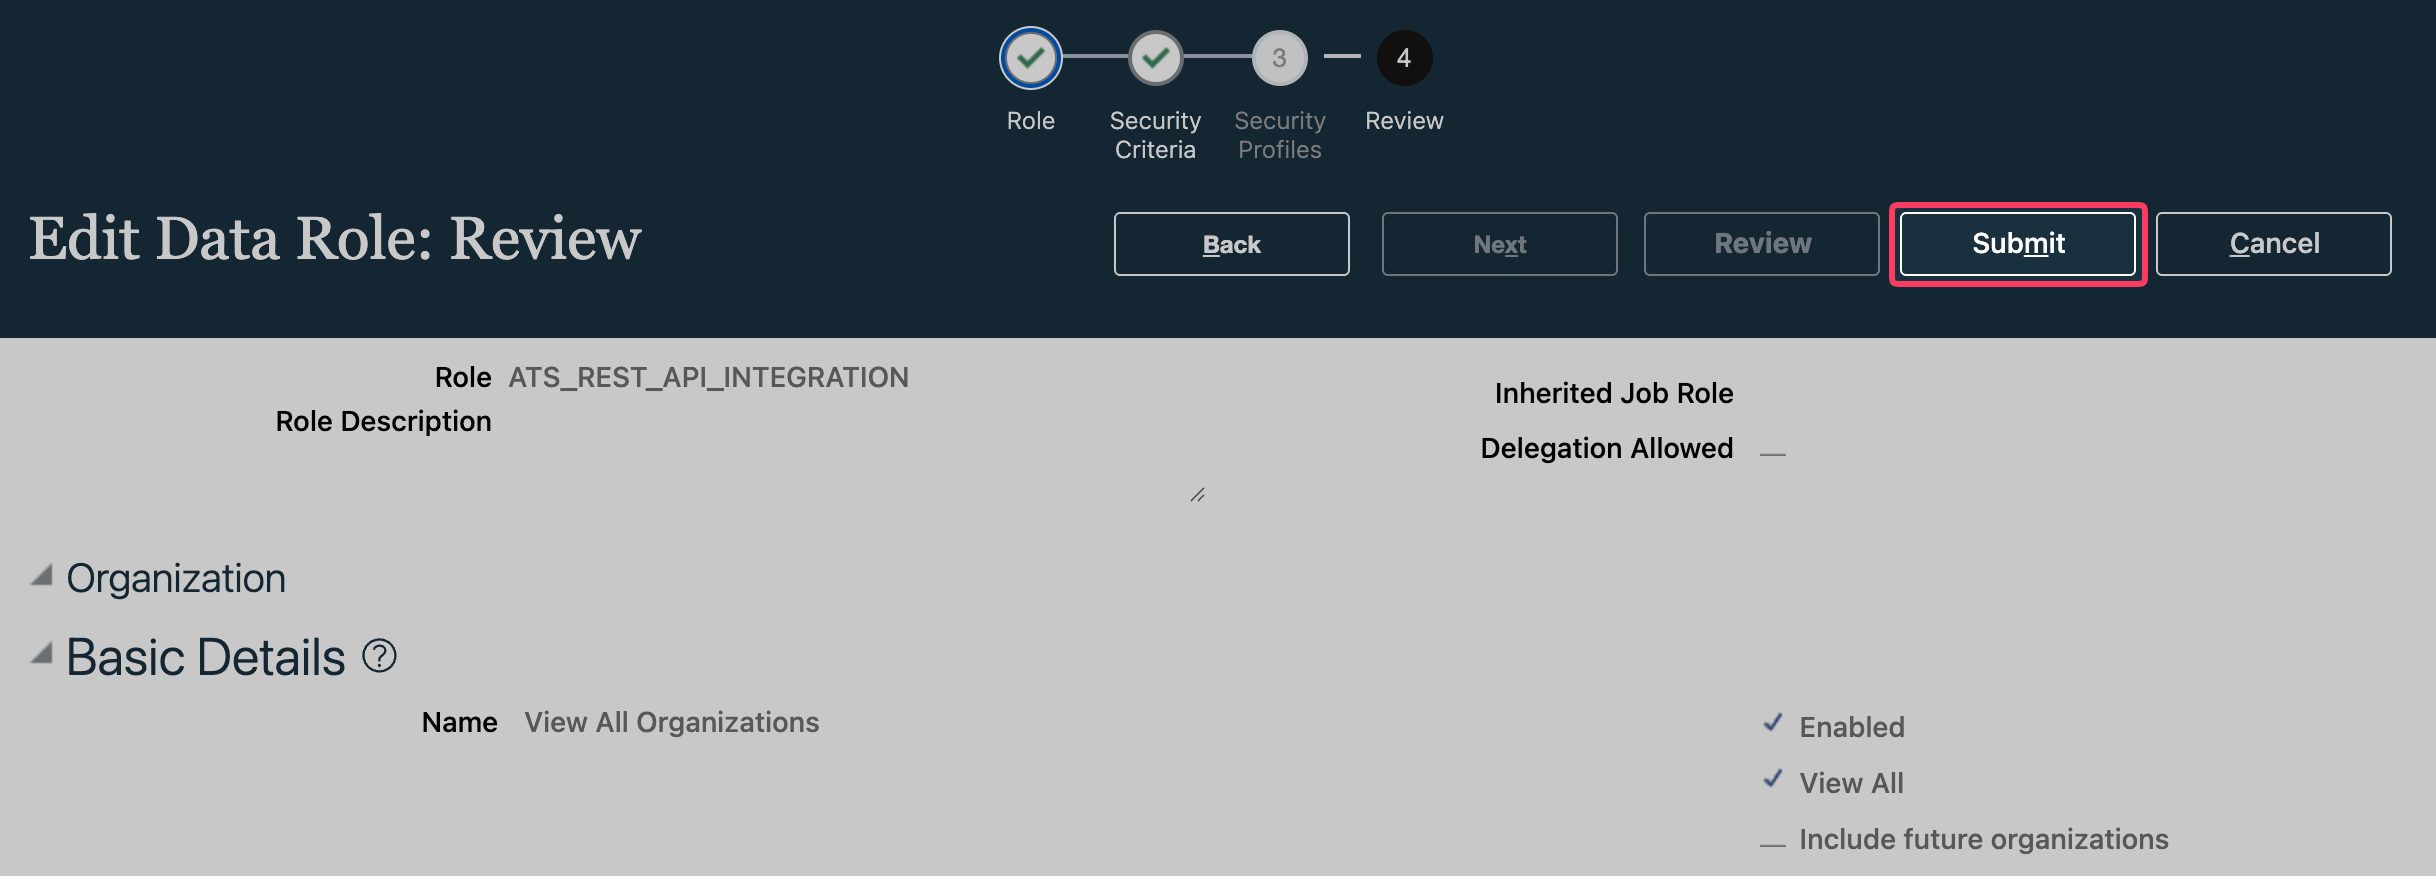
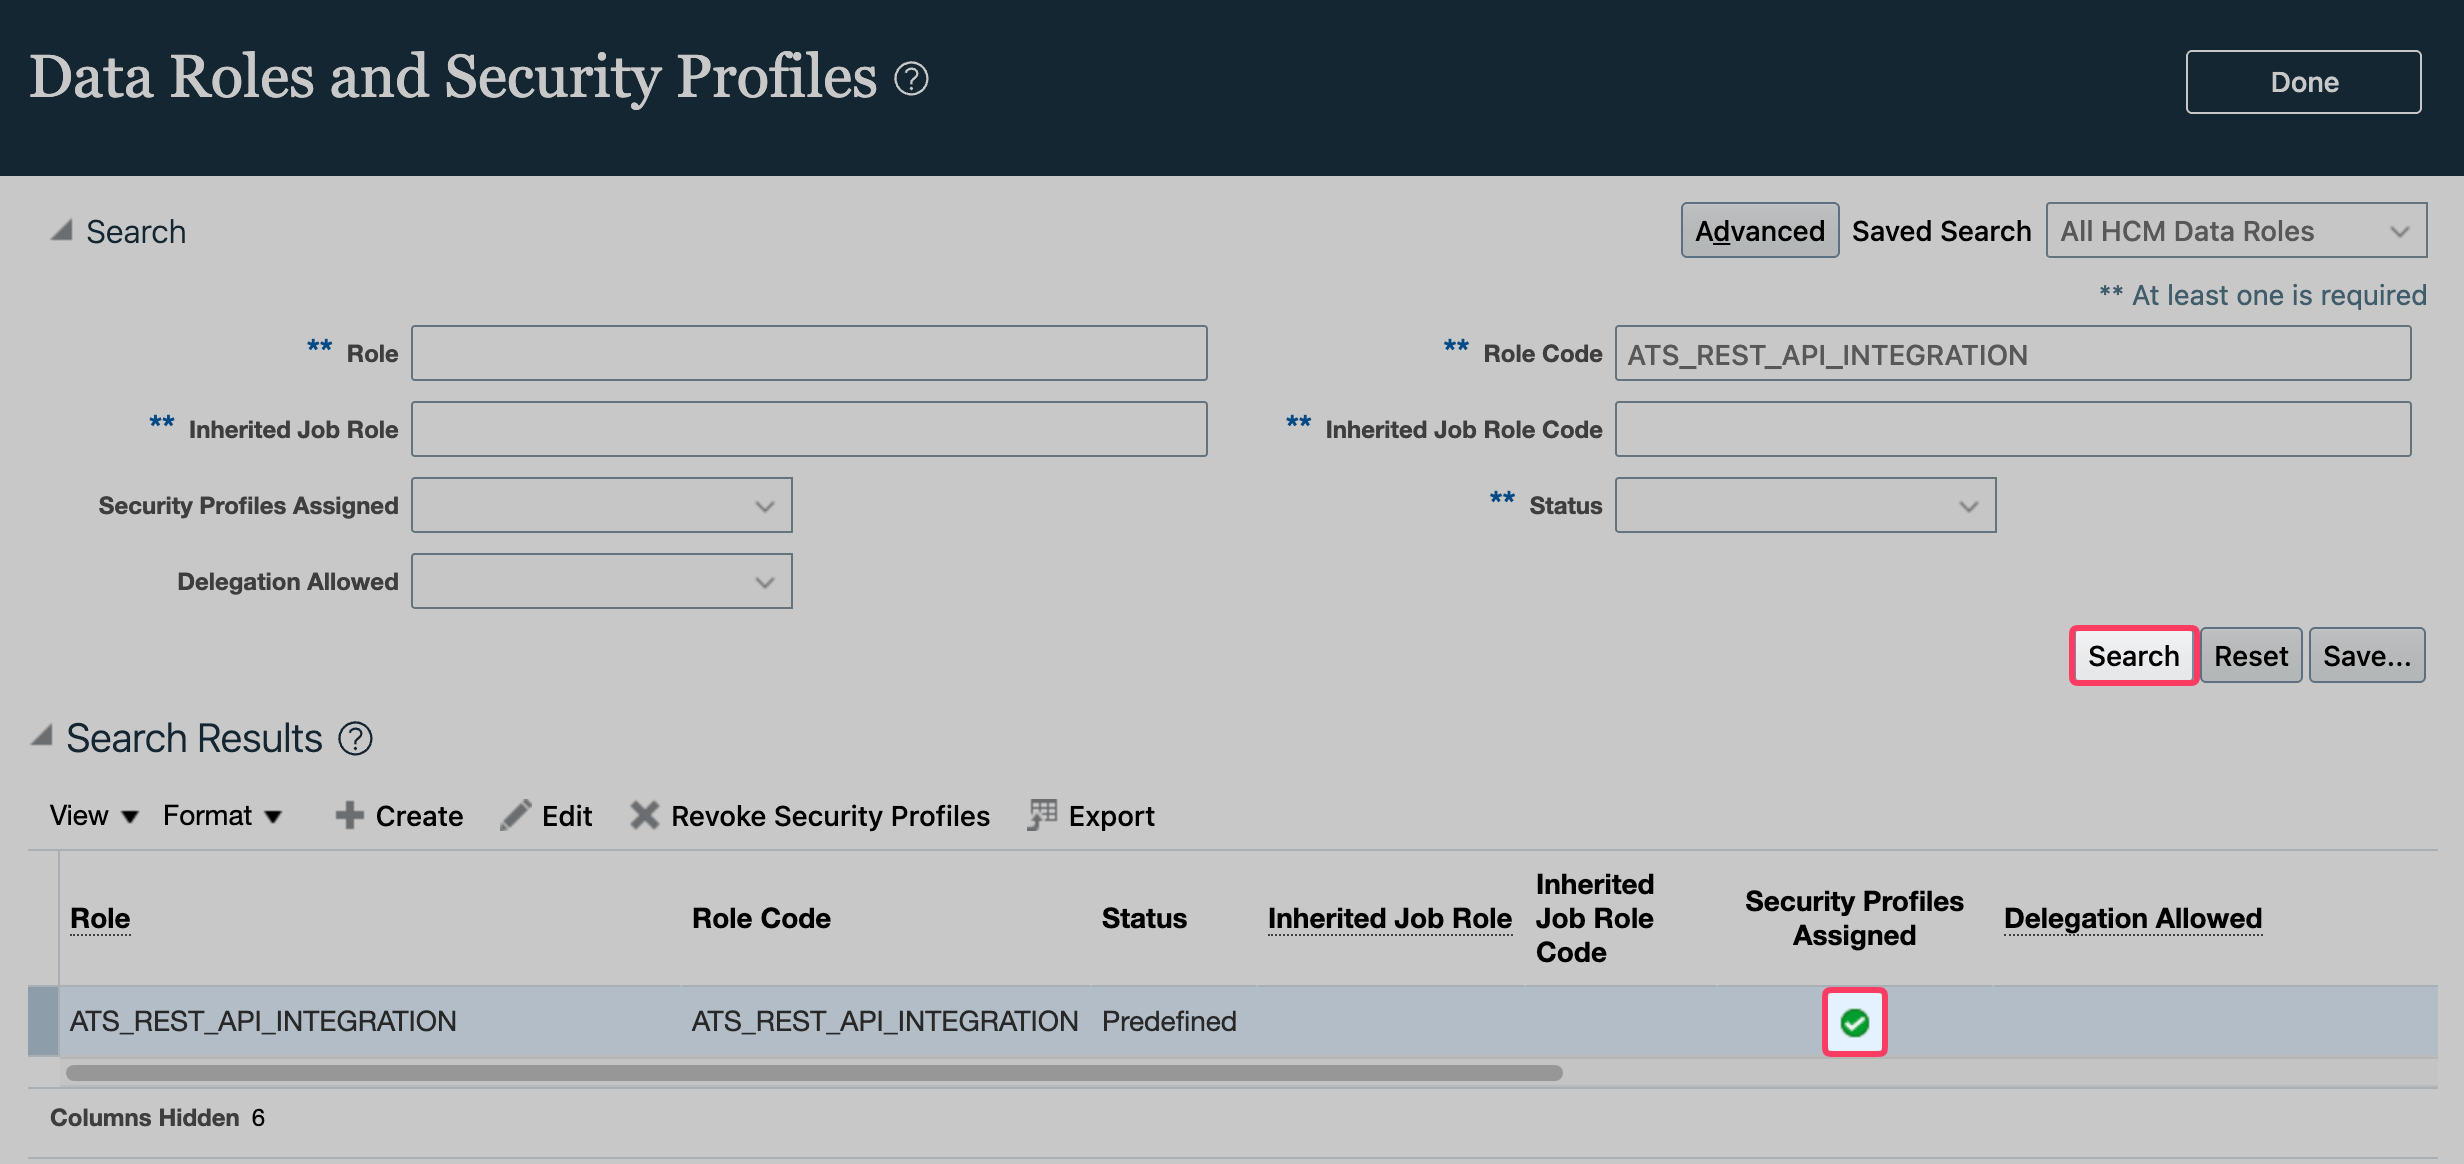
Click Next until you reach the Review step, then click Submit.
-
If you click Search again, a green check mark appears.
Add the data security policies
This step covers candidate email addresses, phone numbers, and job offers. If your connection does not require any of these data points, this step might be skipped altogether.- Go back to the Security Console.
-
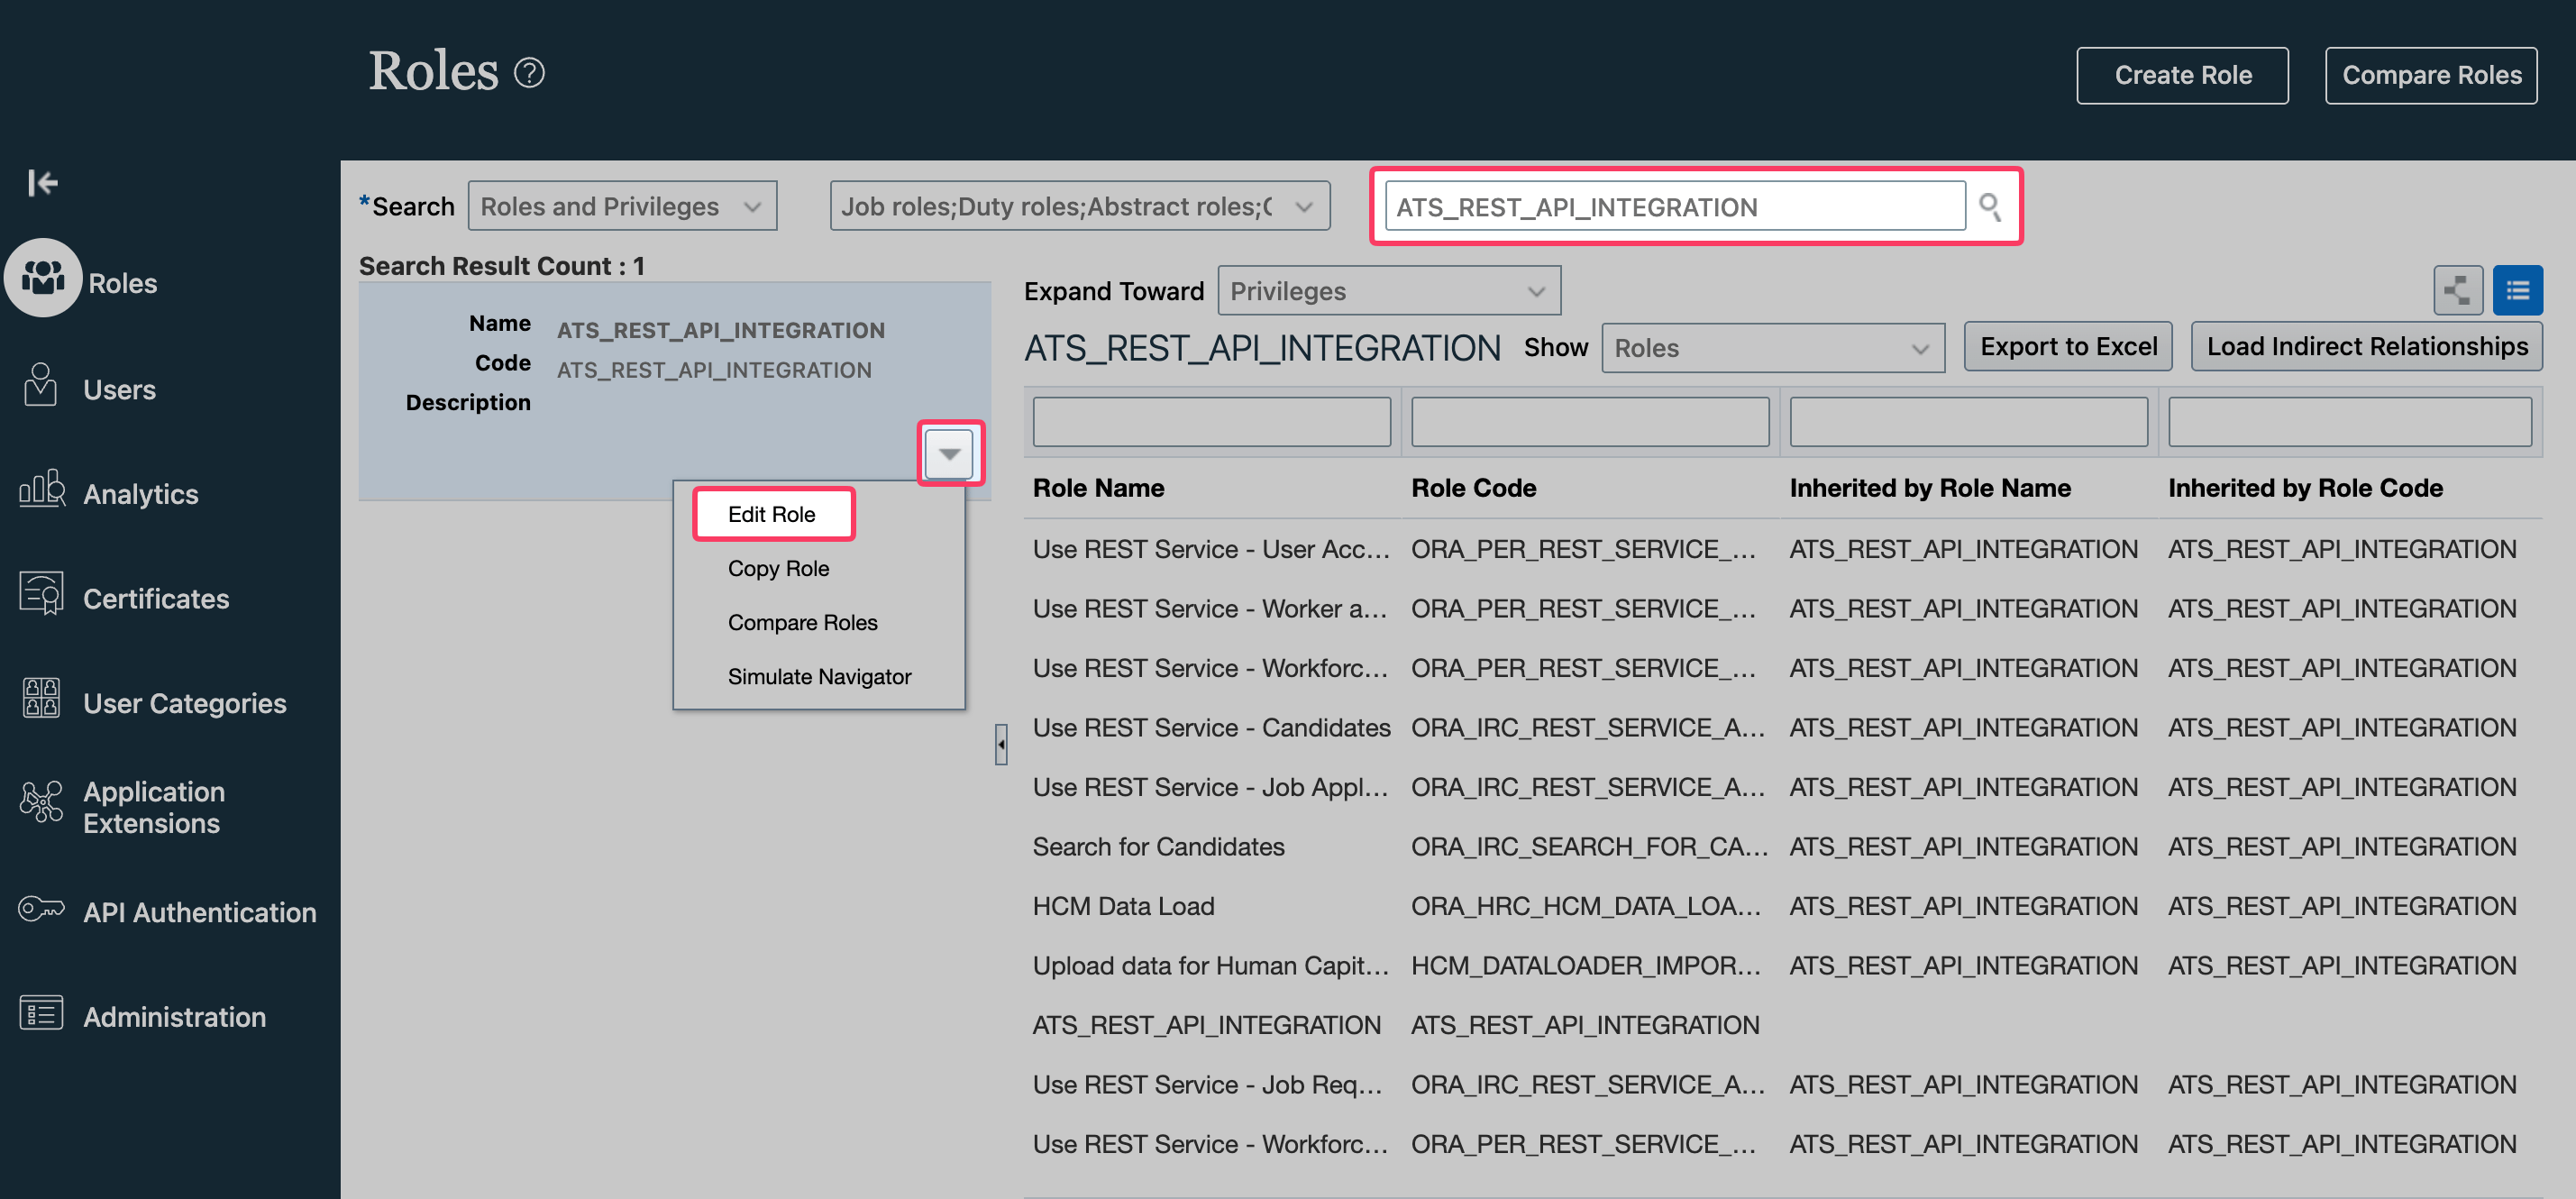
Search for the custom role and click Edit Role.
-
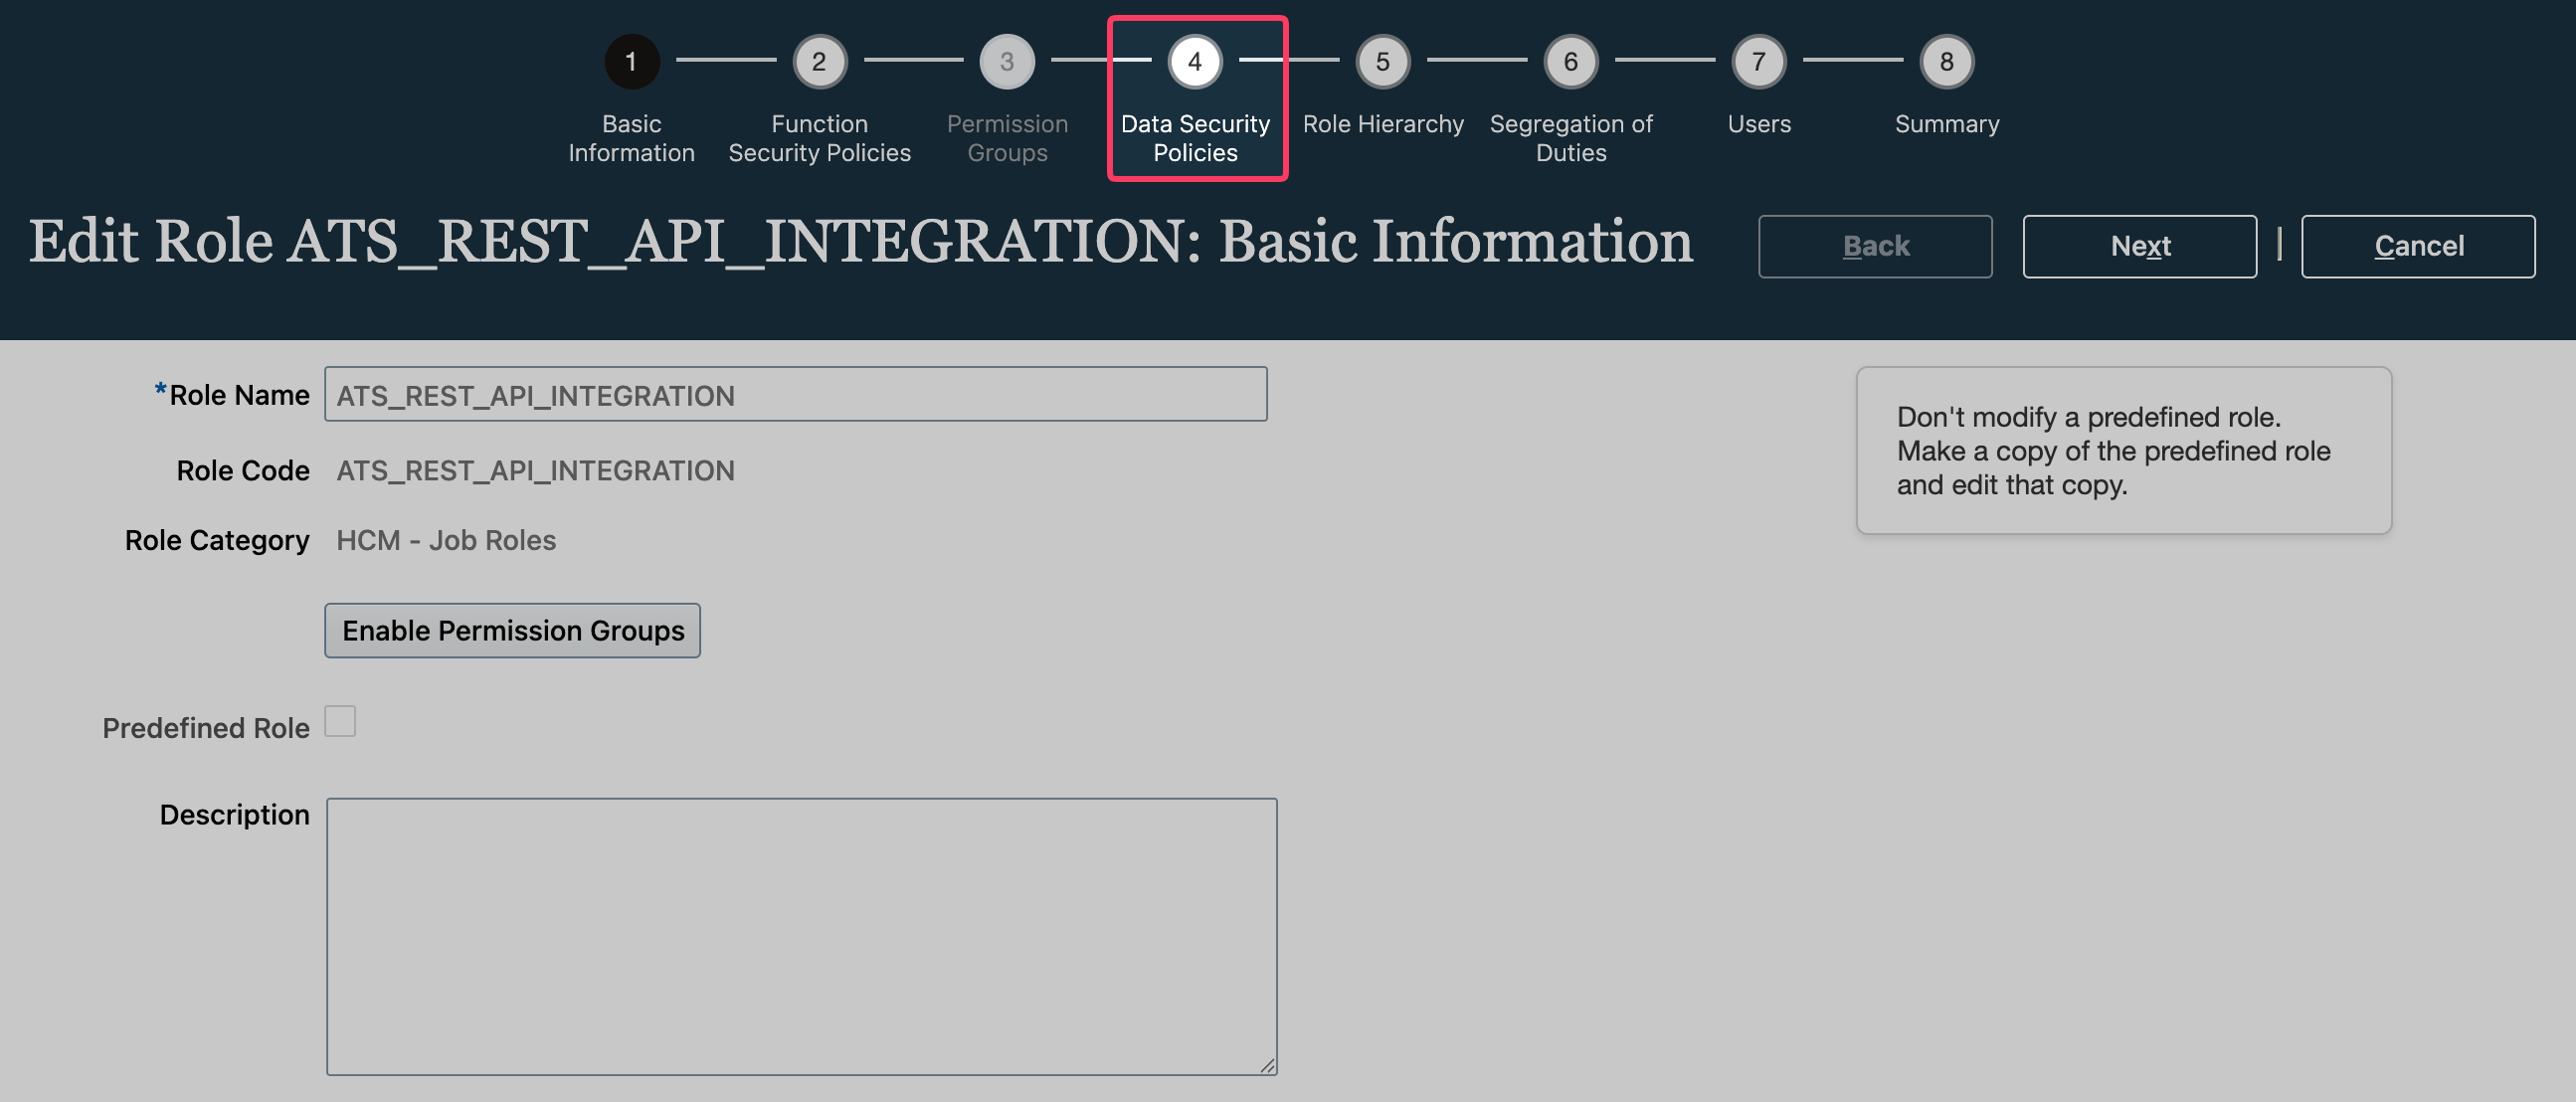
Navigate to the Data Security Policies tab.
-
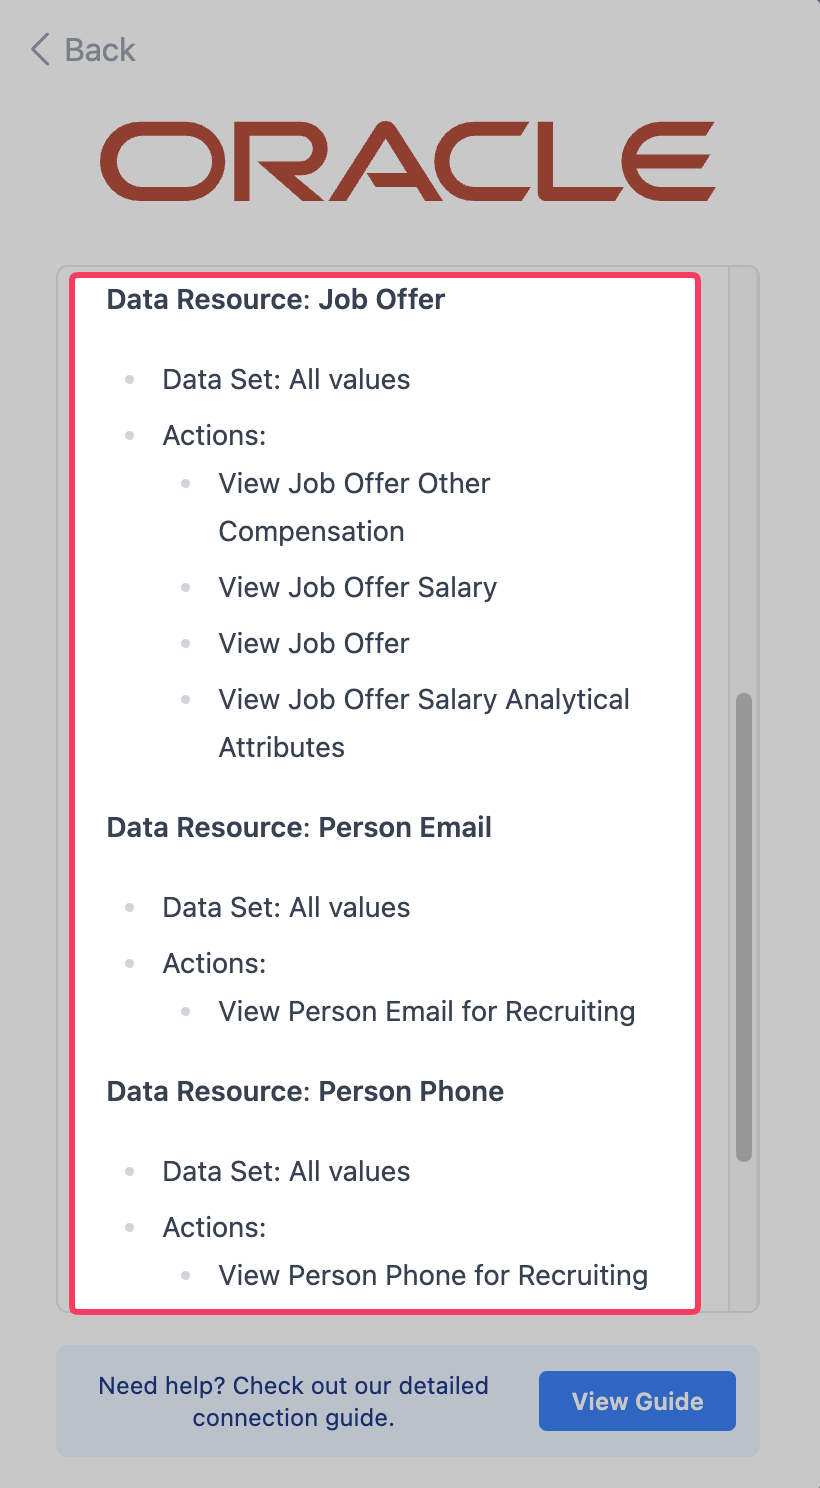
Create new policies according to the connection pop-up.
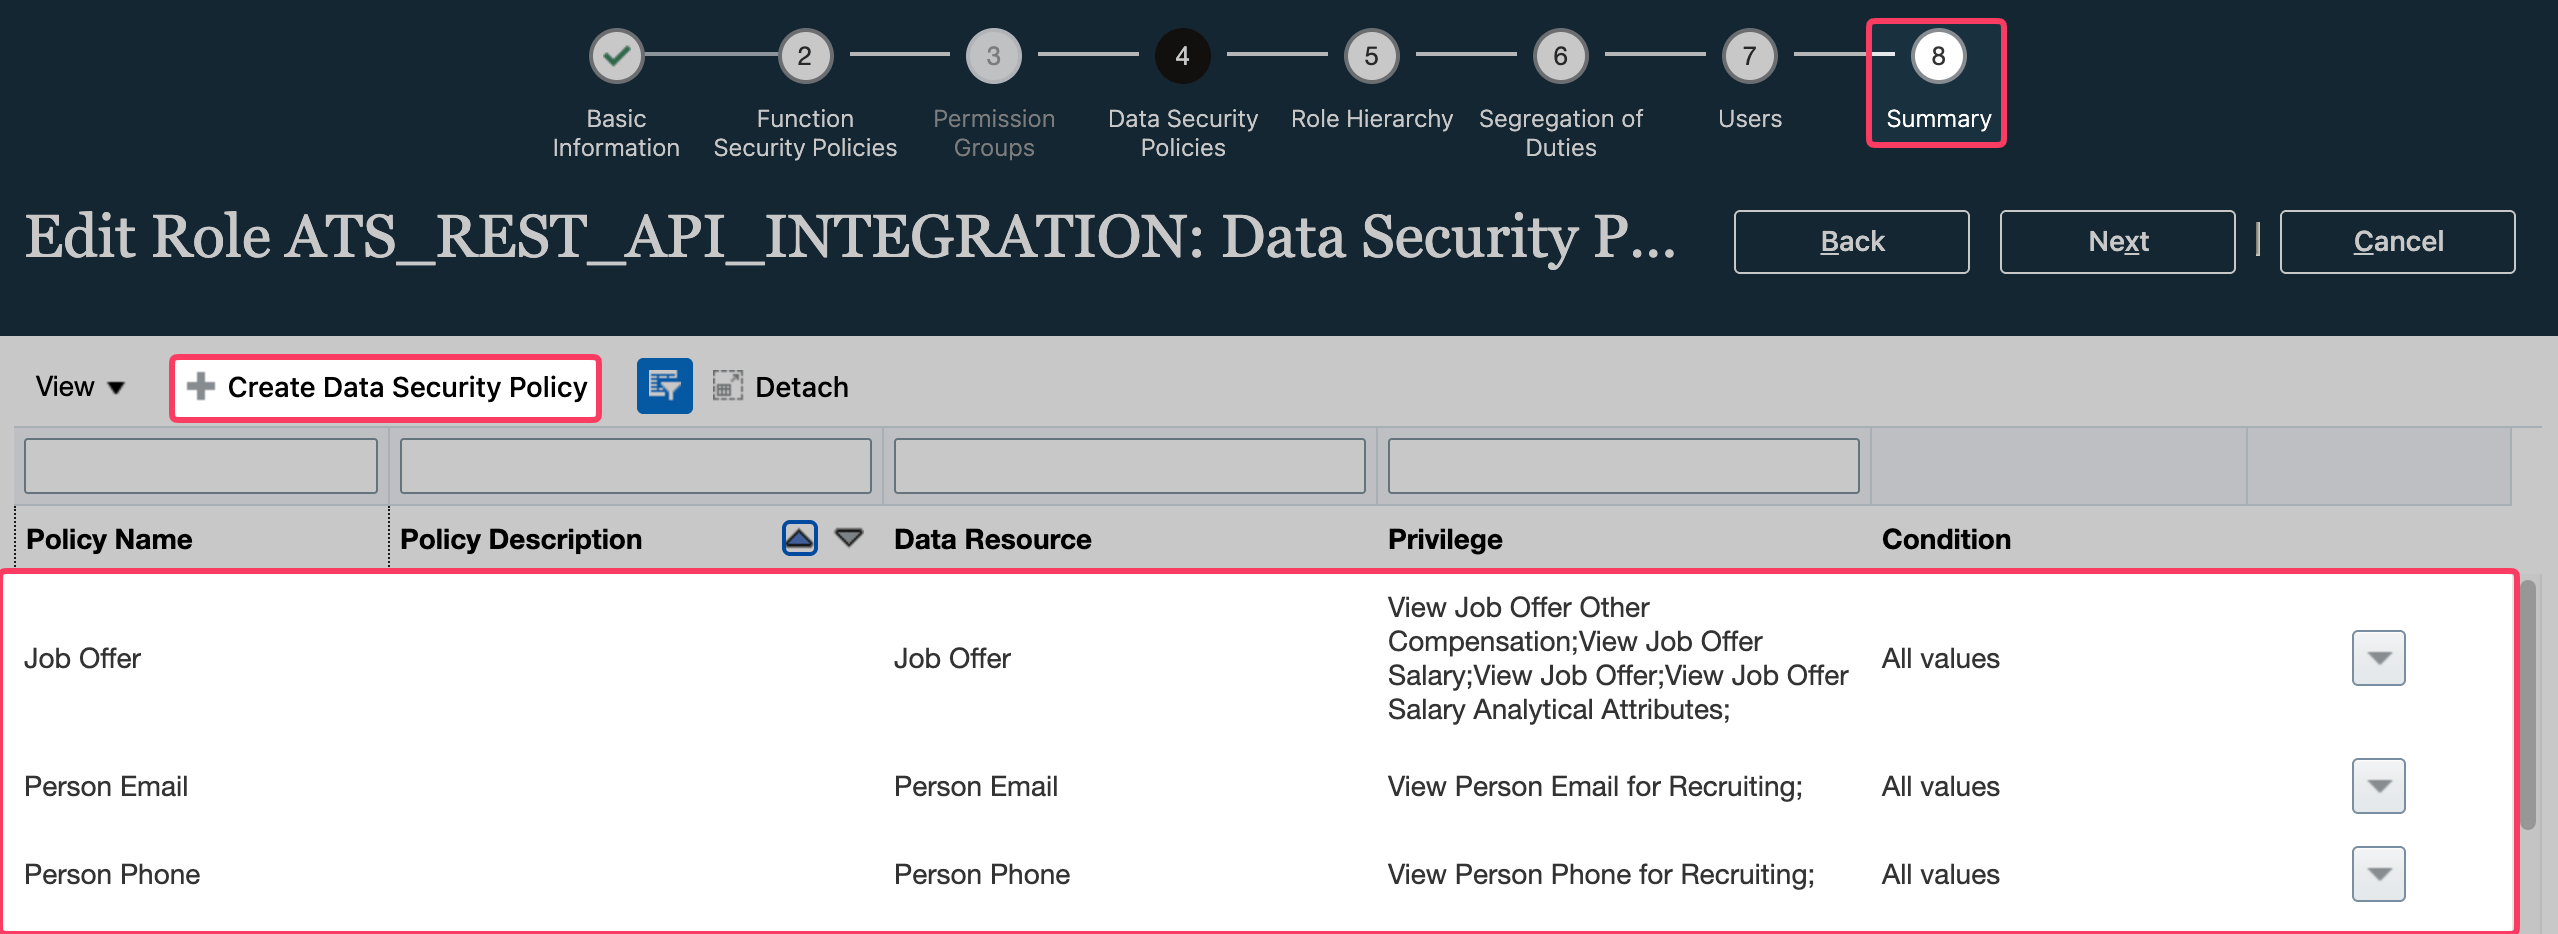
-
Click Summary, then Save and Close.
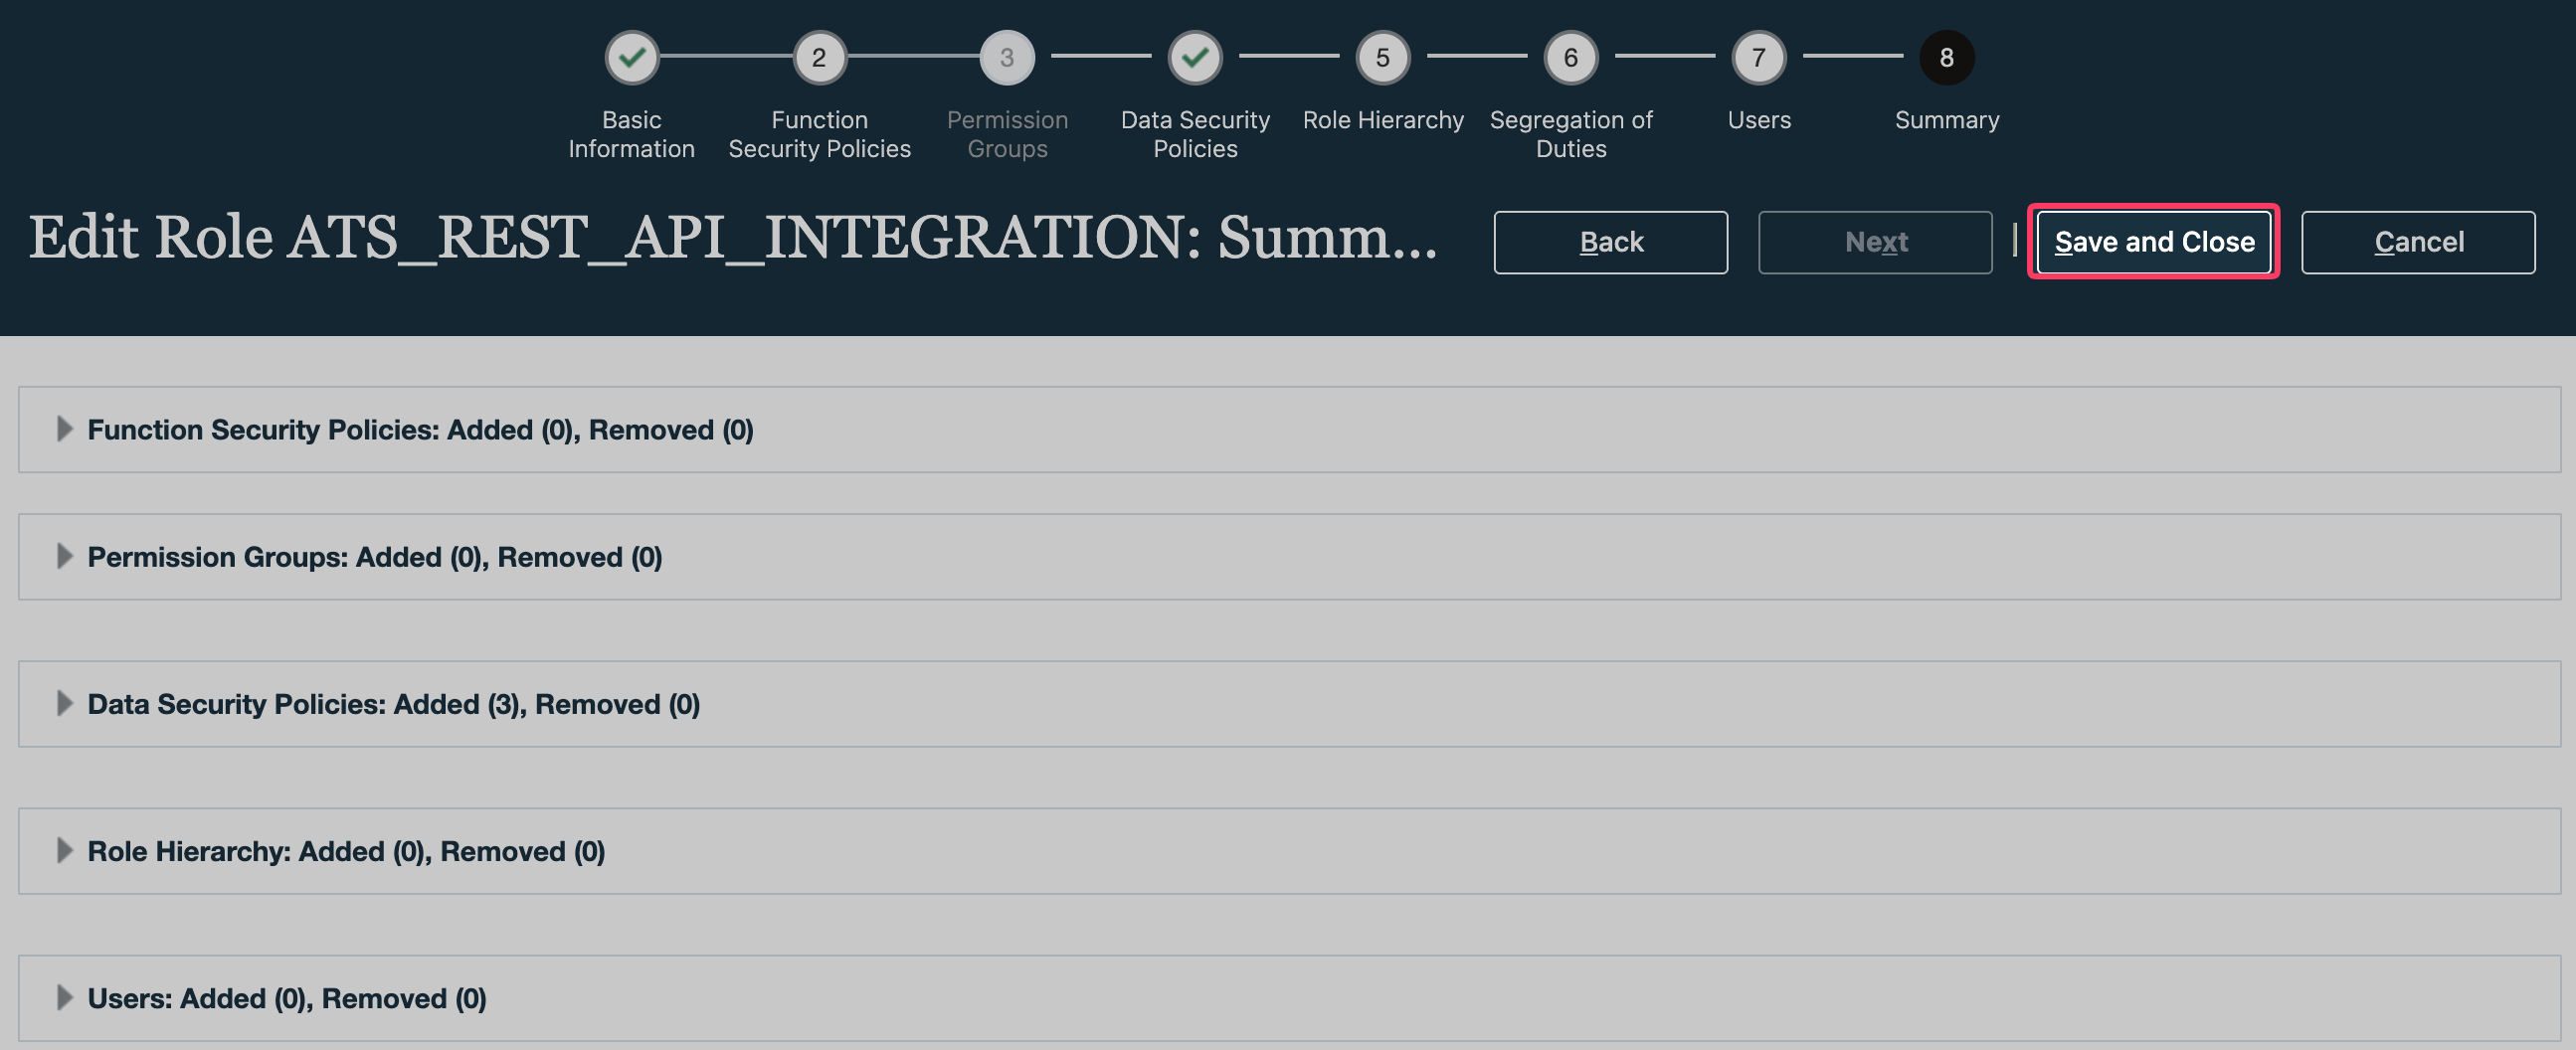
Create a new integration user
- Click the 3-bar menu in the top left of your Oracle Recruiting Cloud instance, scroll down to Tools, and go to Security Console.
-
Go to Users, then Add User Account.
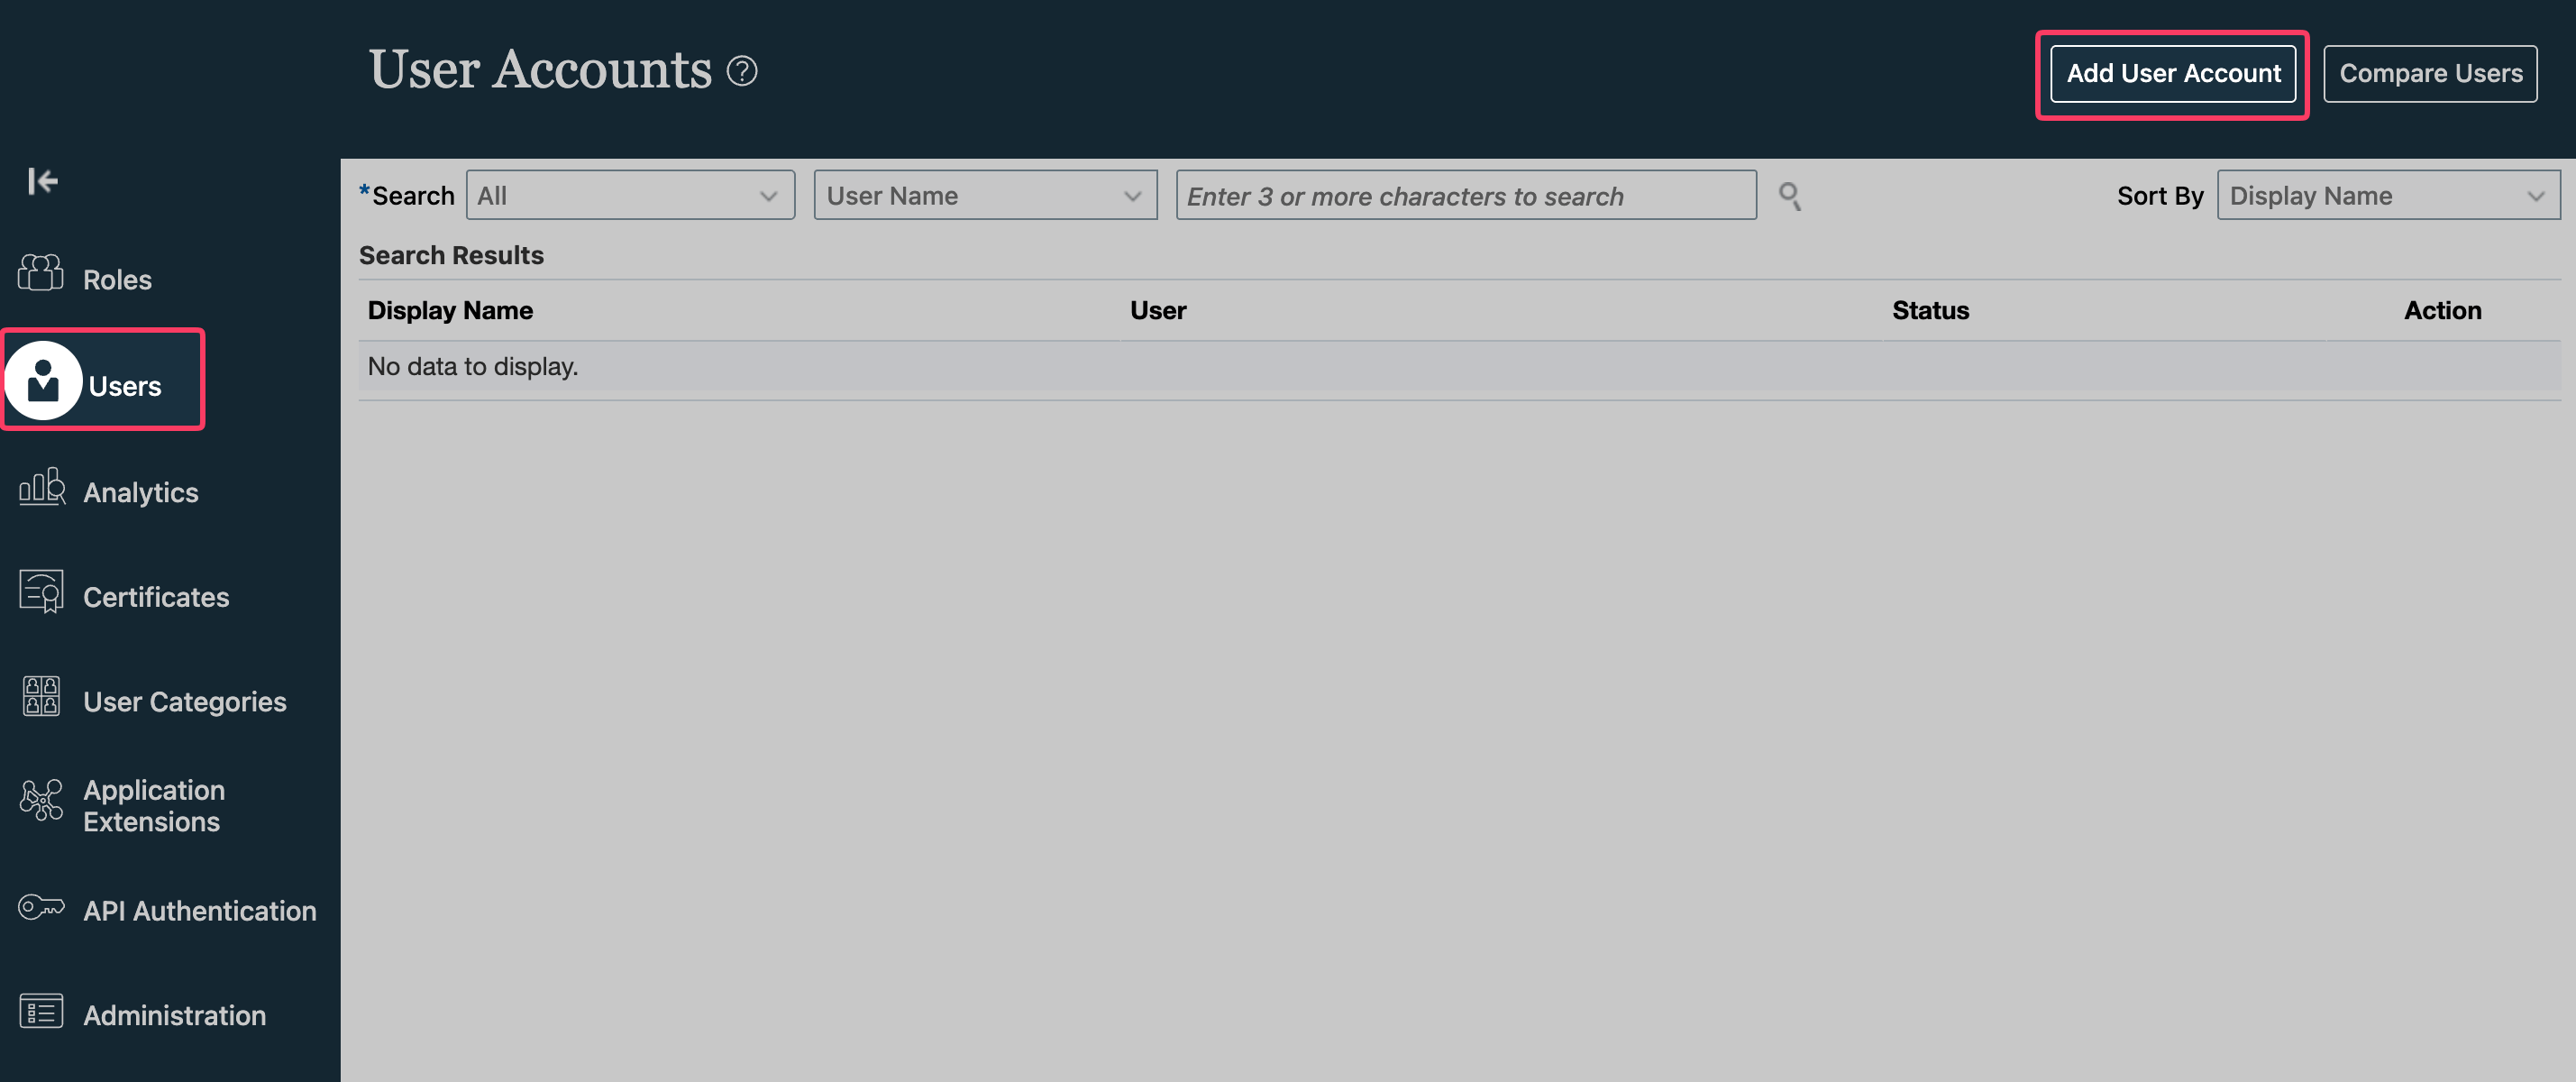
-
Fill in the necessary information, saving the User Name and Password for later. If you have a custom User Category for service users without a password expiration policy, make sure to select it.
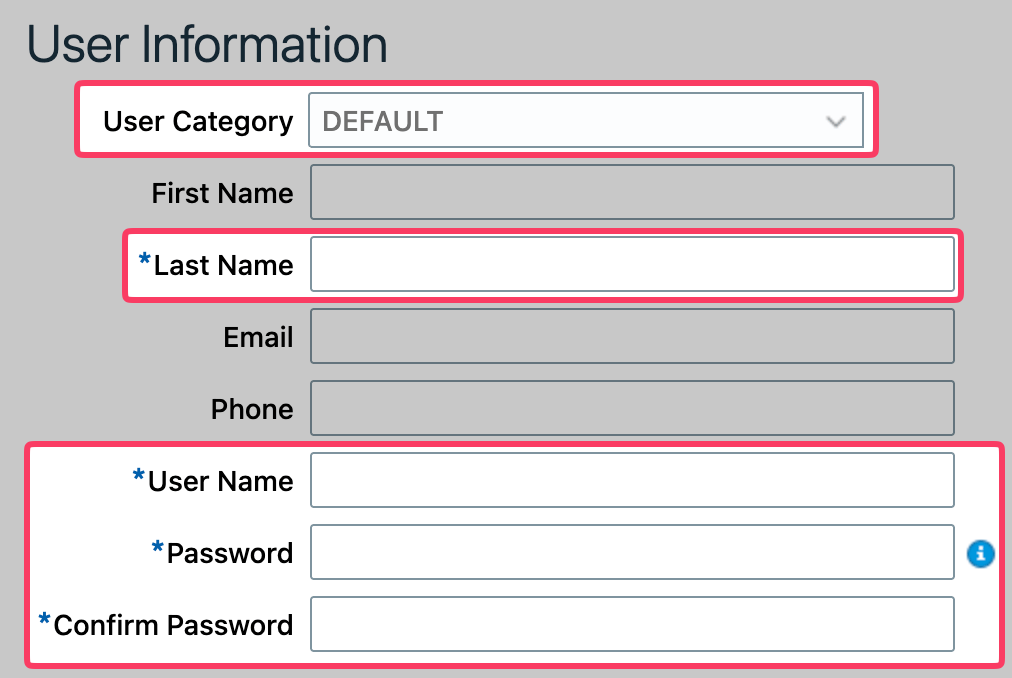
-
Click Add Role.
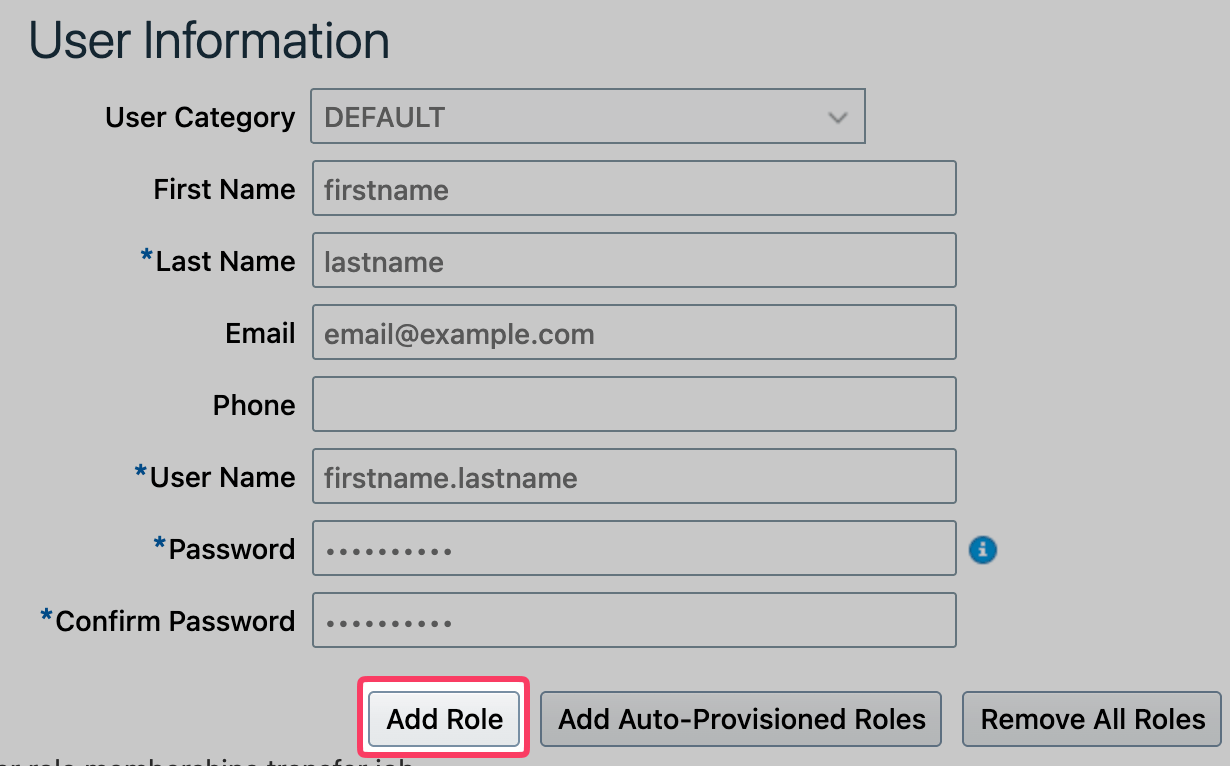
- Add the custom role you created earlier to the user.
- Press Save and Close.
-
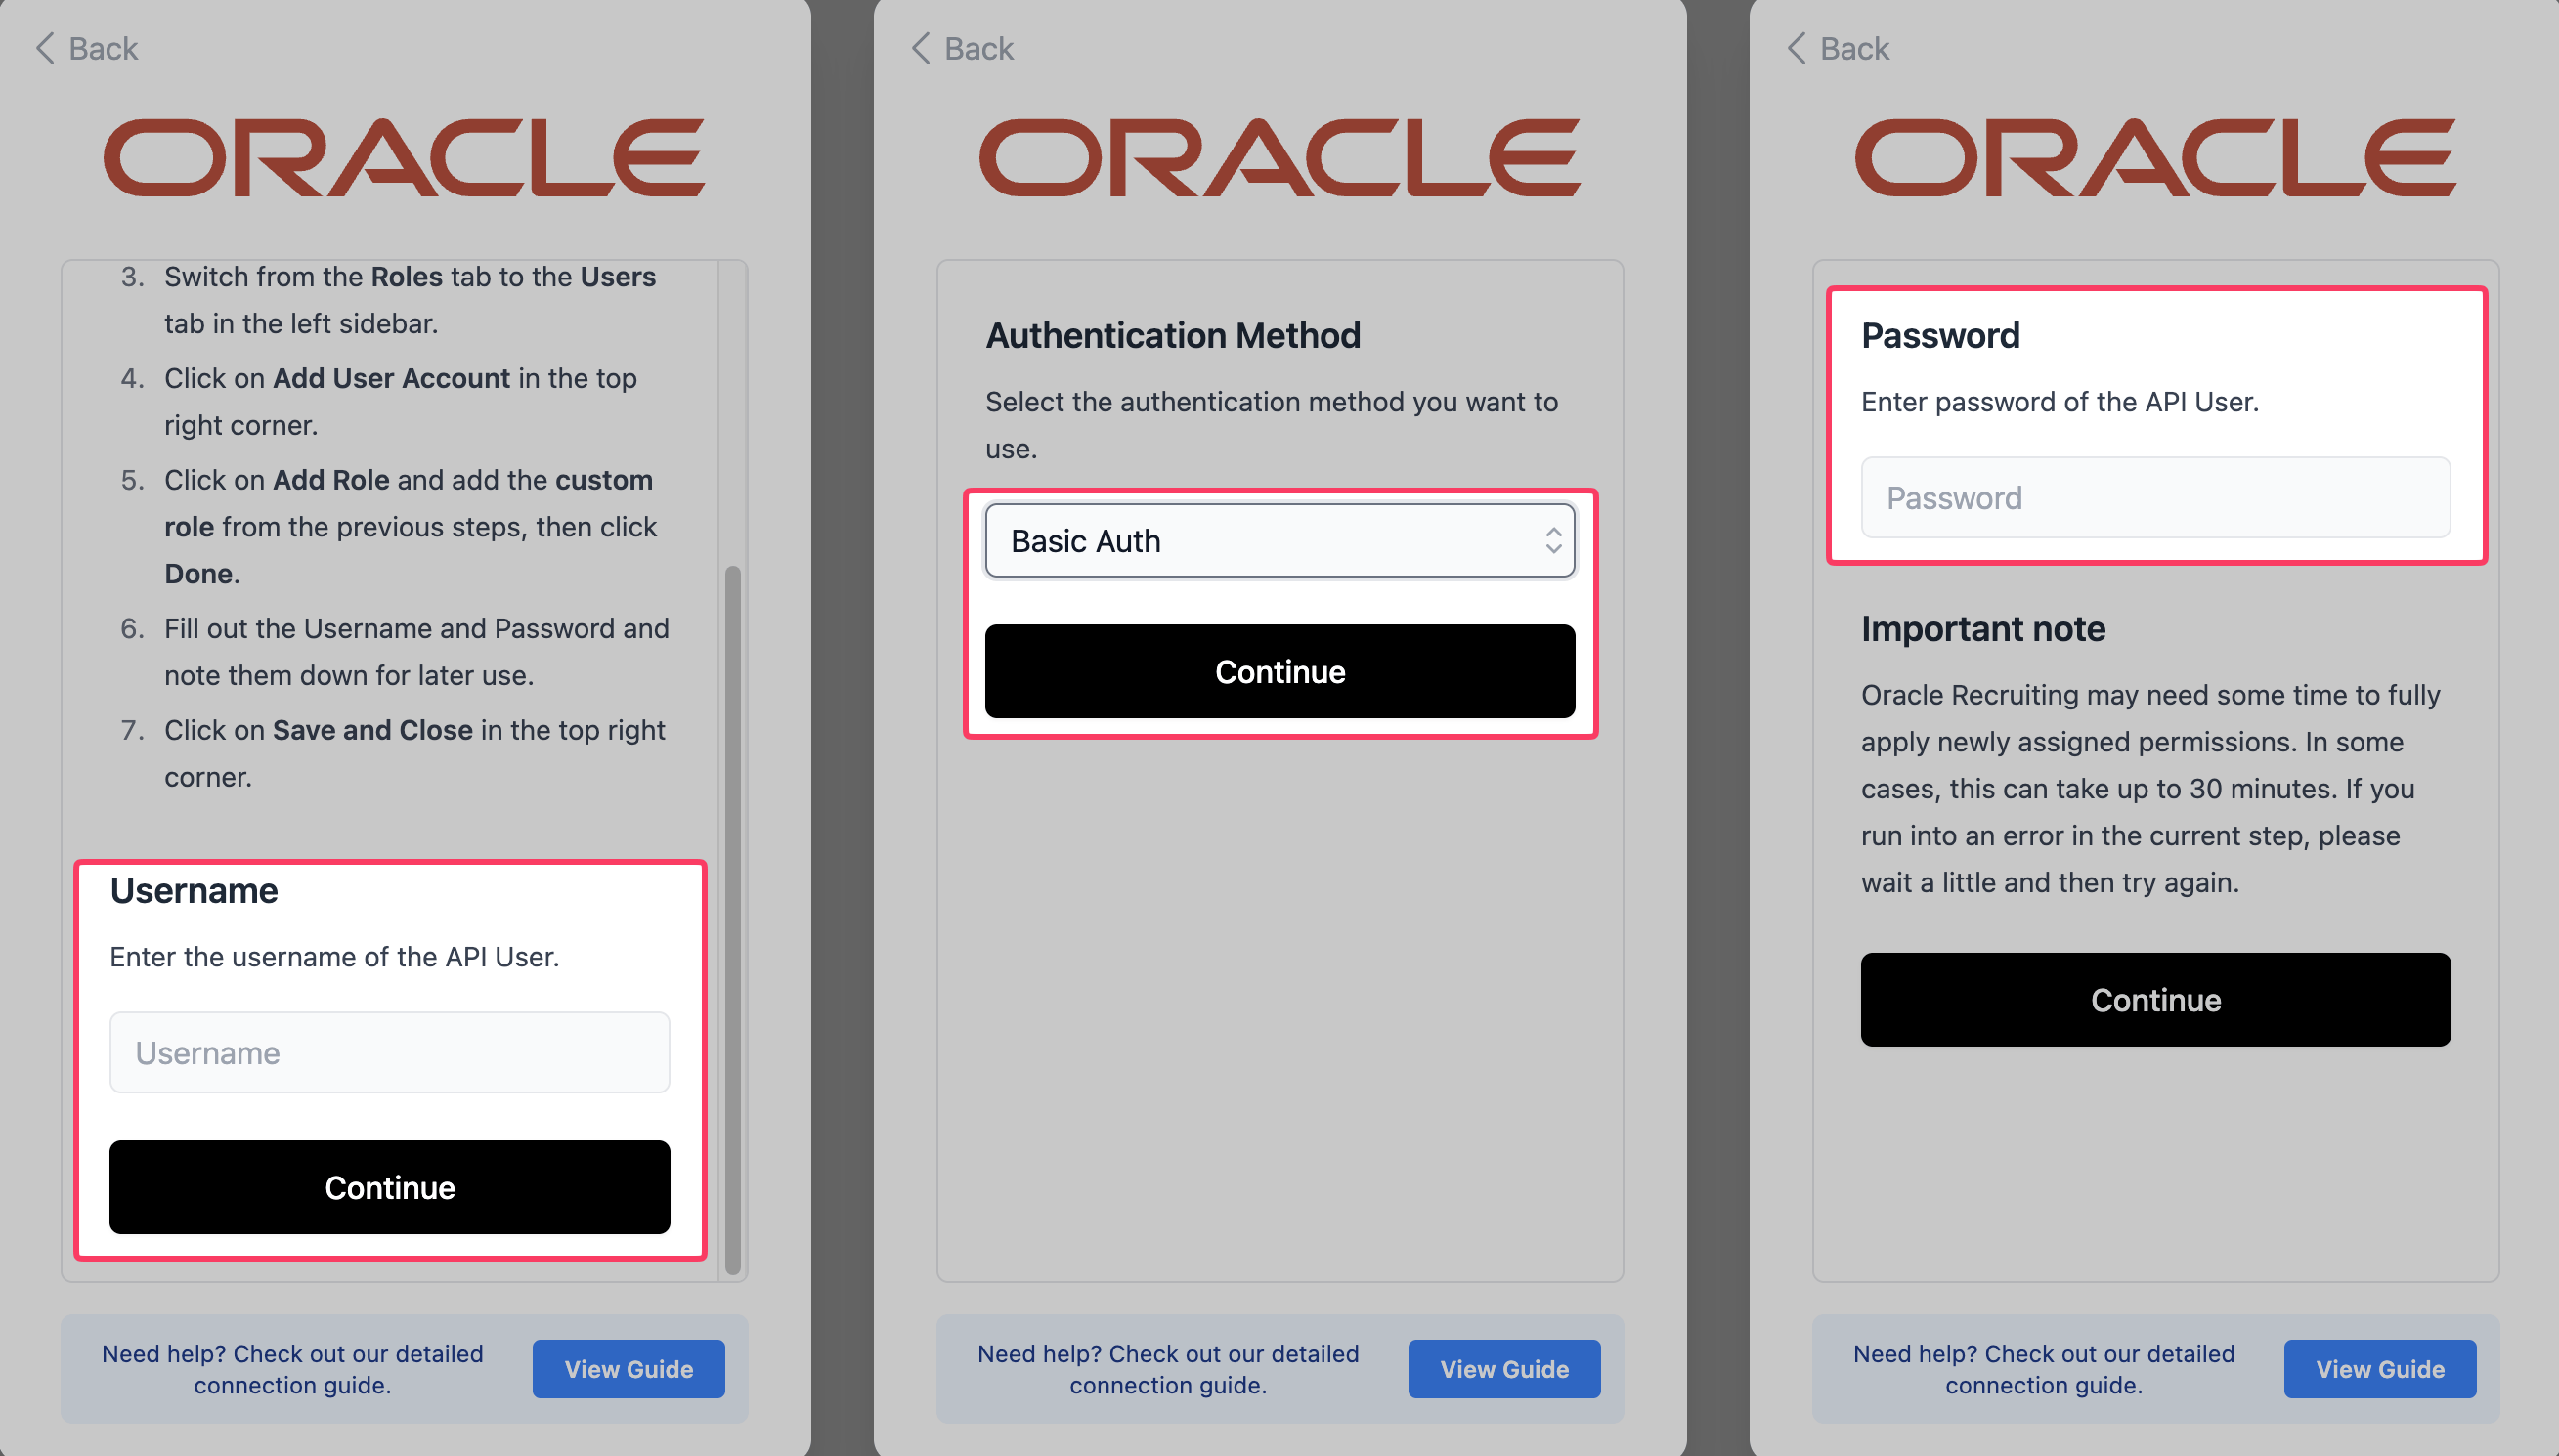
Enter the Username and Password in the connection pop-up, or follow the instructions to set up JWT authentication.
Setting up the integration
- Navigate to the Integrations tab on the Juicebox platform.
- Select Oracle Recruiting Cloud and click Activate. You can also use the search bar at the top.
- Follow the instructions in the connection pop-up, entering your instance URL and the integration user’s credentials from the sections above.
- After you have clicked through the remaining pages of the pop-up, the configuration will be completed. If successful, you will see a green Connected button in your Integrations marketplace.
It may take a few minutes for all data to sync between Juicebox and Oracle Recruiting Cloud.