

This guide is part of a welcome kit series for Juicebox users. Check out the previous guides on running a search and reaching out to candidates if you haven’t used natural-language search, filters, criteria, shortlists, or sequences yet.
In this guide, we’ll set up AI Agents to source autonomously for us. You’ll learn how to:
- Set up an Agent for always-on, automated sourcing
- Calibrate the Agent to deliver high-quality leads
- Decide how you want it to deliver, approve, and reach out to leads
What are agents and how can they help?
There’s a lot of talk in the market about “agents,” so let’s demystify what that means. AI agents are software capable of gaining context, making decisions, and taking multi-step actions to achieve a goal, with limited human oversight. Juicebox Agents are essentially an extension of your recruiting team. Think of them like a world-class sourcing partner who is always working, proactively building your pipeline. Like a new member of your team, they need training and feedback to do their jobs well and understand the way you think about roles.
Agents don’t replace your human thought and judgment, so it’s important to know what to delegate to Agents vs. where it’s best for you to focus. Our most successful customers have a division of labor that looks like this:
Agents:
- Manage top-of-funnel sourcing
- Provide proactively, deeply researched sourcing support
- Work on evergreen, always-open positions where sourcing is continuous
- Work on high-volume roles where there’s a large search pool and consistent job titles and backgrounds across companies
- Use the ATS integration to rediscover past ATS talent, such as runner-up candidates from previous searches (available on Business plan only)
- Focus on candidate relationships and advising the business
- Own the strategy and decision making for each role
- Work on more strategic or specialized roles with narrower search pools or more specialized candidates
Set up an agent
Running a search with a Juicebox Agent starts almost exactly like any other search. You still click Create new project for a new role and give it a title, like
Backend Engineer.
Up until now, you’ve probably been using the Search interface to describe the candidate. But now let’s switch the toggle over to Agent.
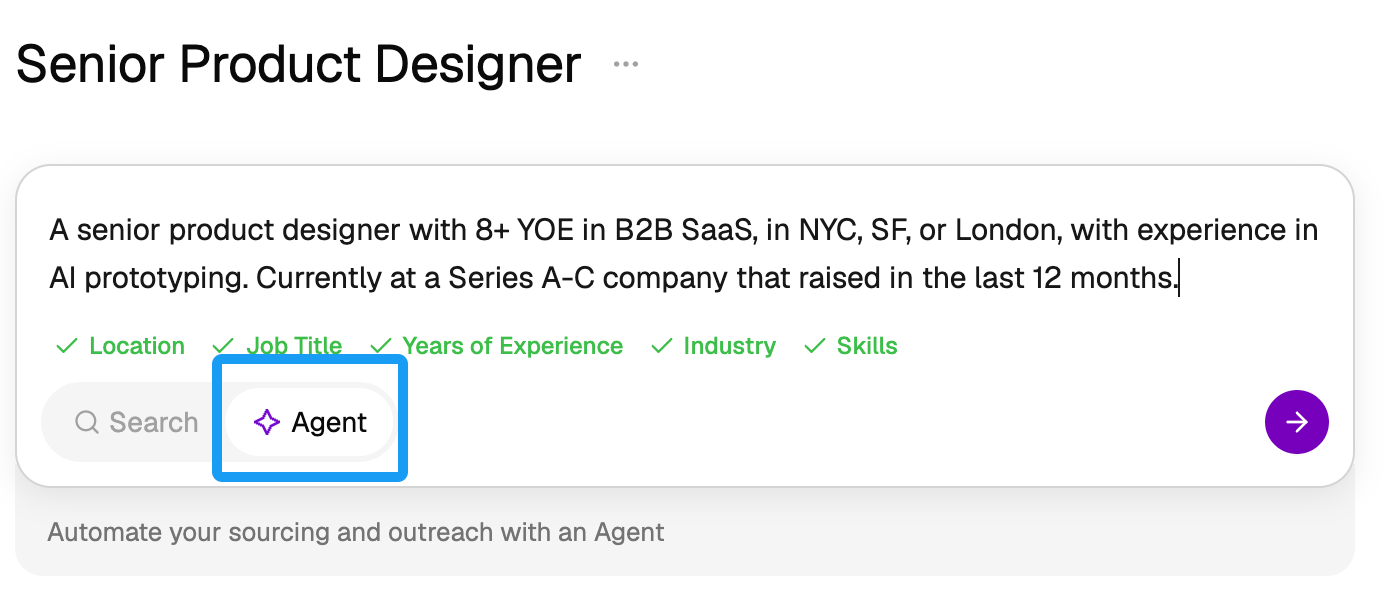
- The job description, pasted in or linked from your ATS
- Any intake notes you have, or have Juicebox record and store the intake meeting to train the agent (see below)
Use intake notes to start an Agent (optional)
Juicebox can join your hiring manager intake meetings to record and transcribe, and provide live insights for you and your hiring manager to use as you collaborate. These notes can also give Agents context, so they start with the full picture of the role. To run an intake through Juicebox, look for Intake under your project in the left-nav. You can write your own notes or use a template. Then have Juicebox start recording the meeting, in-person or over Zoom.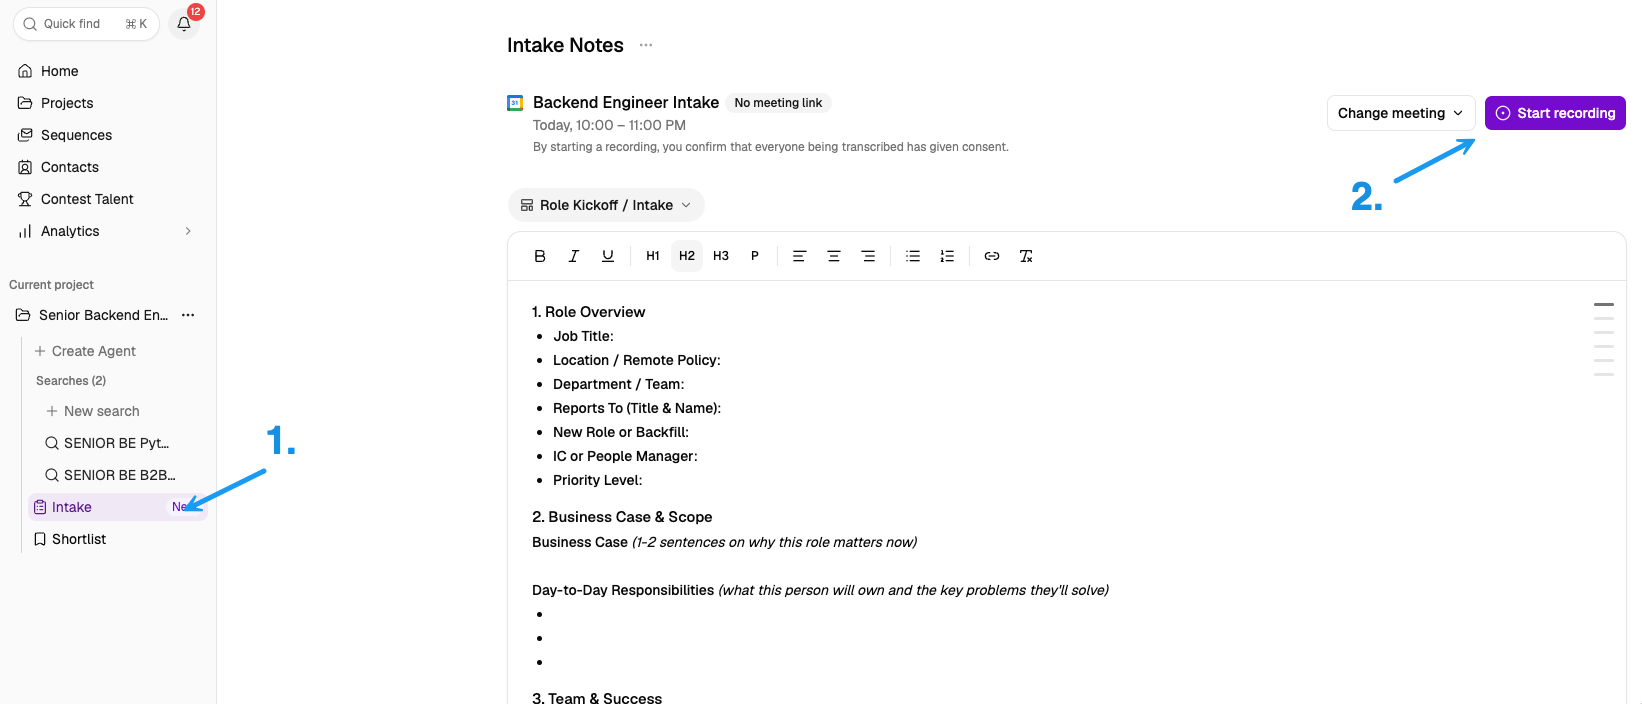
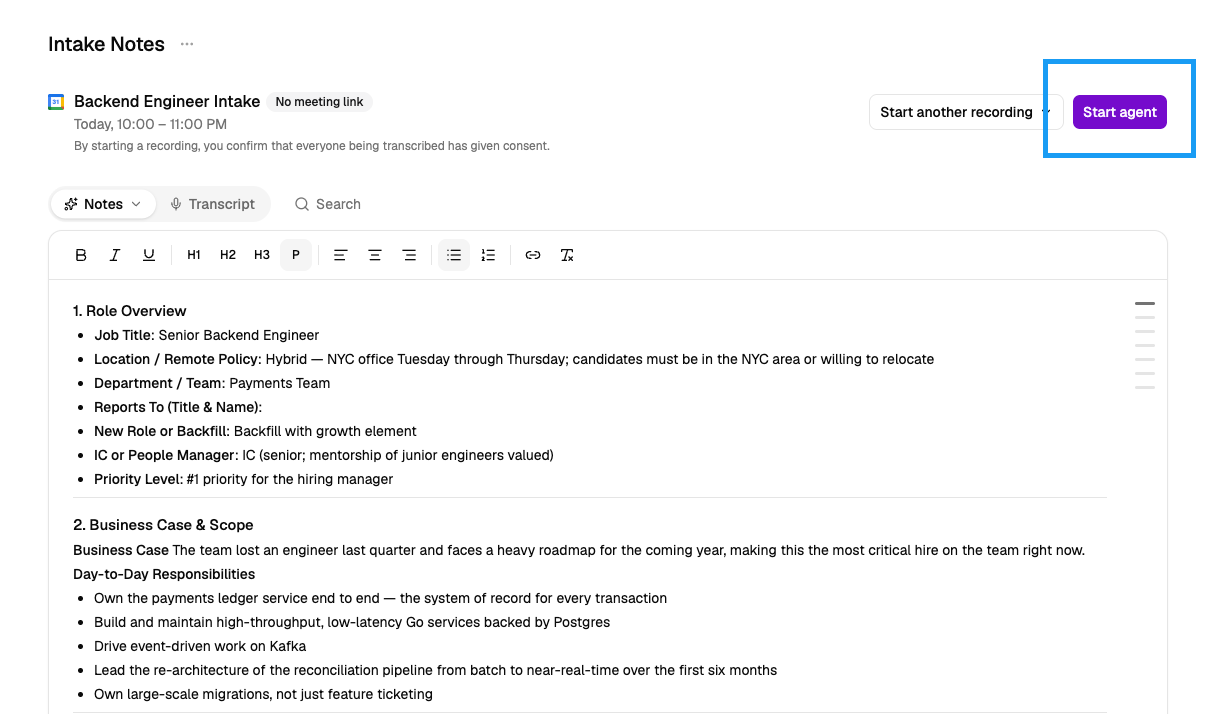
Initial Agent setup
Once you enter your natural-language description, things will start to look different from a regular search. Before finding candidates, the Agent will use any tools you’ve connected, like your ATS, notetaker apps, and drive/docs, to research the role. We call this Contextual Intelligence.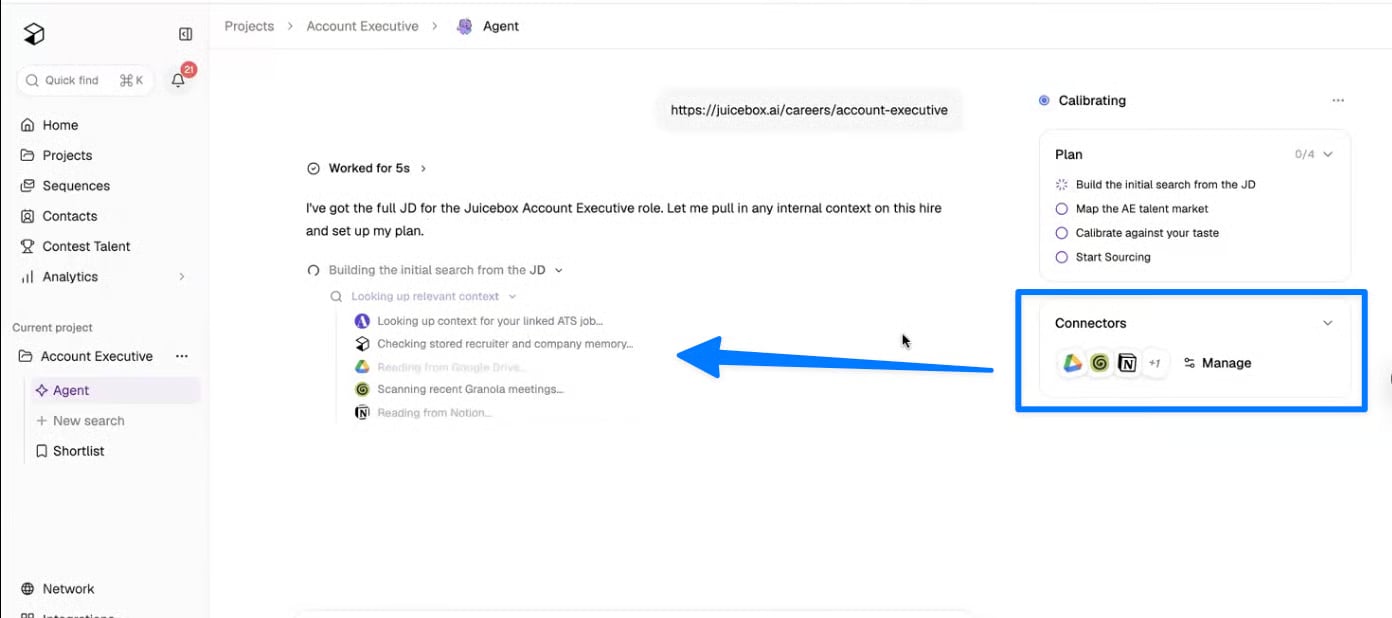
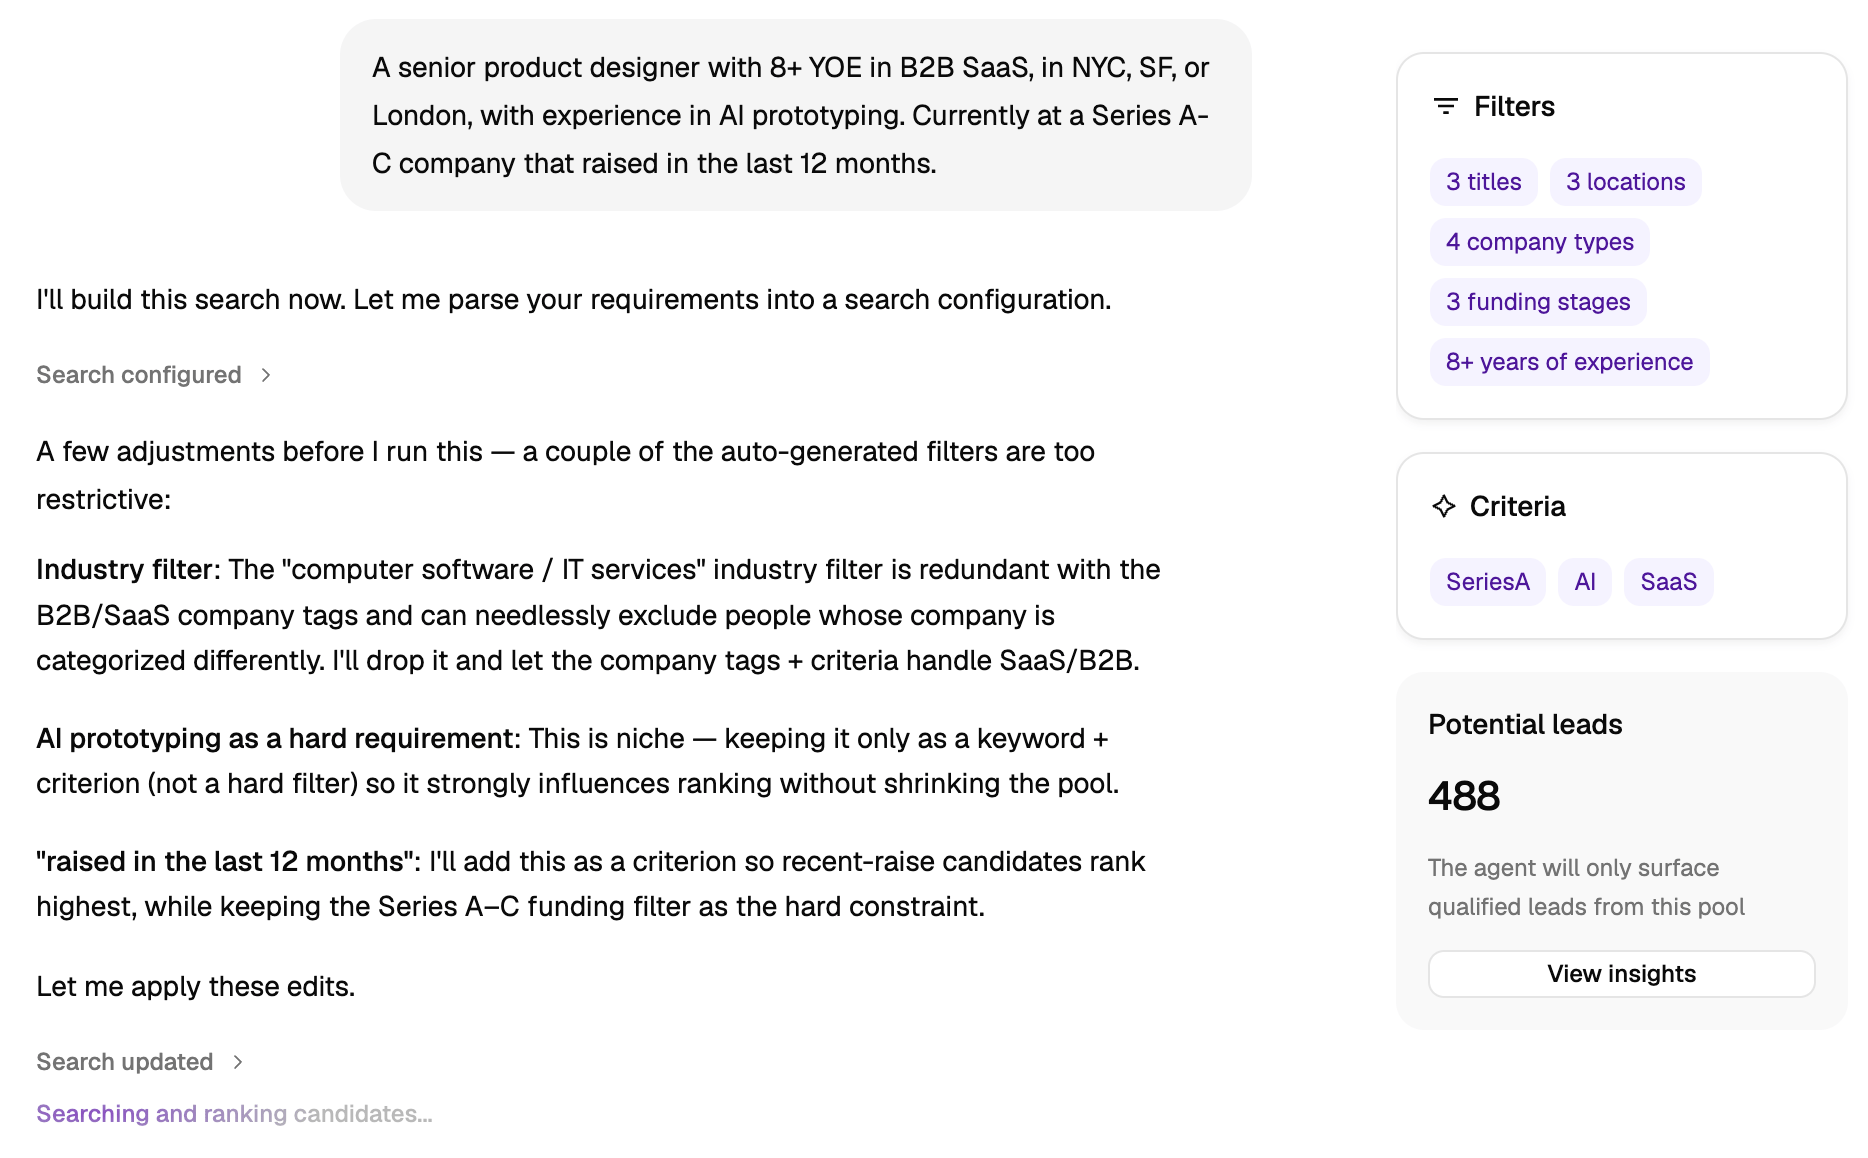
Calibrate the Agent (one-time setup)
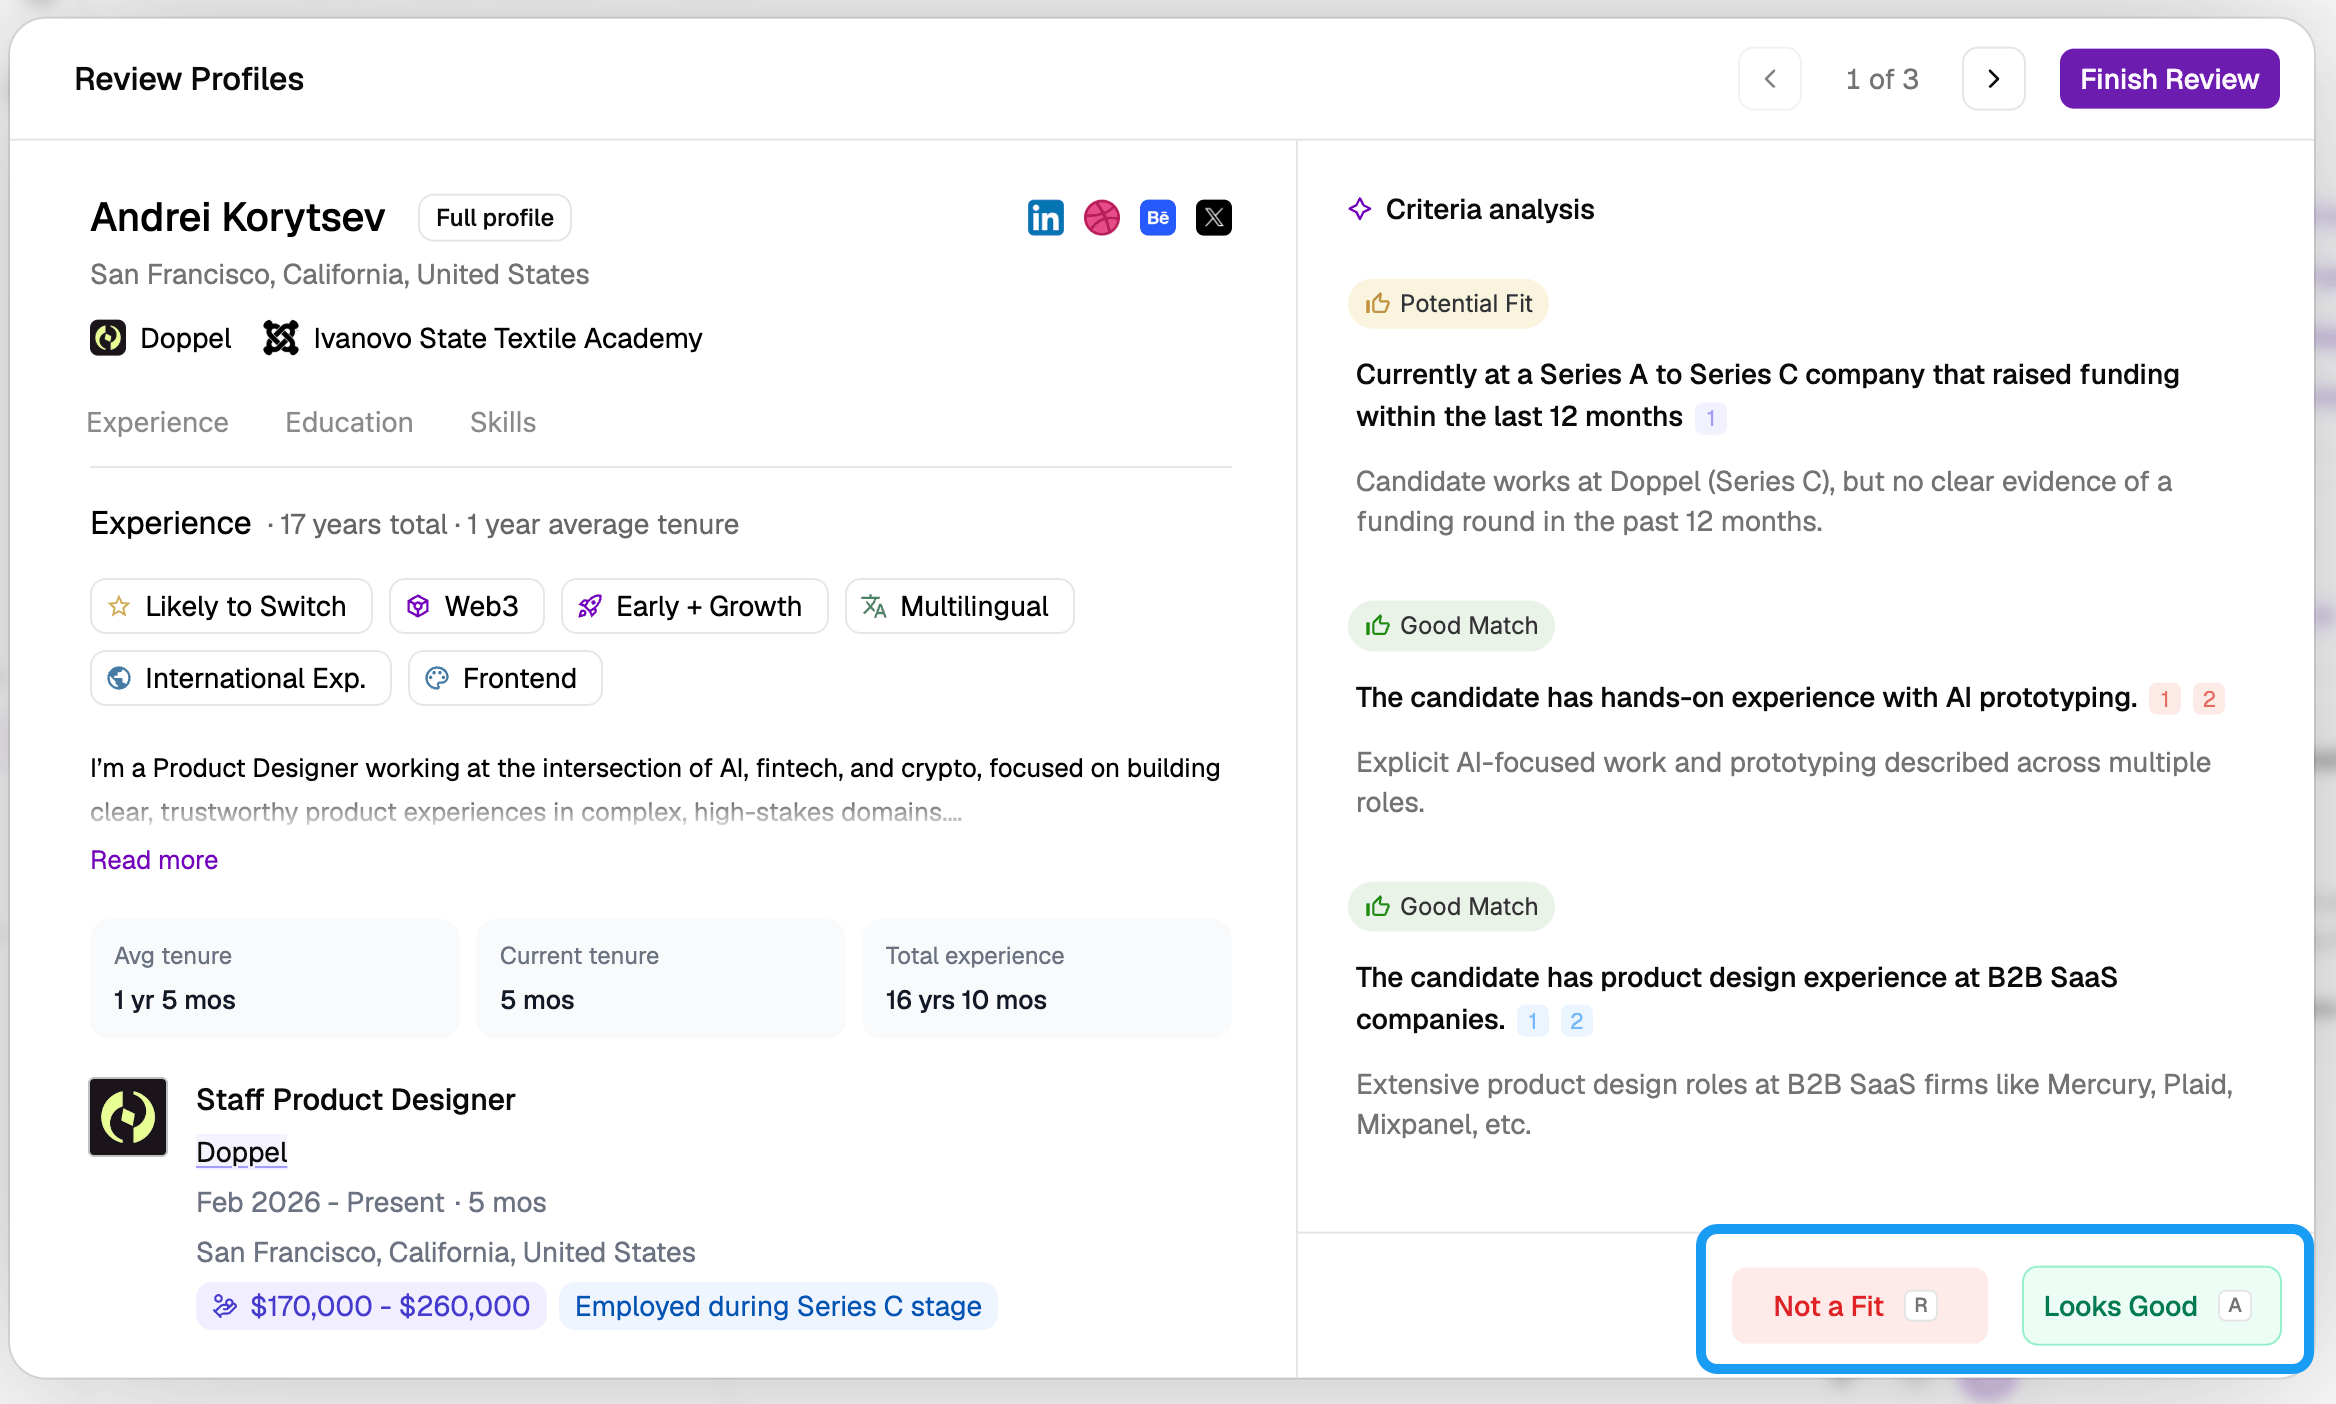
The first time you set up an Agent, you’ll need to calibrate it so that it learns your patterns of judgment and consistently sends you good candidates. Think of this like training a new teammate. The Agent will give you three profiles to evaluate. Click Review leads to review each of them like you would any candidate, not looking for perfection but for match potential.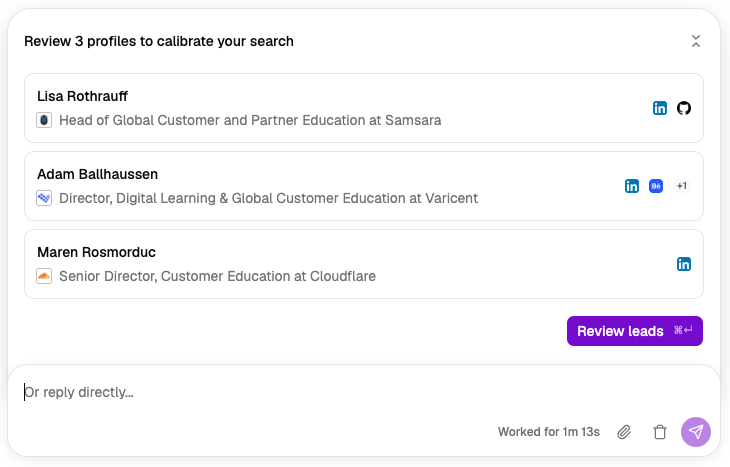
- If you would take a call with this candidate, click Looks Good to approve them.
- If you wouldn’t take a call with this candidate, click Not a Fit to reject them.
Right skills but wrong company stage. We're looking for hypergrowth experience, not enterprise.Job hopping pattern, three roles under 2 years, doesn't match our retention bar.Avoid candidates who worked at Company X.
Strong technical background but I'd prefer customer-facing experienceBackground is in internal L&D but I'd prefer someone who worked in Customer Success5 YoE is a maybe, I'd look for candidates with more experience
Decide on settings
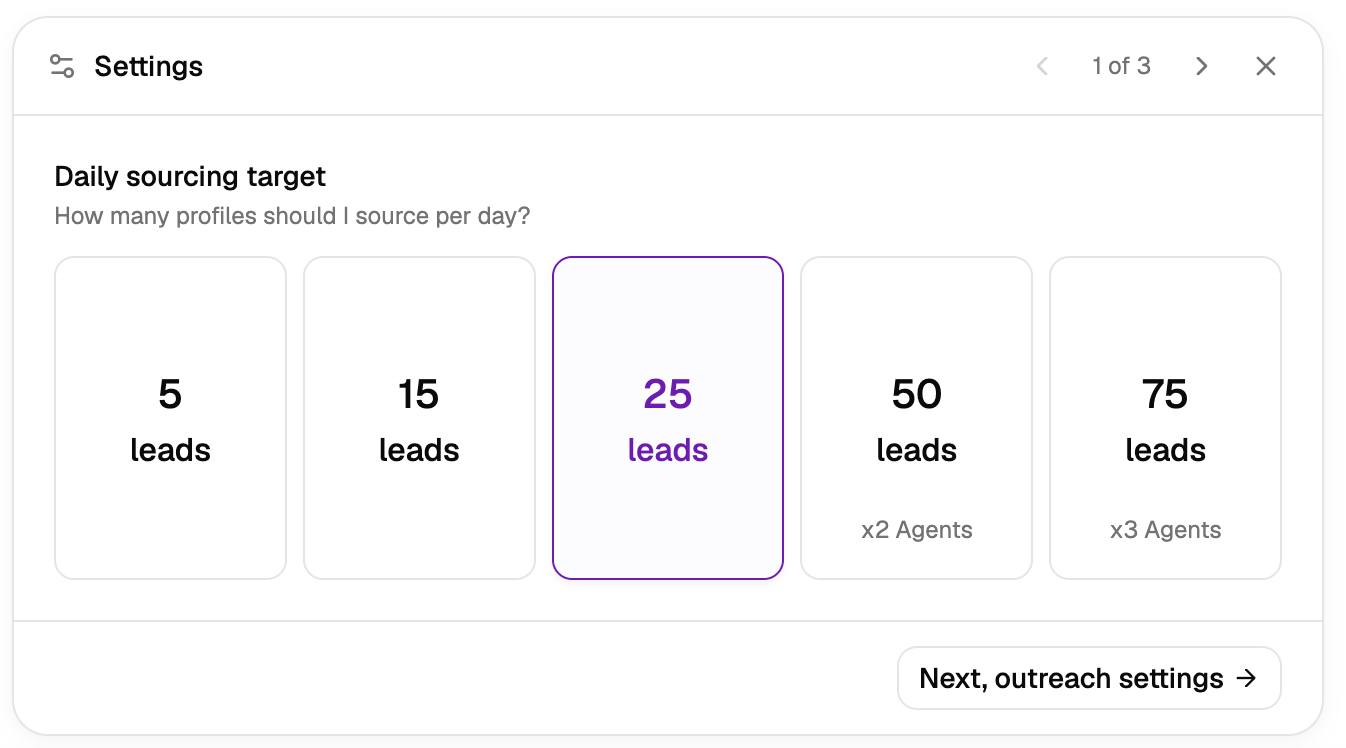
After you’ve calibrated the Agent, it will ask you to make three quick decisions: Volume: How many net-new leads per day should it send? To decide, think about what number you have time to review every day, while also building a healthy pipeline for the role.- Our recommendation: If in doubt, start with 25 so you have a good initial pipeline.
- Note: 50 or more candidates per day will use multiple agent seats.
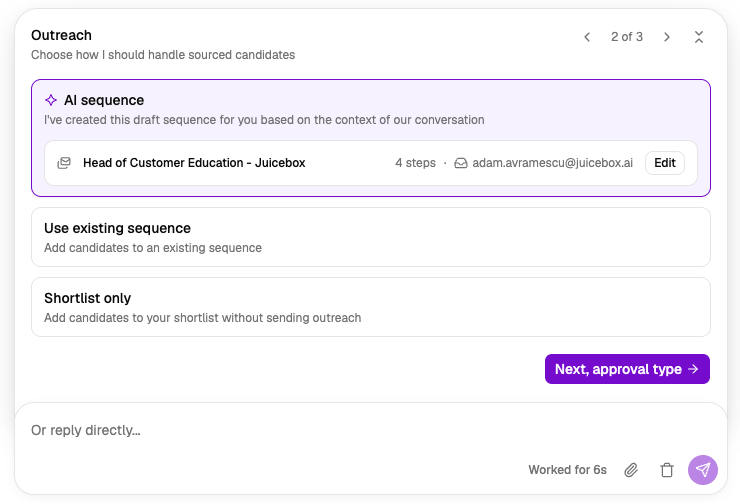
- Our recommendation: During your initial chat with the AI, give it real outreach examples and selling points to build an AI sequence. Then edit that sequence to make it your own.
- Note: Choosing AI sequence will use AI to draft a sequence, but you can still edit it yourself. The Agent won’t autonomously send communications or sequences that you haven’t defined here, so you still have control.
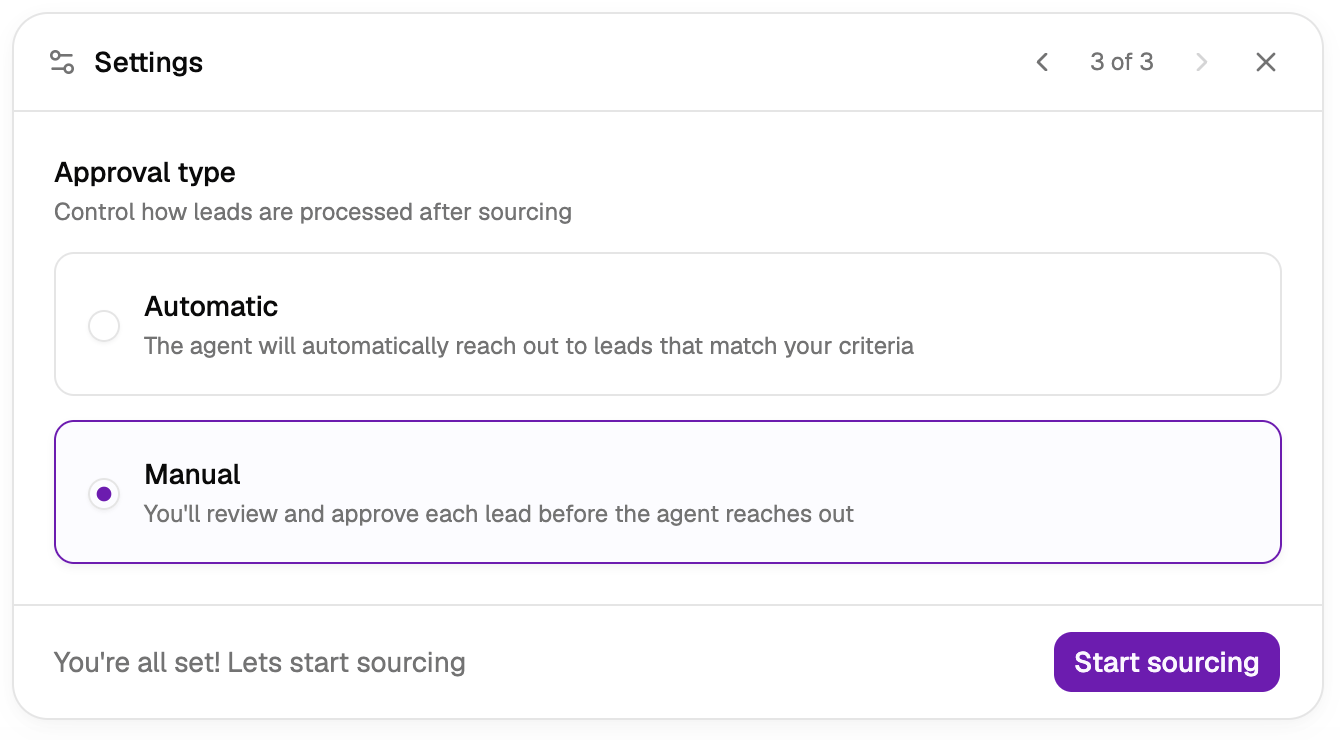
- Our recommendation: Start with Manual for the first few days of a search. Our most successful customers do this for roughly three days or until they’re approving about 75% of candidates.
- Note: If you choose Manual, you’re responsible for reviewing leads to keep the Agent running. If leads sit unreviewed for four days, the Agent will auto-pause so you’re not overwhelmed with leads. Make sure to either review leads at least every three days in Manual mode, or set the Agent to Automatic to avoid this issue.
Refine over time
Once the agent is running, it sources on a schedule: around 9:00am, your local time, every day.
- If you set outreach and approval to automatic, it’s now running automatically. Sit back and relax.
- If you skipped the outreach step, you’ll need to go to your shortlist to manually send sequences.
- If you set approval type to Manual, you’ll need to review and approve candidates on a regular basis. Do this from within the Agent by clicking Review Leads.
- Deliver insights and recommendations on your pipeline
- Determine which criteria are limiting your qualified candidate pool
- Pull candidate lists from connected apps, like Google Sheets or your ATS
- Generate a talent market map into Notion
Want more help? Learn more about reviewing leads, recalibrating Agents, or the Knowledge Vault.
What’s next?
Congratulations! By following this guide, you:- Set up an Agent for always-on, automated sourcing
- Calibrated the Agent to deliver high-quality leads
- Decided how you want it to deliver, approve, and reach out to leads
- Resolved issues when the Agent pauses or runs out of leads
- Use Juicebox for Slack to take action on candidates while you’re on the go, and to collaborate with hiring managers directly in Slack, give them visibility into the sourcing process
- Use the Juicebox MCP to combine Juicebox data with other systems of record and get custom insights, directly in your AI tool of choice
- Use Network Sourcing to get warm leads directly from your teammates’ networks
- Use Talent Rediscovery to source candidates you’ve already interviewed and re-engage them
- Use Smart Reports to generate shareable reports from your shortlists