


About the integration
Connect Connexys By Bullhorn to Juicebox to import jobs and start searches from their job descriptions. You can also export profiles to a selected job. Existing candidates can be identified in Juicebox and used for rediscovery, subject to the access granted to the connection.Before you start
Use a Salesforce System Administrator account for Connexys. The setup menu should include Administration and Platform Tools. Keep the Juicebox permission list open throughout setup. Open Integrations in Juicebox, select Connexys By Bullhorn, and choose Activate. Keep the connection window open while completing the steps below. If the integration is not visible, ask Juicebox Support to confirm access for your account.The screenshots show vendor settings or the connection window provided by Kombo. Use the credentials, source labels, permissions, and URLs from your own connection; screenshot values are examples.
Find the instance URL
In Salesforce Setup, open Platform Tools > User Interface > Sites and Domains > Custom URLs. Enter the Connexys URL from that page in Juicebox. If no Custom URL is available, ask your Connexys administrator or Juicebox Support to confirm the correct endpoint.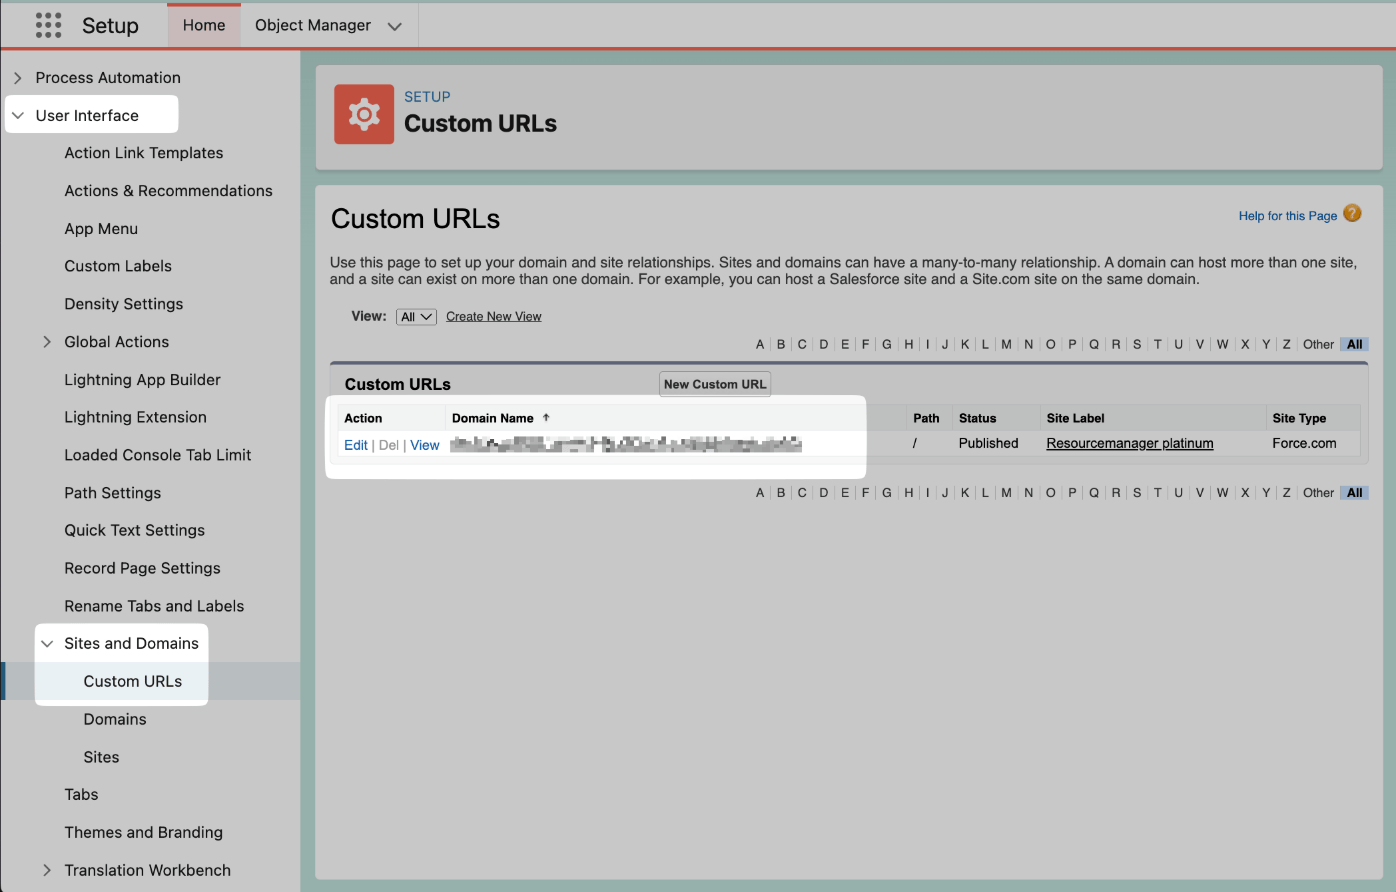
Locate Custom URLs in Connexys Setup.
Prepare the integration user
Open Users > Users > New User. Create a recognizable integration user using your organization’s contact details, with the Salesforce Platform license and the Webservice profiel profile where available. If that license or profile is unavailable, ask your administrator and Juicebox Support to confirm the appropriate user before proceeding.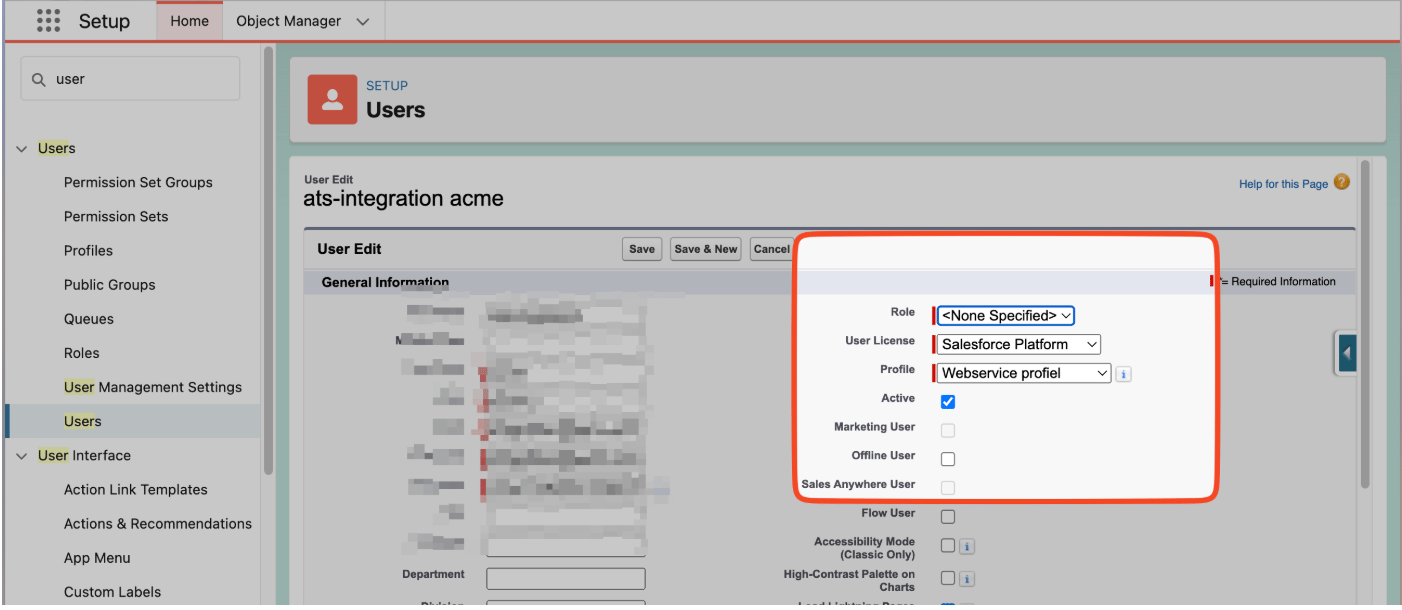
Configure the integration user and its Salesforce license.
Create a connected app
- Open Apps > App Manager > New Connected App and enter the app name and contact information.
- Enable OAuth Settings and Device Flow.
- Add Manage user data via APIs (api) to the selected scopes.
- Enable Client Credentials Flow, accept the confirmation, and save the app.
- Under Apps > Connected Apps > Manage Connected Apps, edit the app and select your integration user under Client Credentials Flow.
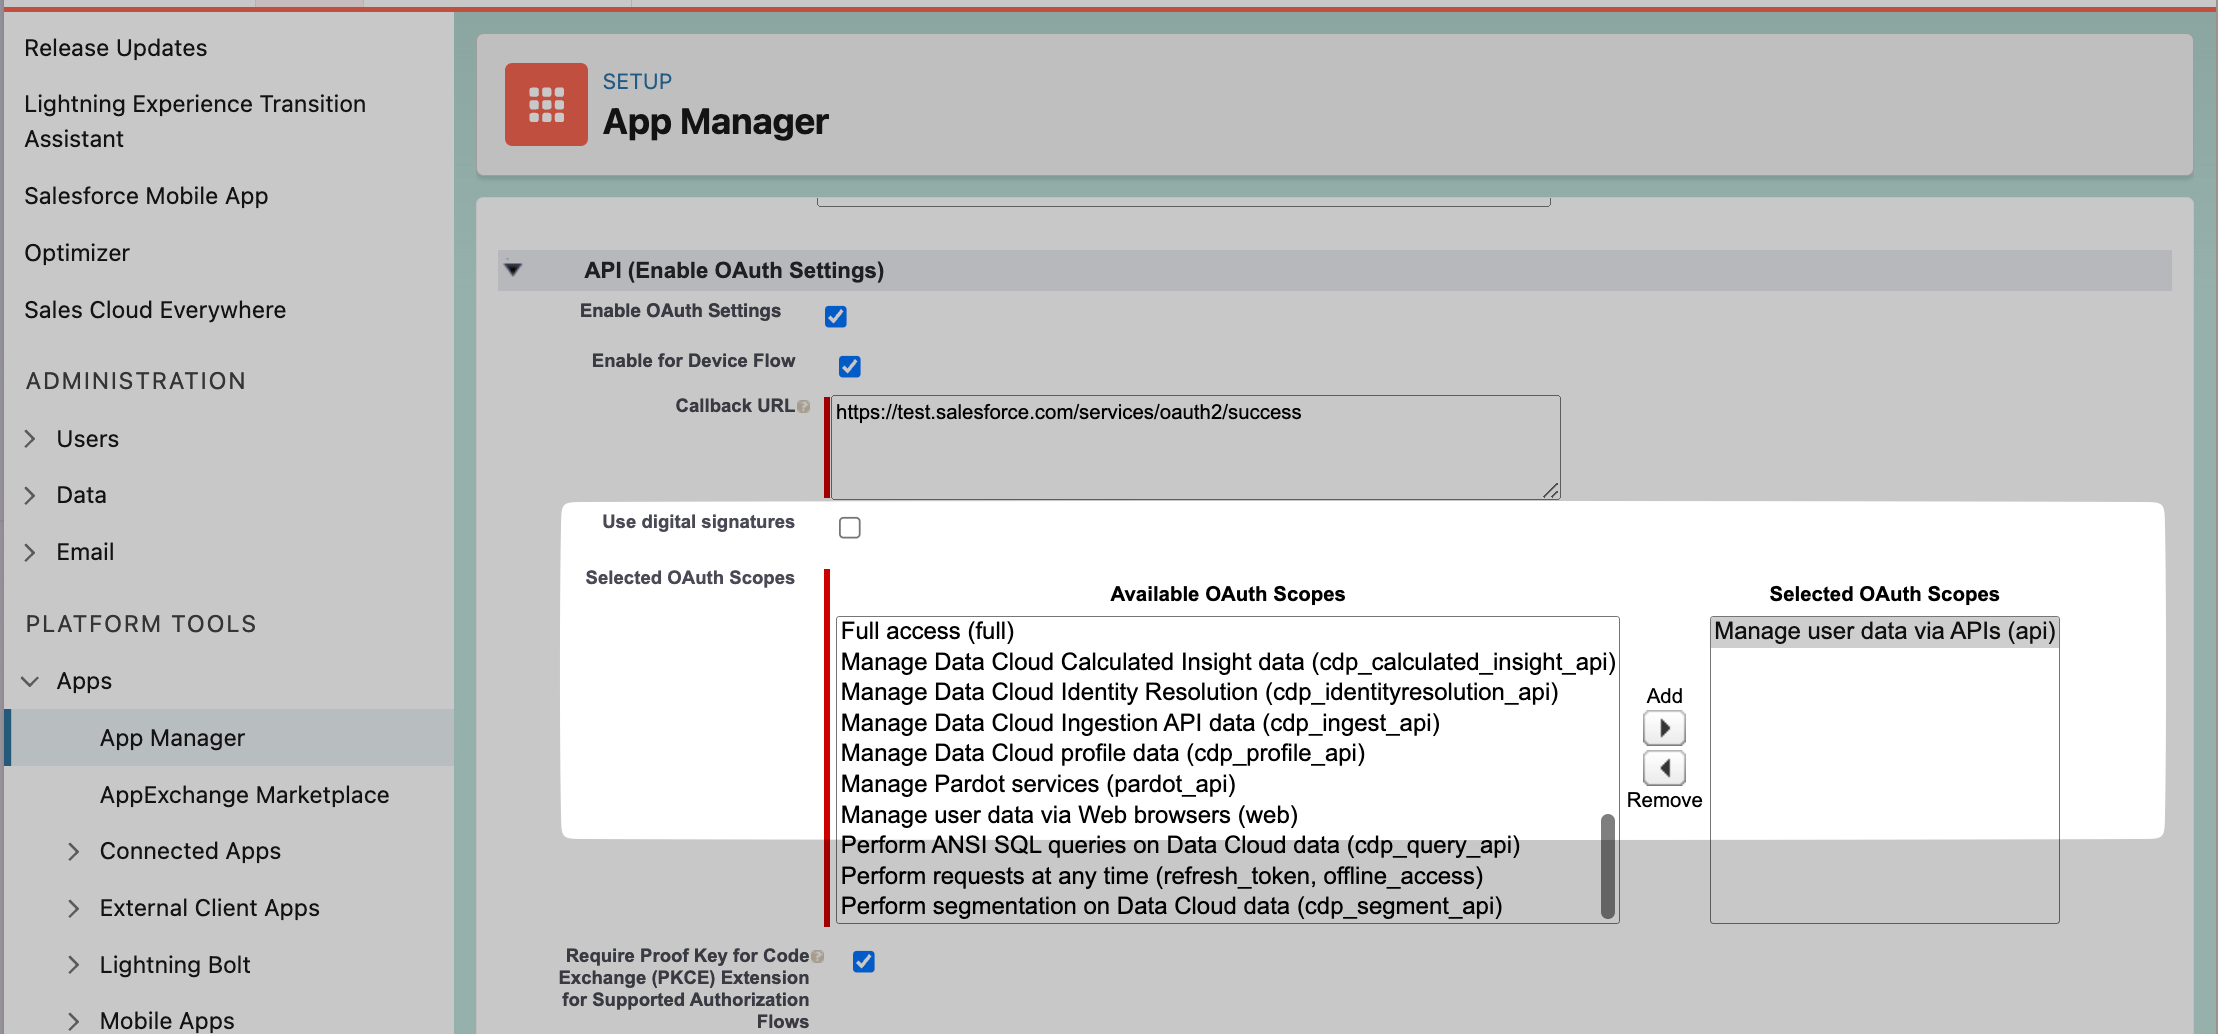
Select the API OAuth scope.
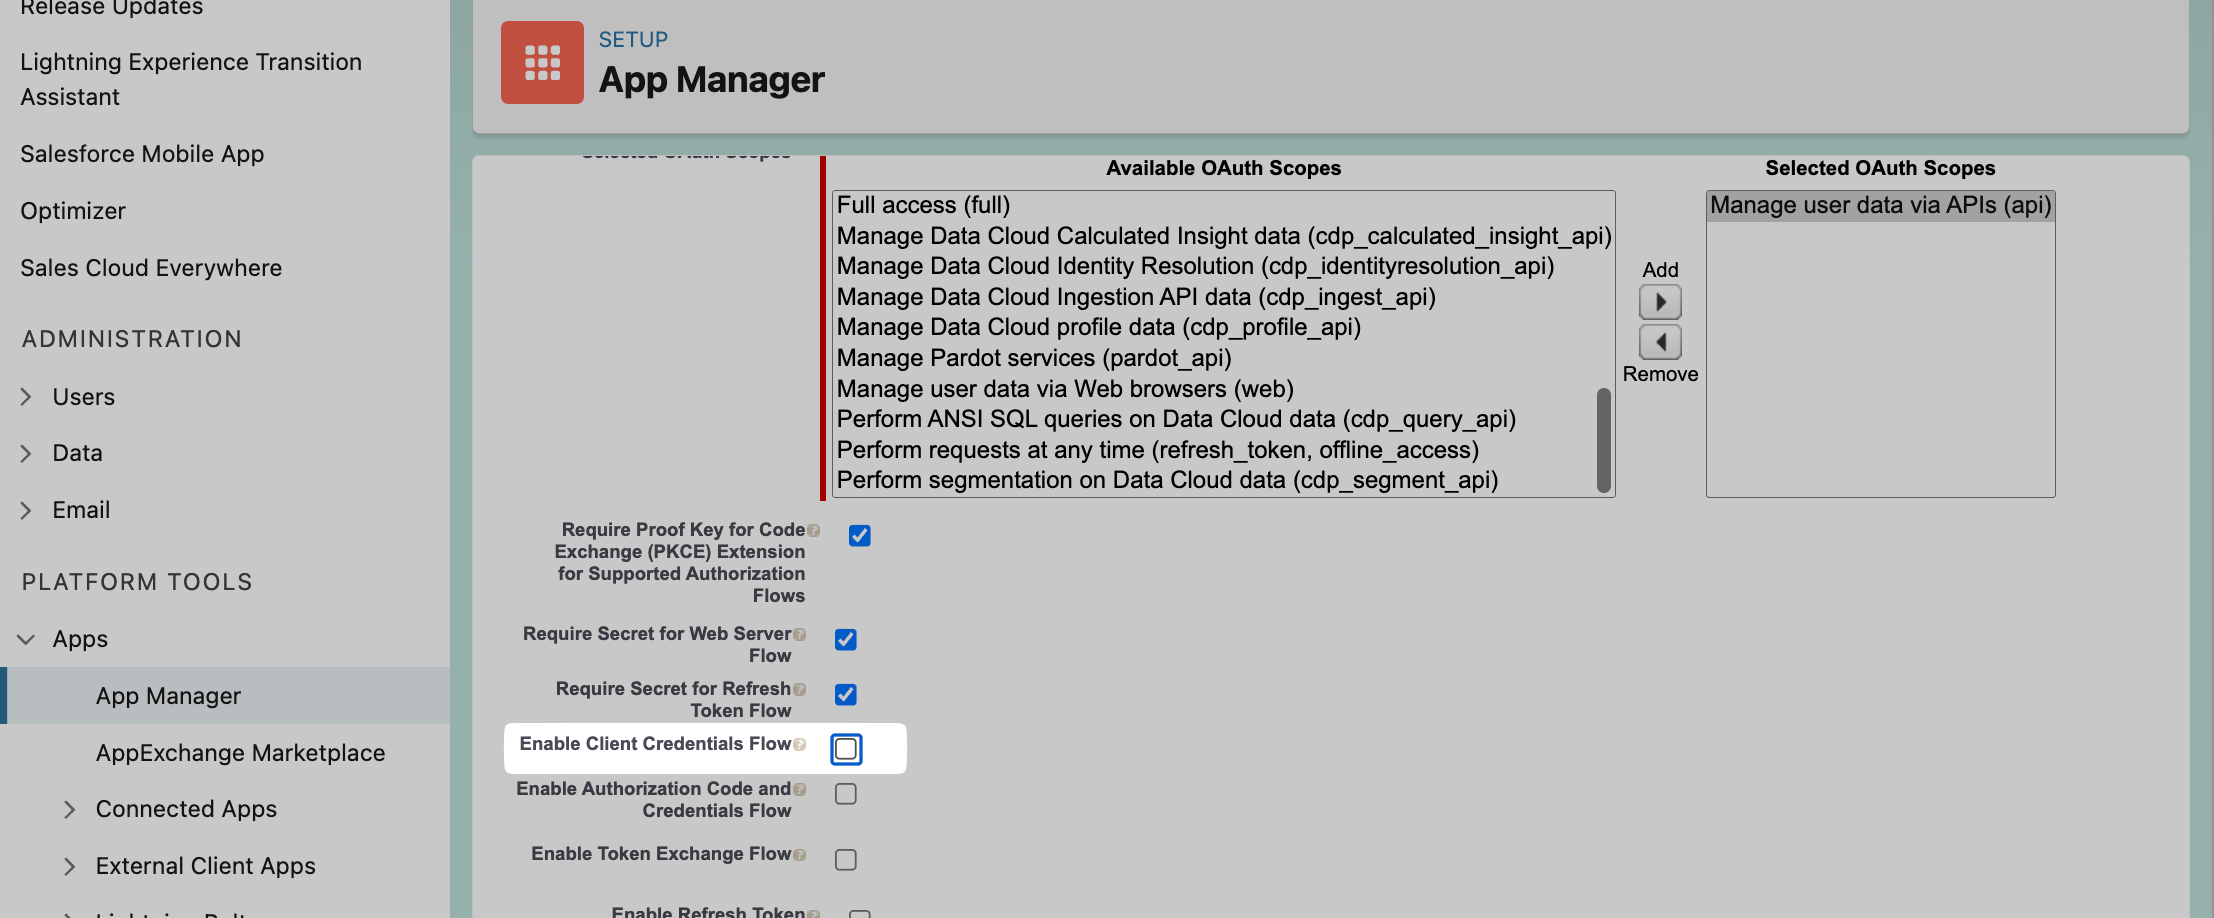
Enable Client Credentials Flow.
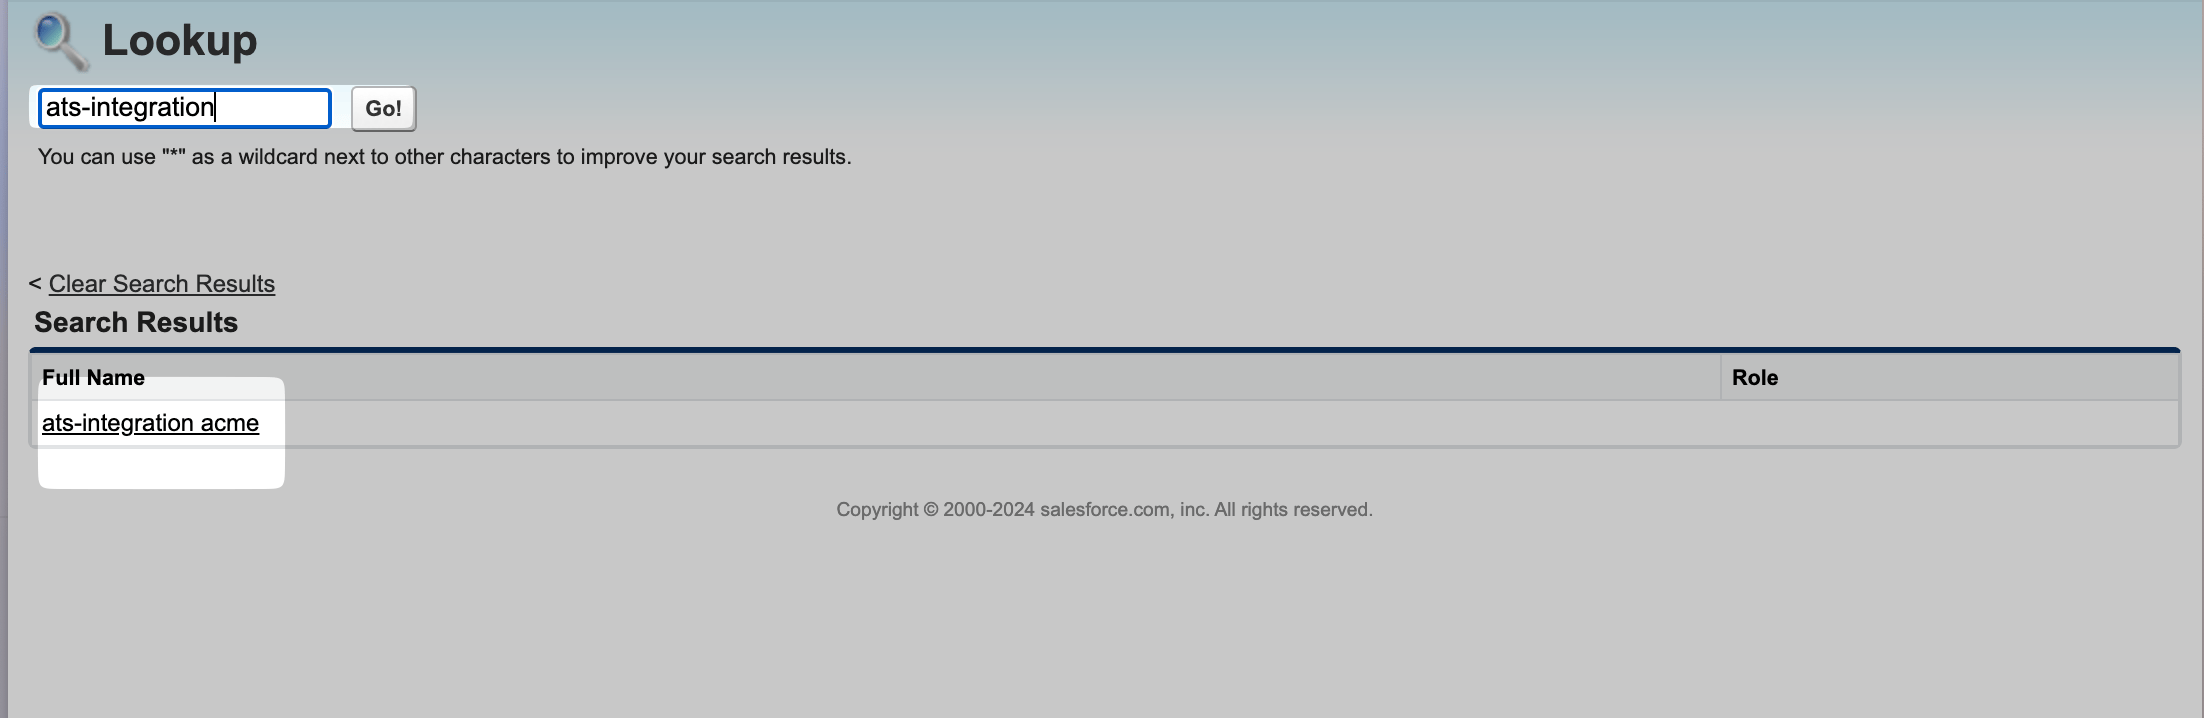
Assign the integration user to the client-credentials flow.
Retrieve client credentials
In App Manager, open the app’s View page and select Manage Consumer Details. Complete Salesforce’s identity check, then copy the Consumer Key and Consumer Secret into Juicebox.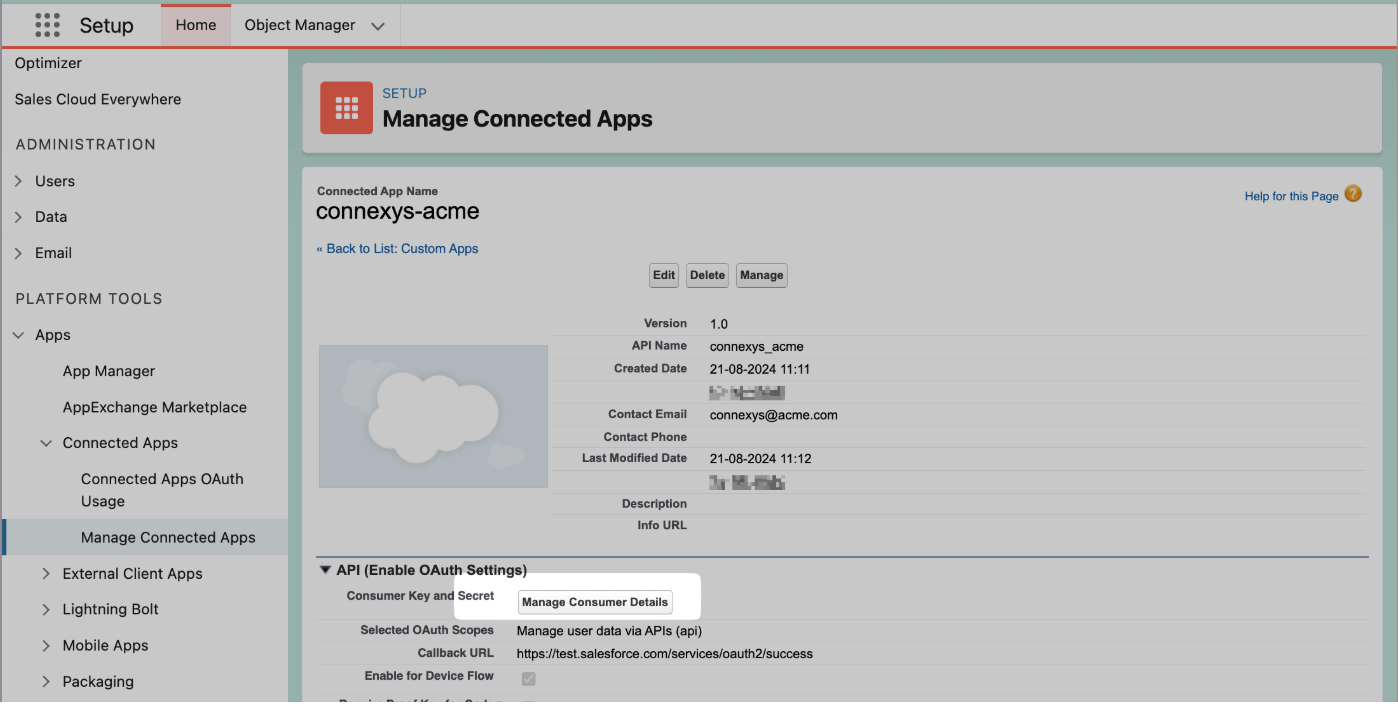
Open Manage Consumer Details for the connected app.
Configure the permission set
- Open Users > Permission Sets, create a named permission set, and open Object Settings.
- For each object named in Juicebox, open its object settings, choose Edit, and enable the permissions requested by your connection window.
- Open the integration user’s Permission Set Assignments > Edit Assignments, add the new permission set, and save.
- Continue in Juicebox and resolve any reported missing permissions.
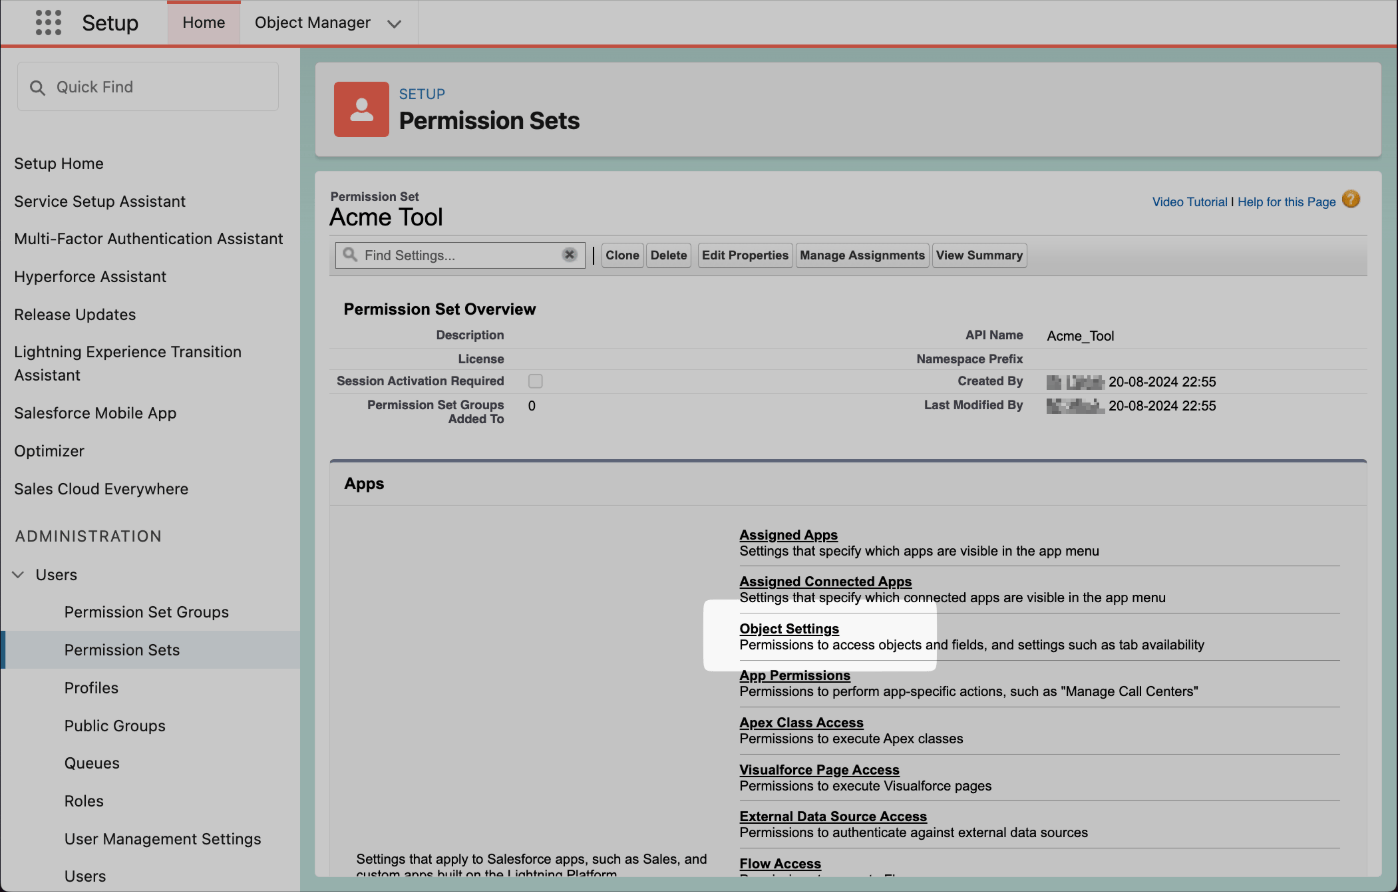
Open Object Settings in the new permission set.
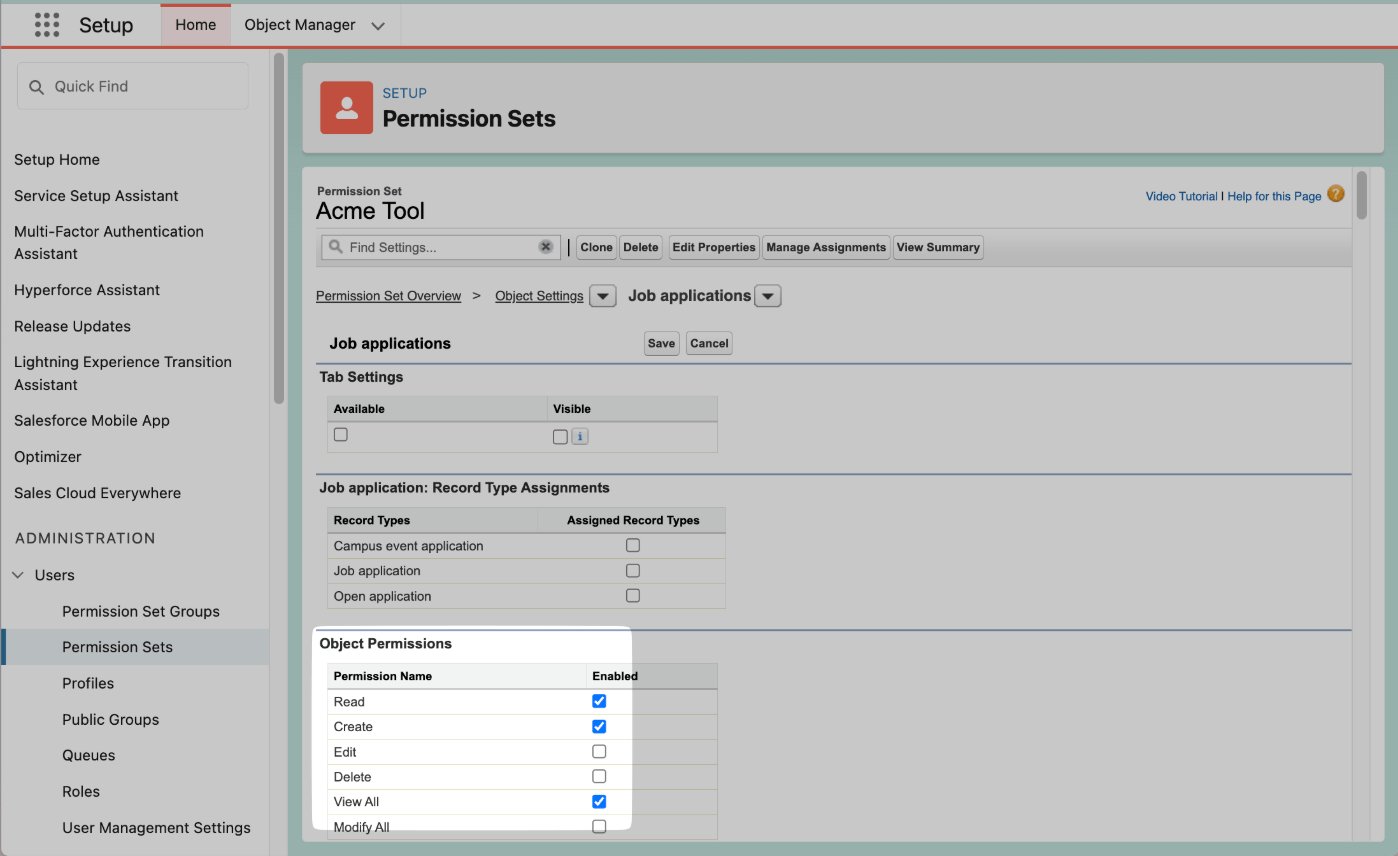
Set the permissions requested for each object.
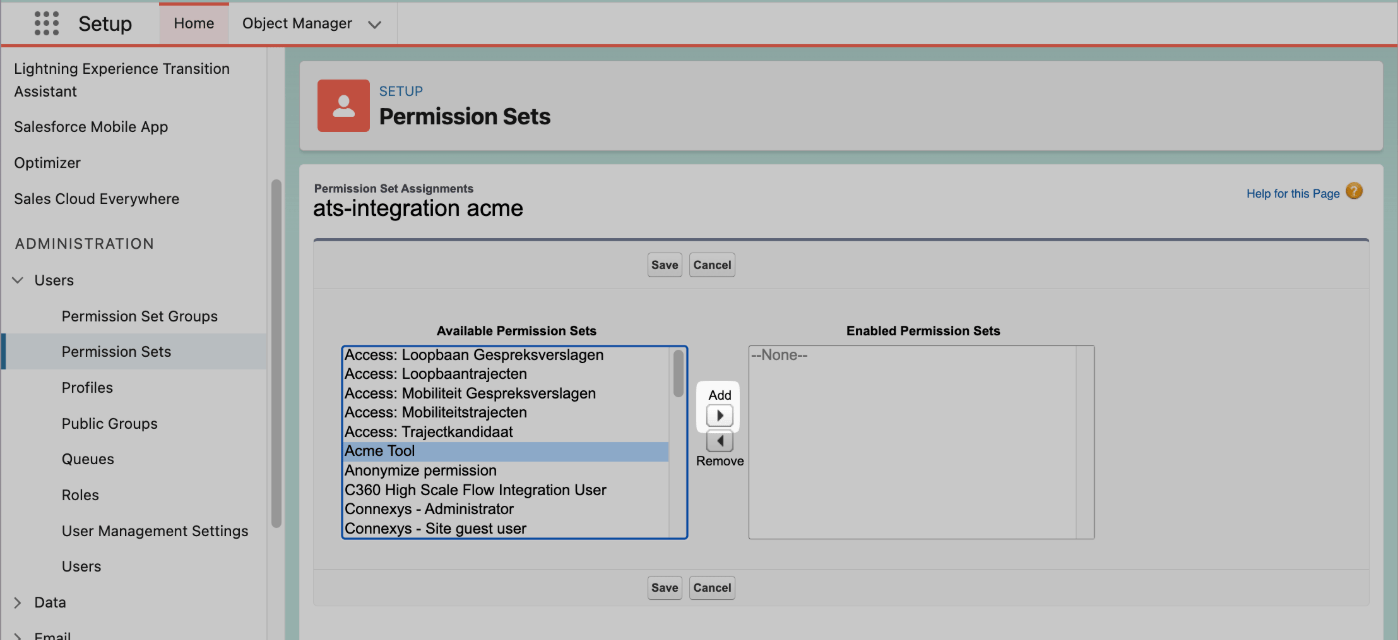
Assign the permission set to the integration user.
Add source values if prompted
In Object Manager, open Candidate > Fields and Relationships > Bron. Under Values, add the source supplied by Juicebox and make it available to the requested record types. Repeat for Job Application > Fields and Relationships > Bron if requested, save, and finish setup.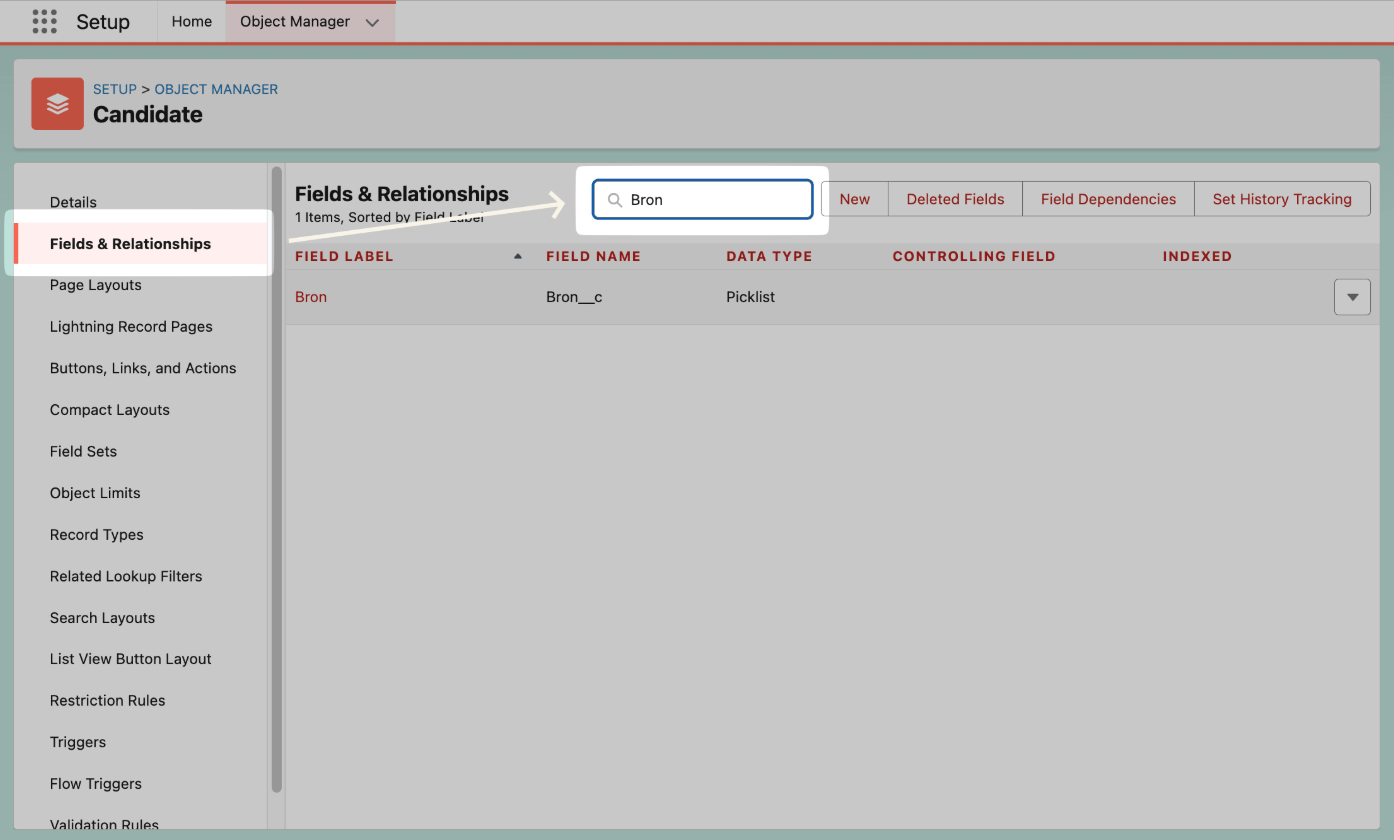
Locate the Candidate source field, Bron.
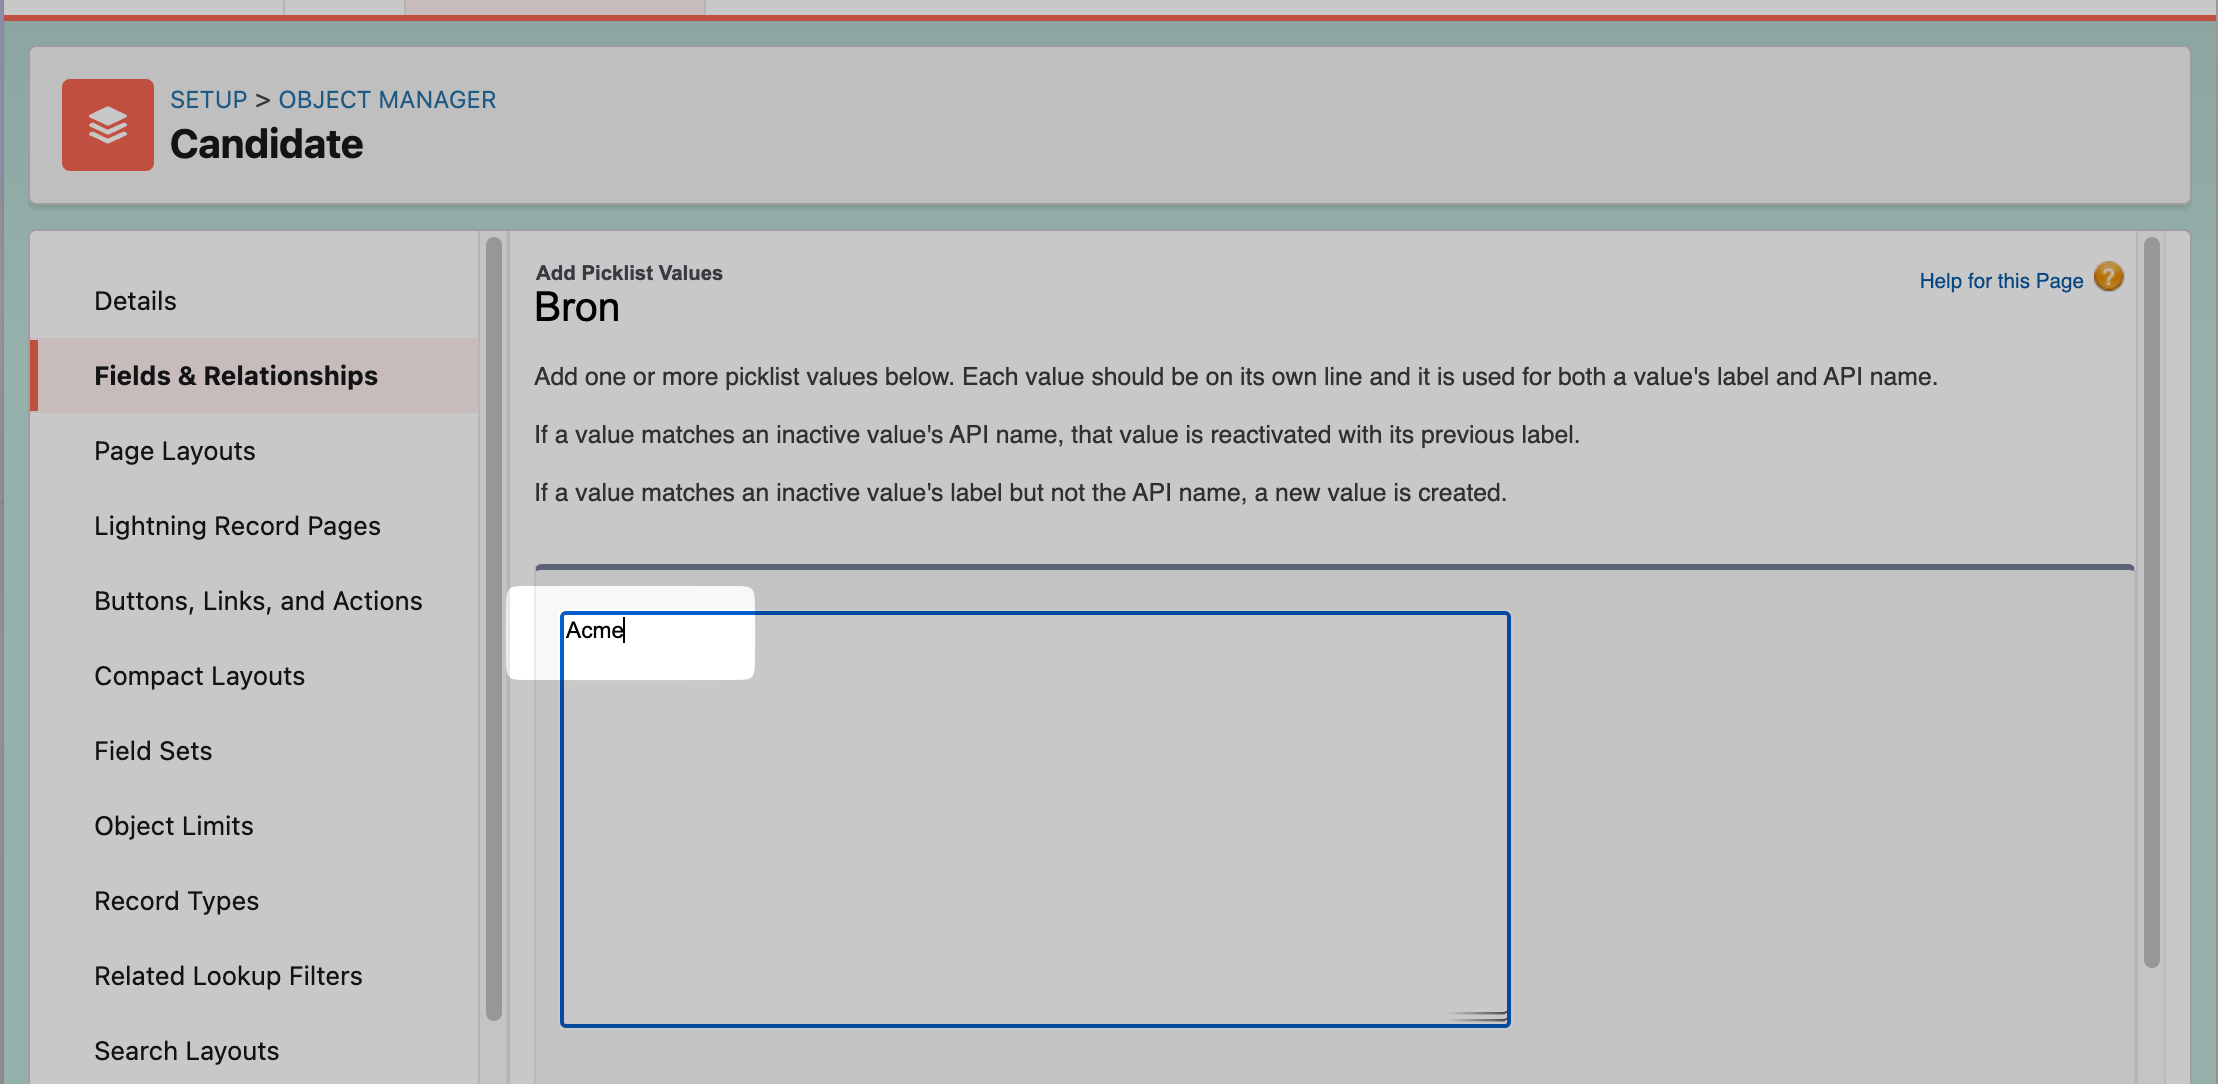
Add the exact source value from your connection window.
Confirm the integration
Finish the connection window and return to Juicebox. Confirm that the connection has completed, then allow the initial sync to populate your data.- Check that the expected jobs appear in Juicebox.
- Find a known candidate and confirm that the information available matches your configured access.
- Export a test profile to a selected job, then verify the application in Connexys By Bullhorn.